Editing in Photoshop CC 2020 and 2021 can help us save those images that we considered lost since the result was not what we wanted. From removing a bad background in Photoshop to removing red eyes , they can be simple techniques where improving our photo is really easy..
When we take a photograph, sometimes despite the effort we put into it, we do not get our result to be the one we are looking for. One situation that we can find ourselves is that our image has been too dark and spoils our work. For this reason we are going to see different options to be able to lighten a dark image in Photoshop CC 2021, 2020 easily and in a short time.
Editable Project PSD
So that you can easily test these settings, we leave you a PSD file inside a zip where you can try the different settings to clarify your image.
 Project clarify image in Photoshop.zip 15.82MB 0 Downloads
To stay up to date, remember to subscribe to our YouTube channel! SUBSCRIBE
1. Lighten photo with Adjustments in Photoshop CC 2021, 2020
One of the quickest ways to clarify our image is to use the basic Photoshop settings. We will be able to adjust quickly with these options.
Step 1
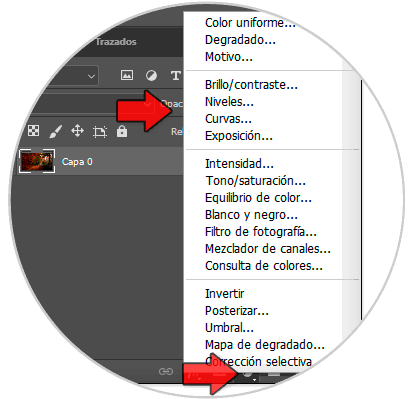
Once our image is open we can go to the lower options within the layers panel, here we will find different options:
Step 2
We are going to see each option. You can try each one and adjust them until you get the desired effect.
Clarify Image with Levels
Brighten image with Brightness / Contrast
Lighten Image with Curves
Clarify image with Exposure
Step 3
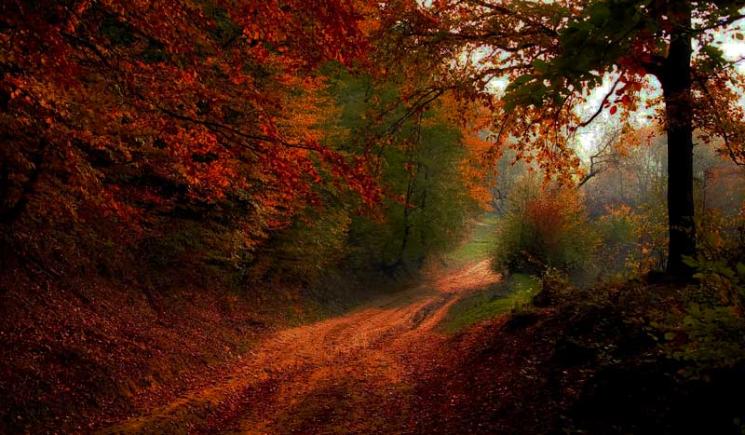
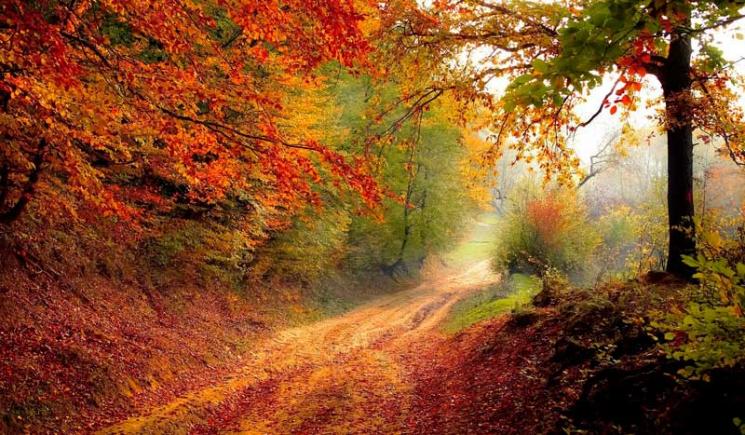
With these different adjustments we can get our image to be clarified to the degree we want.
2 . Lighten photo with Dodge in Photoshop CC 2021, 2020
If you have an image where you only want to lighten a specific part and not the entire image in Photoshop CC 2021, 2020, you can use the “Dodge” tool.
Step 1
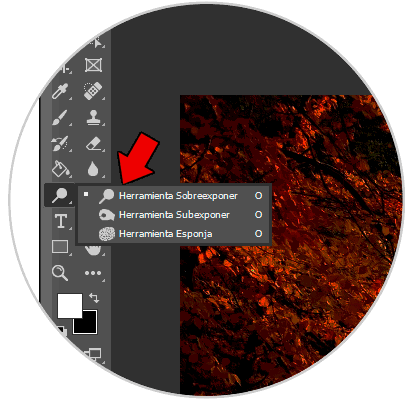
We go to the tools panel and click on the "Dodge" tool.
Step 2
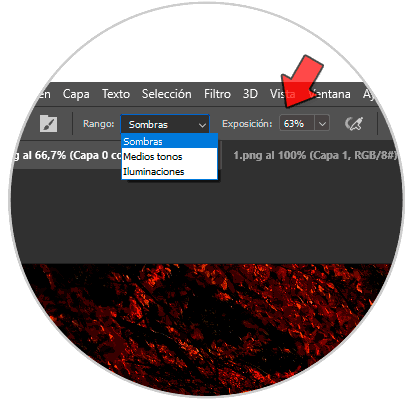
In the upper part we are going to choose what we want to adjust, such as the shadows first and what will be the exposure range to apply.
Step 3
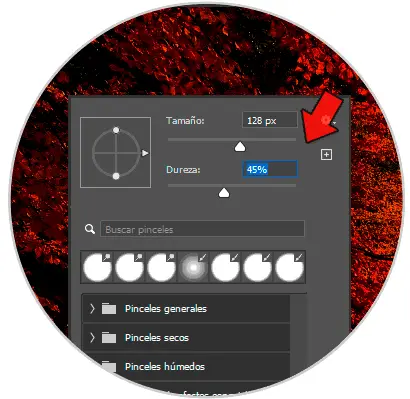
In addition, you can right click on the canvas and adjust the hardness of the brush so that the cut of some areas and others is not noticeable when applying the overexposure. You can also change the size of the brush for a more specific correction.
Step 4
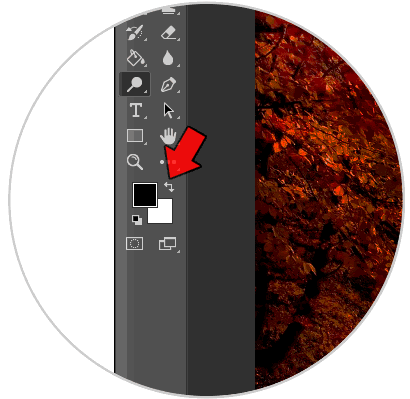
You must also adjust a color to apply the overexposure.
Step 5
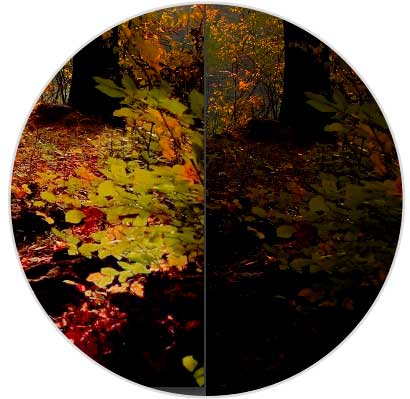
Now we just have to go to the image and paint in those areas that you want to clarify. You just have to play with the brush and with the lightening settings to achieve the effect we are looking for.
3 . Lighten Photo with Layers Mode in Photoshop CC 2021, 2020
With this option we can both clarify the image in a moment and clarify it by areas.
Step 1
The first thing is to duplicate our main dark layer. For this we use the following combination:
Ctrl + J
Step 2
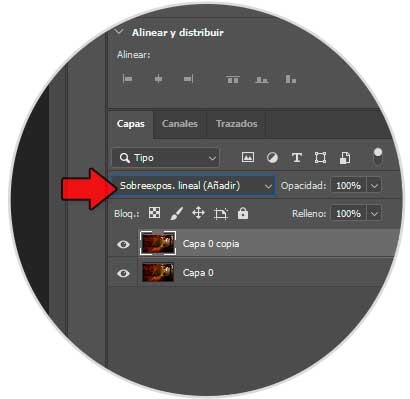
Once duplicated, we are going to apply a blend mode to the new layer of “Linear Dodge (Add).
Step 3
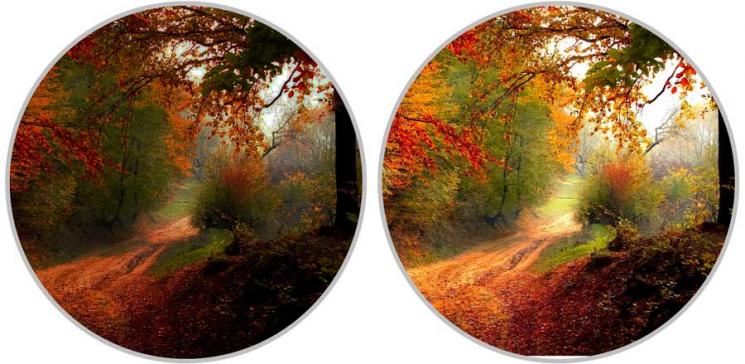
With this we will achieve that our image has changed to a clarified mode.
Step 4
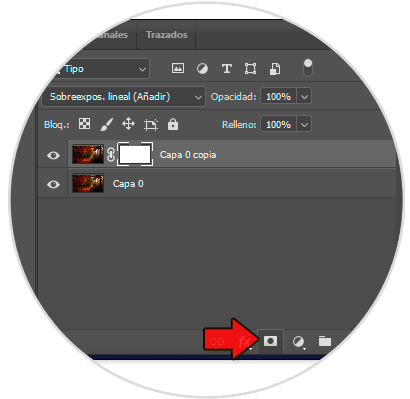
If we want to apply this effect in a specific way, we apply a layer mask to the second layer with blending mode "Linear Dodge (Add)".
Step 5
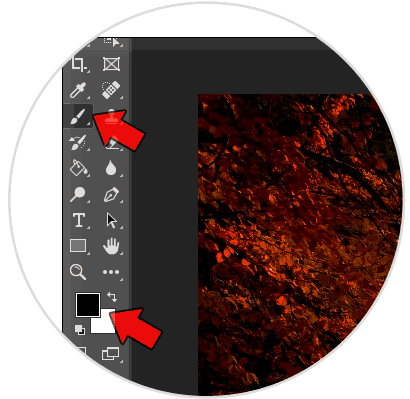
Now we will choose the brush and the black color
Step 6
With this we will only have to adjust the values of the brush and paint over those areas that we want to leave dark as at the beginning, leaving only the lightened ones.

Note
If you make a mistake, use the soft color of the brush to paint again, that's why we use layer mask, to be able to undo movements.
In this way we have different options to quickly clarify an image in Photoshop CC 2021, 2020..