The PS5 is one of the best consoles that we can find on the market today, and it undoubtedly has an immense number of followers who play through it daily, either locally or online . The configurations and adjustments that we can carry out in this console are quite extensive, since it offers different options and services..
For the console to function correctly, it is important that we keep it updated so that in this way we can use the device in the best possible way with all its news and improvements, and prevent errors from appearing .
Upgrading the console can be done from automatic to manual. This already depends on our tastes and preferences so below we show you all the steps you must follow to know how to activate or deactivate automatic updates PS5 step by step..
To stay up to date, remember to subscribe to our YouTube channel! SUBSCRIBE
Enable or disable automatic updates PS5
The steps you must follow to do this are as follows.
Step 1
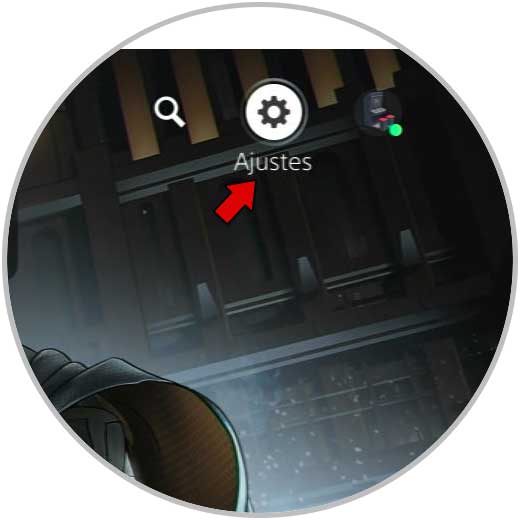
The first thing you should do is enter the "Settings" of the console "
Step 2
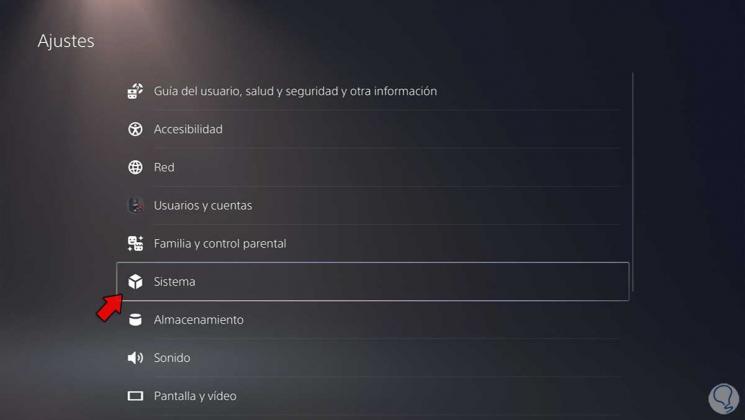
The next thing is to enter the "System" section
Step 3
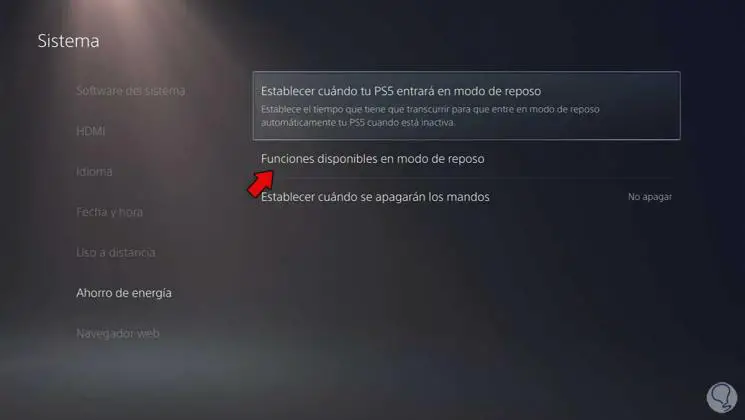
Now you must go to the "Energy Saving" tab and click on "Functions available in standby mode"
Step 4
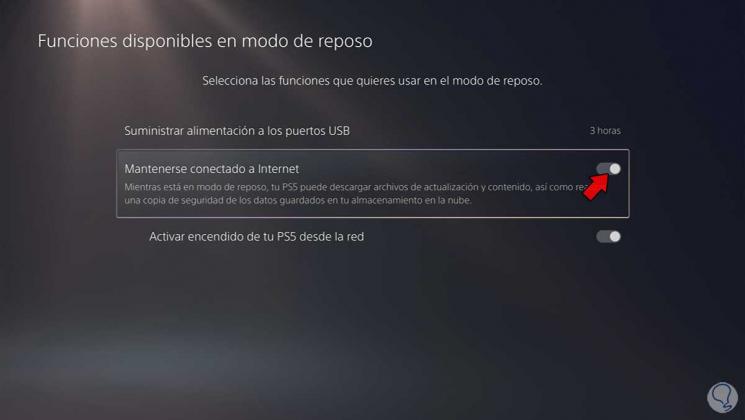
You can then select whether or not you want the PS5 to remain connected in sleep mode, which will allow or not download updates.
Step 5
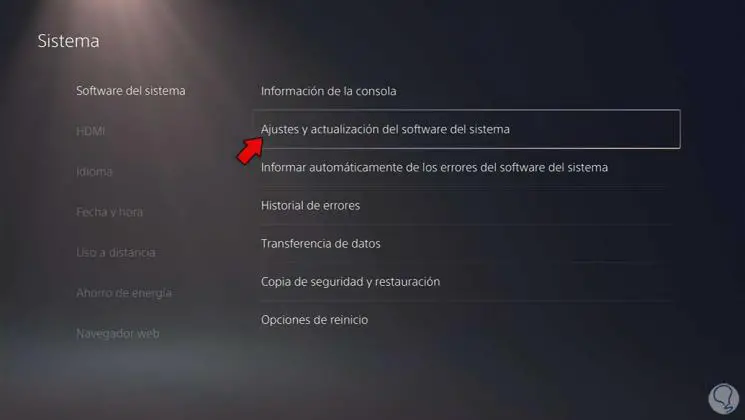
Now you must return to the previous menu and click on "System Software" and there in "Settings and update of the system software"
Step 6
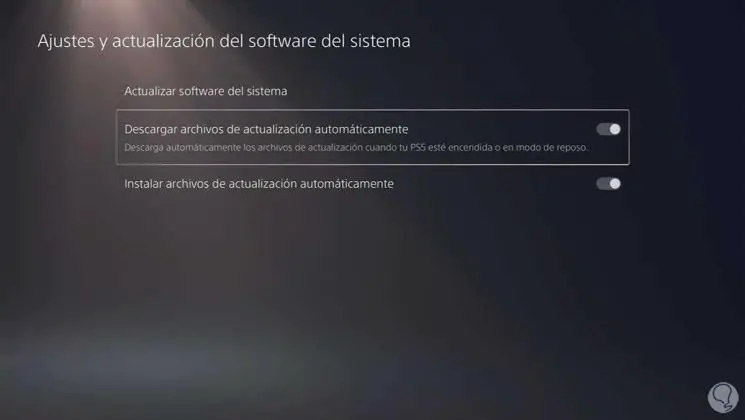
From here you can decide whether or not you want to enable updates to be downloaded automatically on PS5.
Step 7
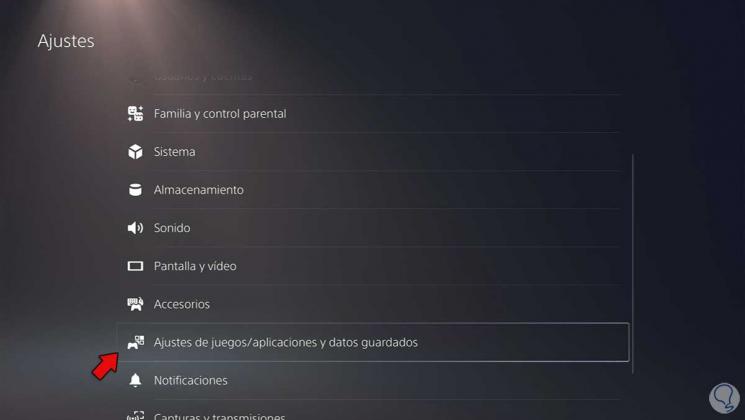
Finally within the settings, you can click on "Settings for games / applications and saved data"
Step 8
From here you can decide if you want game updates to be downloaded automatically or not.
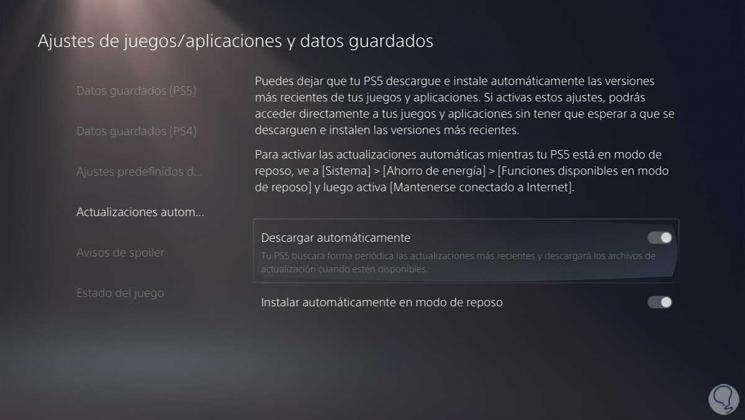
In this way you will be able to select on the PS5 if you want the updates to be automatic or not.