Shutting down the computer where we use Windows 10 is one of the tasks that we perform daily when we have finished our workday, this is useful since the entire system, as well as its services are turned off (they rest) and the hardware of the equipment (hard drives, CPU, RAM, etc) also stop working. If we leave the equipment on without use, apart from the fact that we waste energy, we are limiting their useful life, therefore we turn off the equipment..
It may happen that physically it is not possible to be present at some point to turn off the equipment, in this case the most functional option is to schedule this shutdown so that the system does it for us and this is possible thanks to the Task Scheduler and the shutdown command Windows 10 , let's see how to set a timer for shutdown of the Windows 10 operating system.
To stay up to date, remember to subscribe to our YouTube channel! SUBSCRIBE
How to schedule Windows 10 automatic shutdown with timer
Step 1
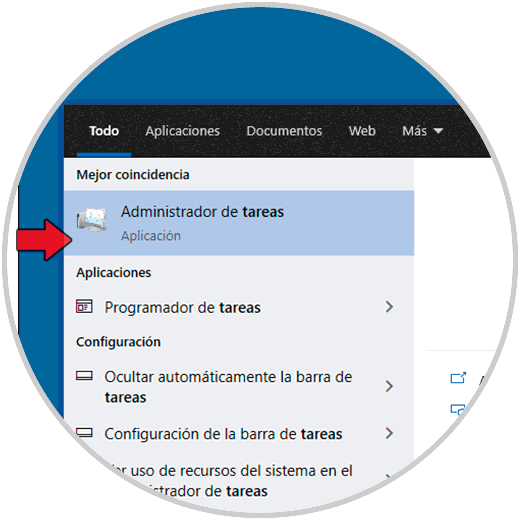
We enter "tasks" in the search engine and select "Task Scheduler":
Step 2
In the open Scheduler we click on "Create basic task":

Step 3
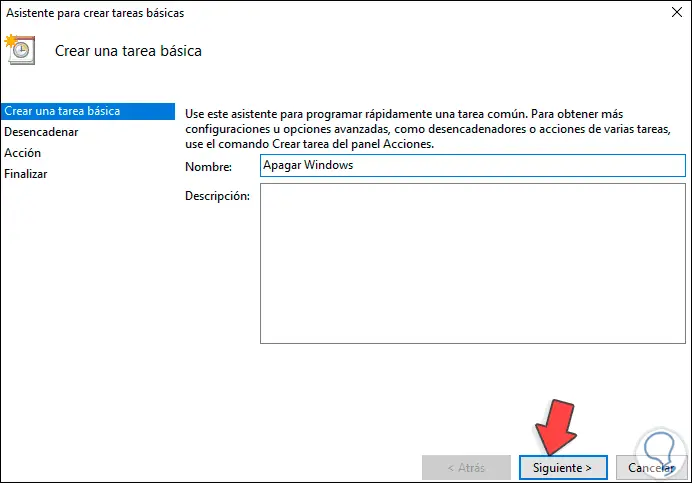
We assign the desired name to the task to create:
Step 4
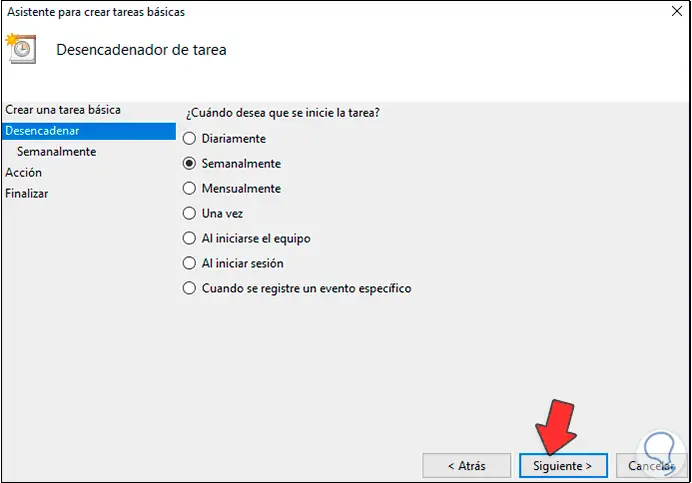
We click on Next and now we define the frequency to perform the task, this can be:
Step 5
Based on the selected option we can define the date, days and time in which the task will be executed in Windows 10:

Step 6
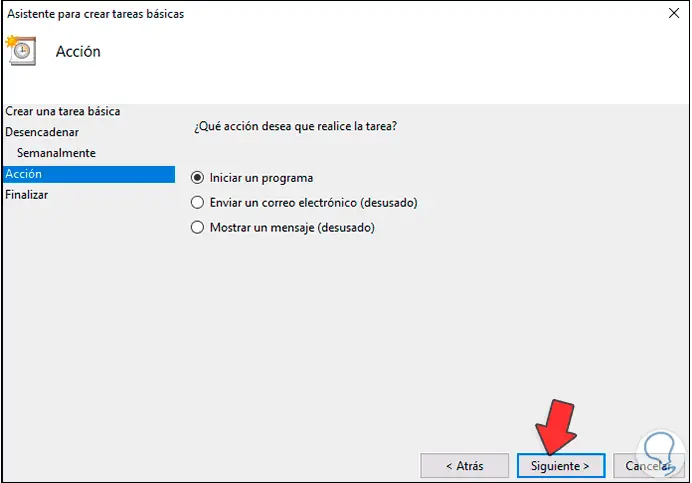
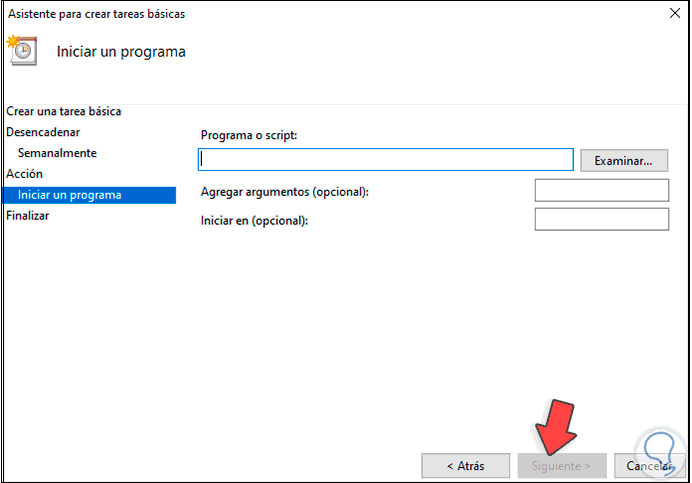
Click on Next and now we select "Start a program":
Step 7
We see the following:
Step 8
Click on Browse and go to the path "C: \ Windows \ System32 \ shutdown.exe":
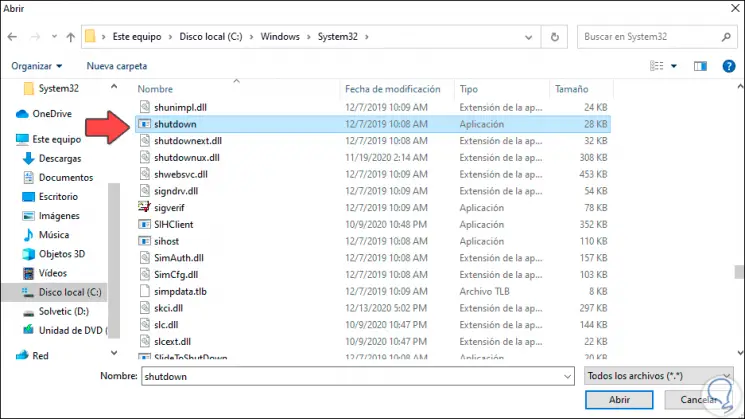
Step 9
We click Open and we will see the added path:
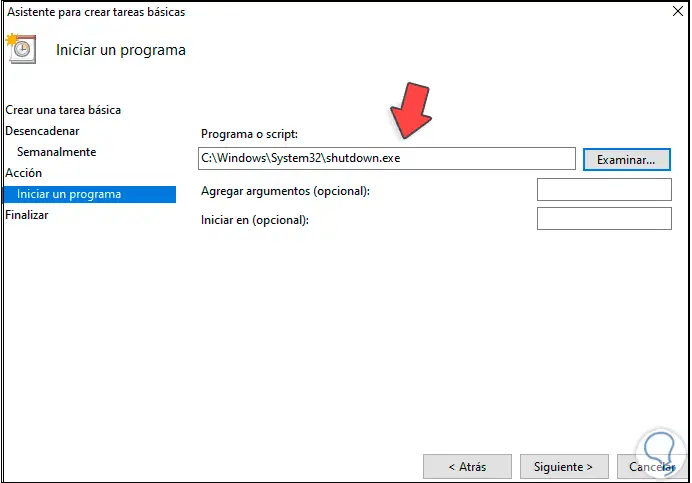
Step 10
In the "Add arguments" field we enter "-s -t 300", this value 300 is expressed in seconds (it should always be like this) to give the user the opportunity to save their work, in this case 300 seconds is 5 minutes:
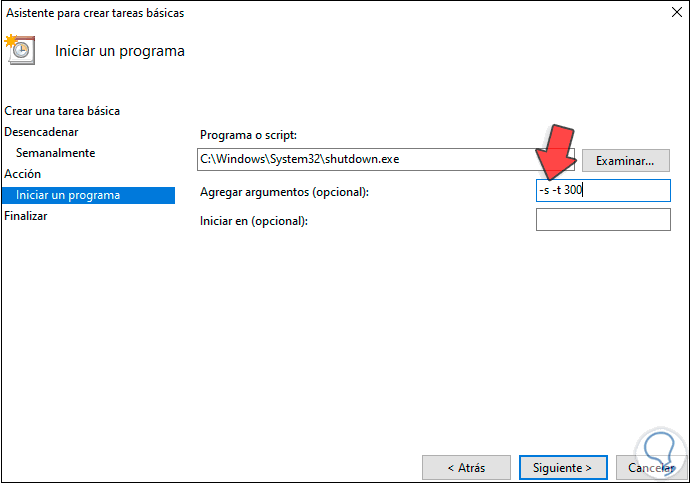
Note
If we want the shutdown to be immediate, we enter -s -t 0.
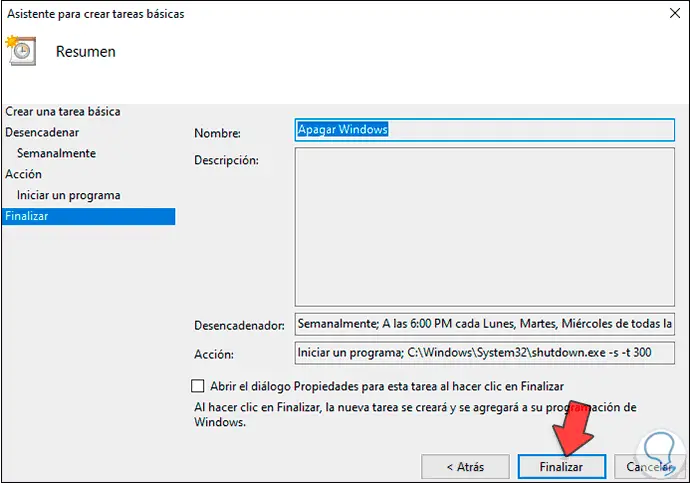
Step 11
Click Next and we will see a summary of the shutdown task, click Finish to complete the process:
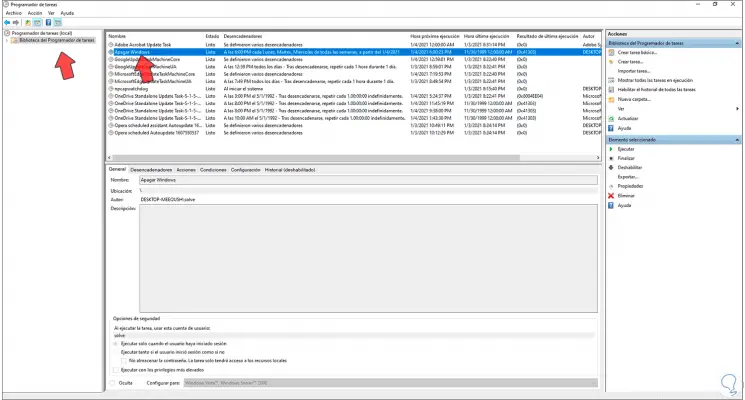
Step 12
Once the task has been completed, we click on "Task Scheduler Library" and locate the created task:
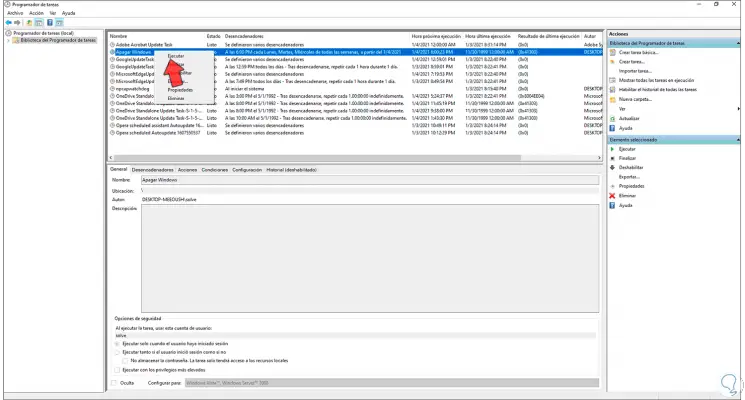
Step 13
We right-click on it and it is possible to execute some tasks such as:
- Run it to see how it works
- Remove it from the system
- Export your configuration to be used on another computer
Step 14
We check that the task works as it is by clicking on "Run", this will display the following message about the closing of the session. There we see the date and time in which the equipment will proceed to shut down.

This is the functional process to allow Windows 10 to shut down automatically..