When we are using our mobile devices, we like to be able to manage our applications and files in the best possible way. In this way we will be more productive at work and we will be more comfortable when carrying out the different tasks..
Chromebook is a Chrome-based system that gives us the possibility of working 100% online by synchronizing all the information between registered devices, but beyond this there is the possibility of working with different applications simultaneously. But it is not always possible to minimize one and then open it, in this case we can make use of the Chromebook's split screen function.
That is why below we will see how to use it effectively step by step..
To stay up to date, remember to subscribe to our YouTube channel! SUBSCRIBE
1. Use split screen on Chromebook
Step 1
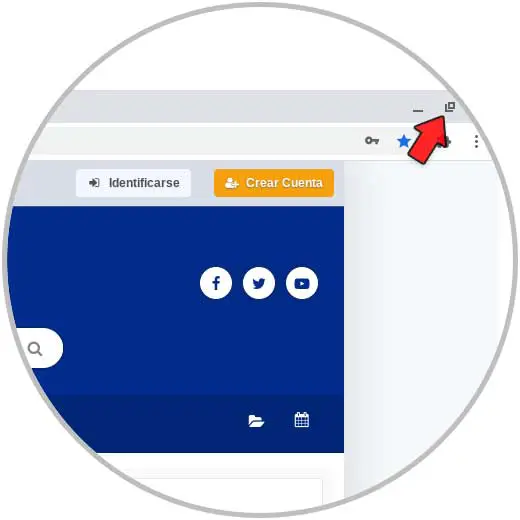
When we open an application or web page it will open in standard mode. To divide the screen, we click or touch the icon to change the size of the window (in computers with a touch screen) in the upper right corner of the screen.
Step 2
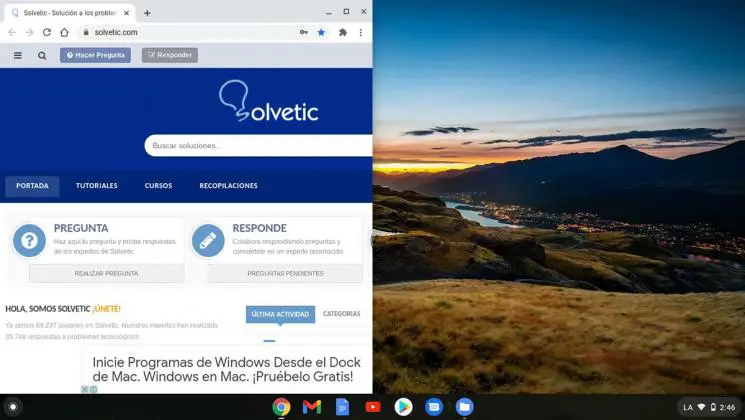
When this is a little smaller, we can drag the window to the left or right as we wish:
Step 3
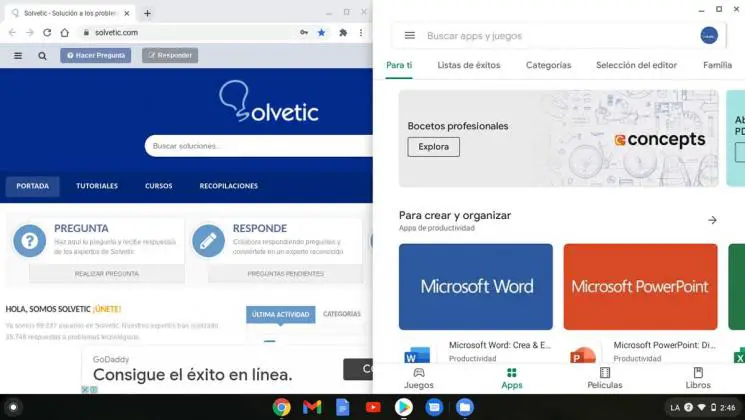
This window will be anchored there, now it is possible to add another window with the desired application. To do this we open it, click on the icon to change its size and drag it to the opposite side so that the division of the screen is a success:
2. Adjust the size of Chromebook windows
Step 1
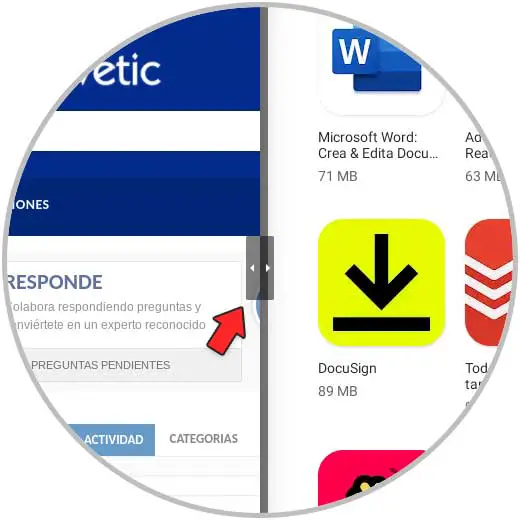
By default the windows are identical in size, but it is possible to adjust this size according to need, for this we hover the mouse over the union of the two windows and we will see the following:
Step 2
There we simply drag the desired window to the size that we consider appropriate:
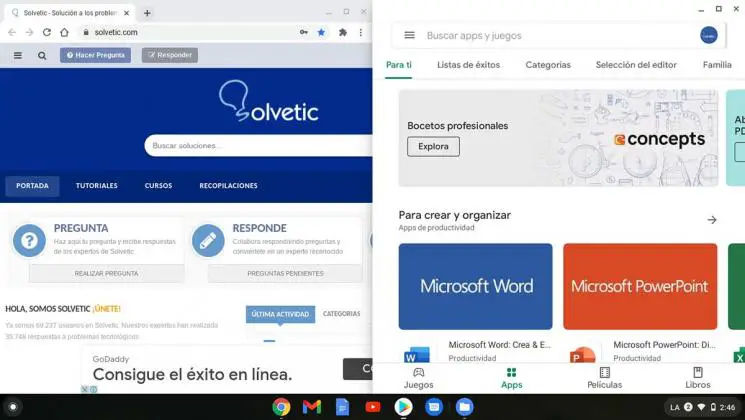
From here, simply click on the desired window to work on it on Chromebook.
It is a simple process to split the screen on Chromebook.