Information security is essential in a world where data can be in constant danger and that is why as users we must bear in mind the best current security options so that information is not compromised or altered..
In the case of Microsoft Word, we know that this application offers us a wide group of options to edit the content and if a user without knowledge or simply to do some damage, accesses the file, they can make numerous changes affecting time and work. To avoid this getFastAnswer advises you to protect a Word file with the read-only mode, in this way we will avoid changes in the file that are not authorized.
Below we show you all the steps you must follow to know how you can protect a Word document against writing, so that it only opens in read-only mode and thus avoid unwanted modifications..
To stay up to date, remember to subscribe to our YouTube channel! SUBSCRIBE
How to protect a Word document with read-only mode
This is a process that equally covers Word 2016 or 2019
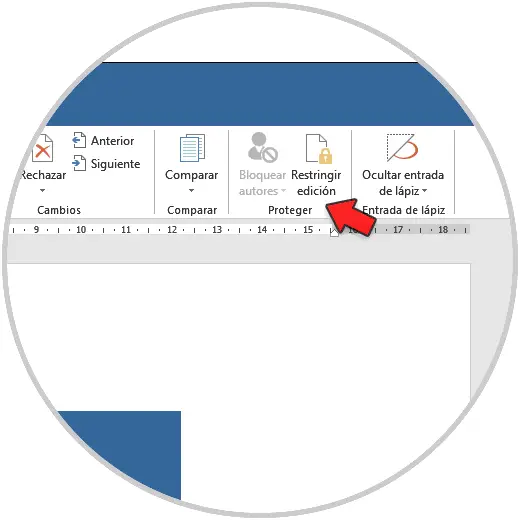
Step 1
We open Word and go to the Review menu and click on "Restrict editing":
Step 2
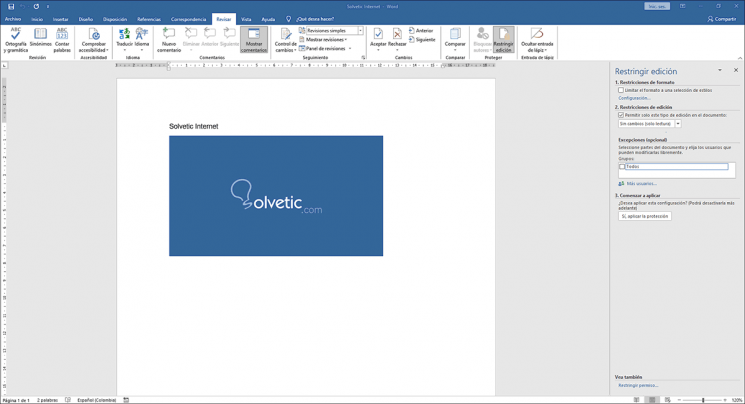
By clicking there, we are going to activate the box "Allow only this type of editing in the document" and set "No changes (read only)":
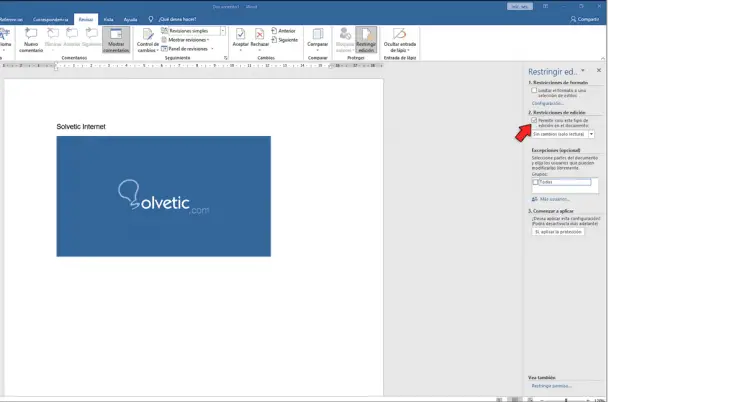
Step 3
At the bottom we can define the segments where the changes are to be applied. In the Exceptions section we can establish all or only some parts of the document.

Step 4
We confirm the process by clicking "Yes, apply protection" and set the password with which the file will be protected:
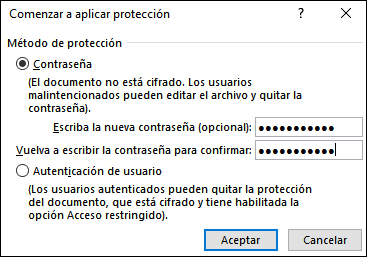
Step 5
The "User Authentication" option applies to scenarios where domain controllers are handled.
Click on Accept and save the changes.
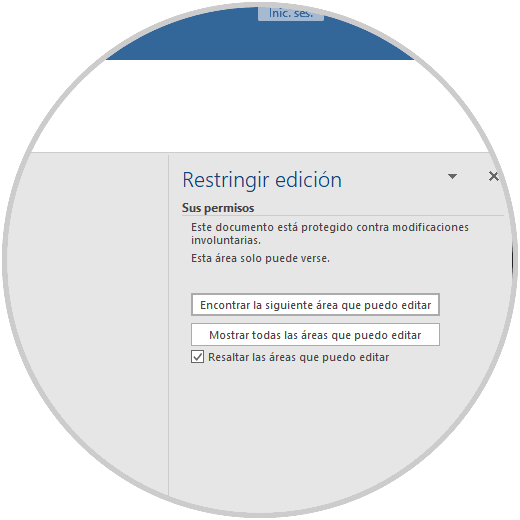
We close the document, when accessing the file, we can see that all the editing options are disabled:
Step 6
We go to the menu "Review - Restrict edition" and we will see the following:
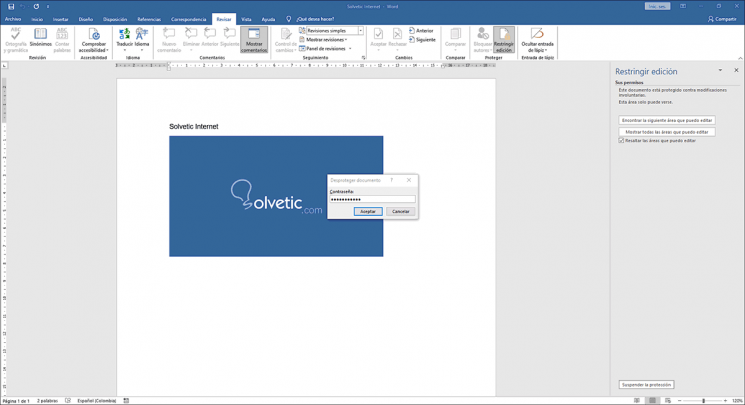
Step 7
Click on "Suspend protection" to activate the edition (we must enter the assigned password):
Step 8
Click on OK and now we see that all the editing options of Word 2016 or 2019 are enabled to be used:
This is a simple but fully functional process to add a touch of security to the information recorded in Word and thus avoid unauthorized changes.