Every day we handle all kinds of information in Windows 10 , from basic information to data that is confidential or private, these by default are stored on the hard drive and for security reasons we may be looking for some way to add security to this information, the answer It is simple and getFastAnswer will give it to you and it is to prevent access to the disk and in some cases hide it if necessary, we are going to see how to achieve these methods in Windows 10..
To stay up to date, remember to subscribe to our YouTube channel! SUBSCRIBE
1. Restrict access to Windows 10 GPEDIT hard drive
Step 1
The first thing is to see that you have permission to open the disk, for this we access the File Explorer and access the disk drive to hide:
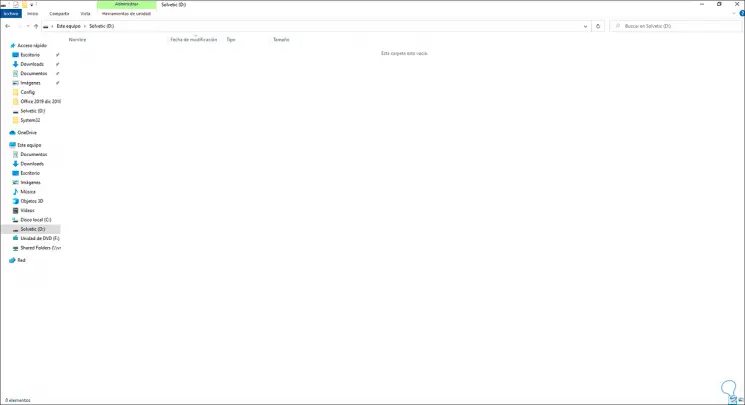
Step 2
The first method will be using the group policies which are available in the Pro and Enterprise editions of Windows 10, we access the group policy editor from the search engine by entering "gpedit":
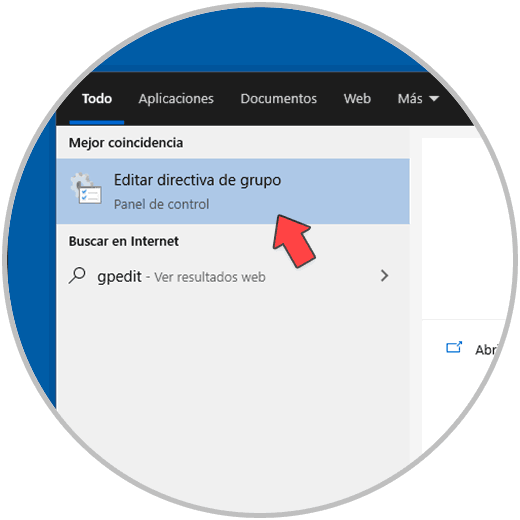
Step 3
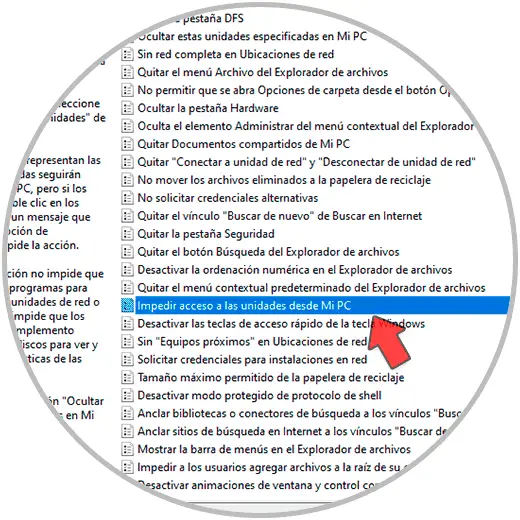
We go to "User Configuration - Administrative Templates - File Explorer", there is the policy called "Prevent access to the drives of my PC":
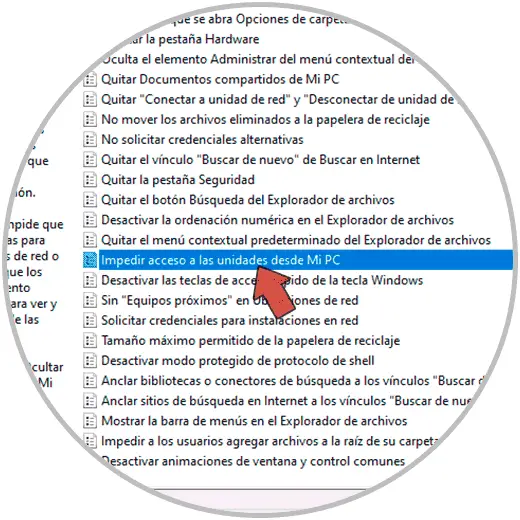
Step 4
We double click on it and we will see the following:
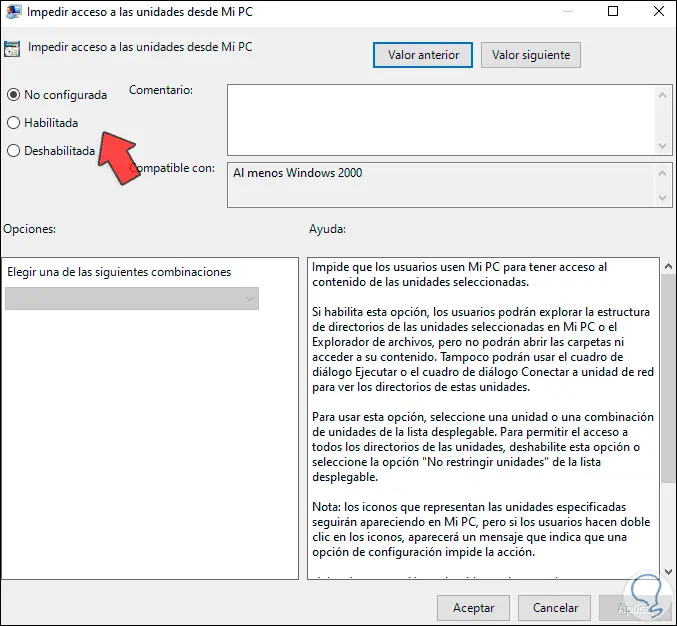
Step 5
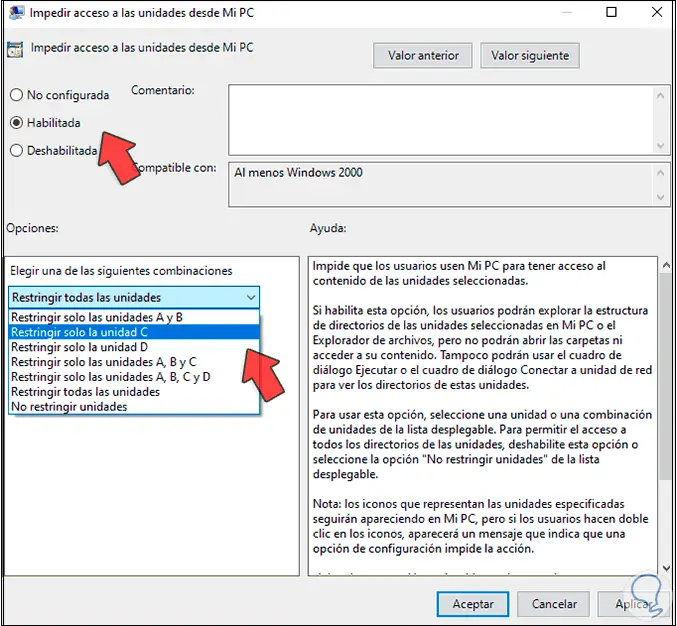
Activate the "Enabled" box and choose the unit to hide, we can see the various options:
Step 6
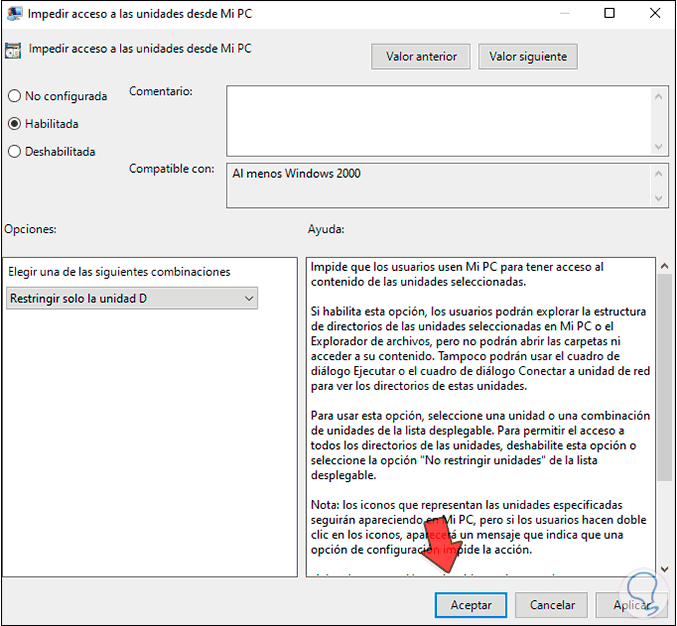
In this case we select "Restrict only drive D":
Step 7
Apply the changes and we see the policy enabled:
Step 8
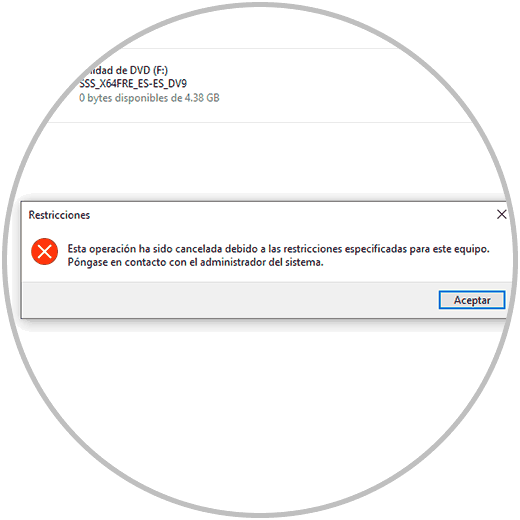
Refresh Explorer to verify that the selected drive cannot be accessed:
Step 9
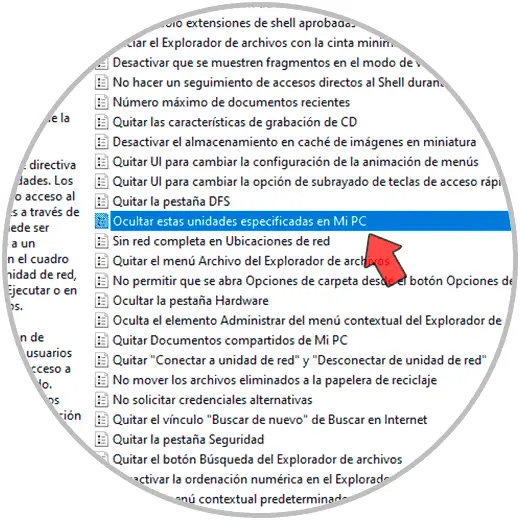
Now, it is possible to add more security by hiding the drive, for this select the policy "Hide these specified drives on my PC":
Step 10
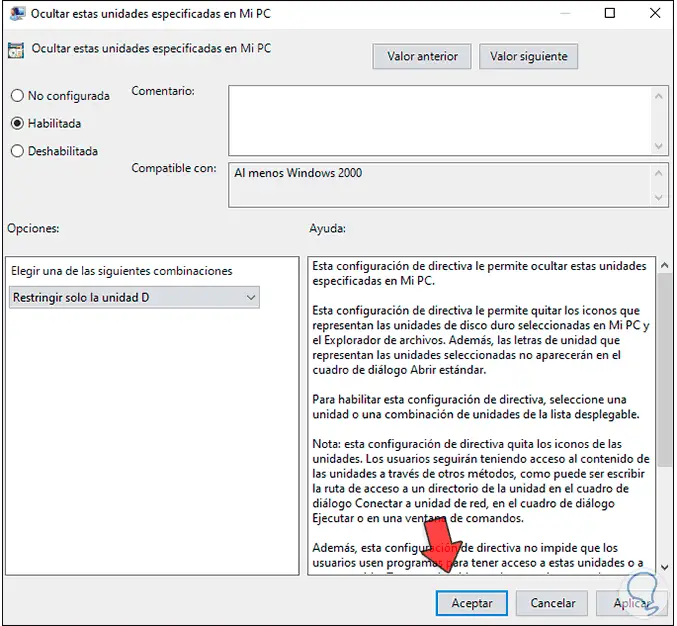
Activate the "Enabled" box and select the desired unit, in this case D:
Step 11
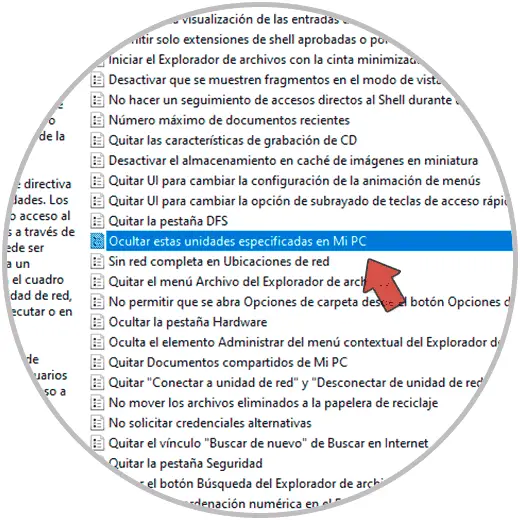
Apply the changes:
Step 12
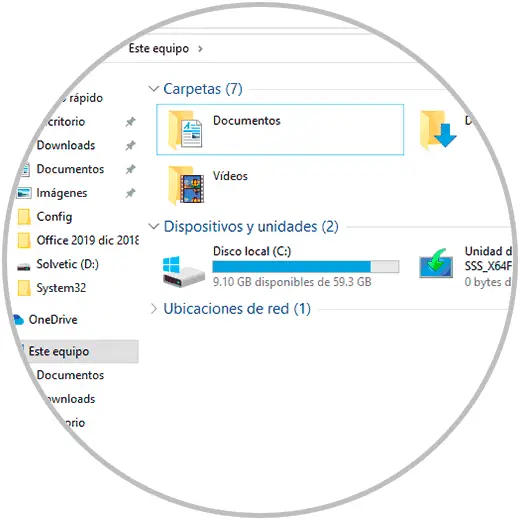
In Explorer this drive will be hidden:
2 . Restrict access to hard drive Windows 10 REGEDIT
Step 1
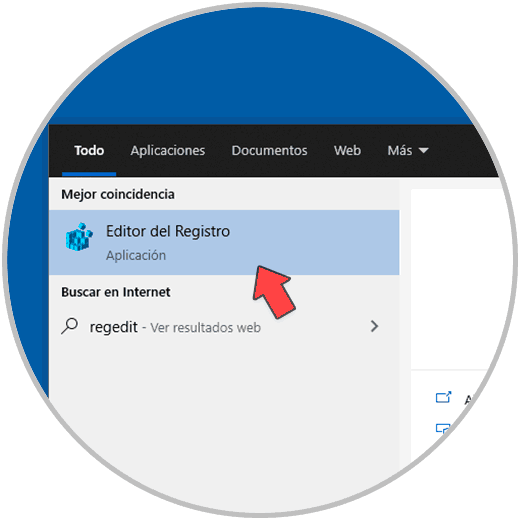
This option is available for all editions of Windows 10, we see that we have access to the disk drive and then we access the registry editor by entering "regedit" in the search engine:
Step 2
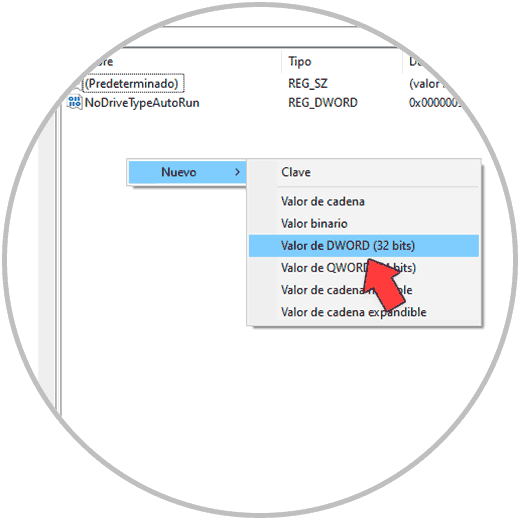
In the editor we go to the path "HKEY_CURRENT_USER - Software - Microsoft - Windows - CurrentVersion - Policies - Explorer", there we right click and select "New - DWORD Value (32 bits)":
Step 3
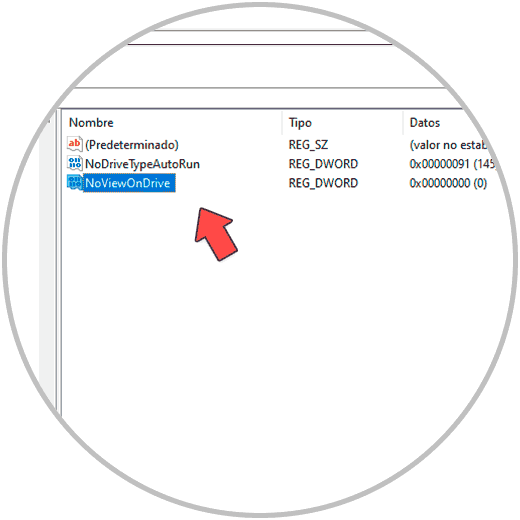
We call this value "NoViewOnDrive":
Step 4
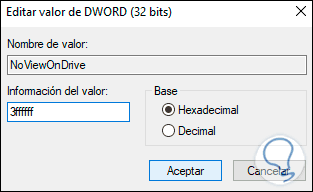
We edit its value and set it to "3ffffff". Apply the changes, this allows the unit to be hidden.
Step 5
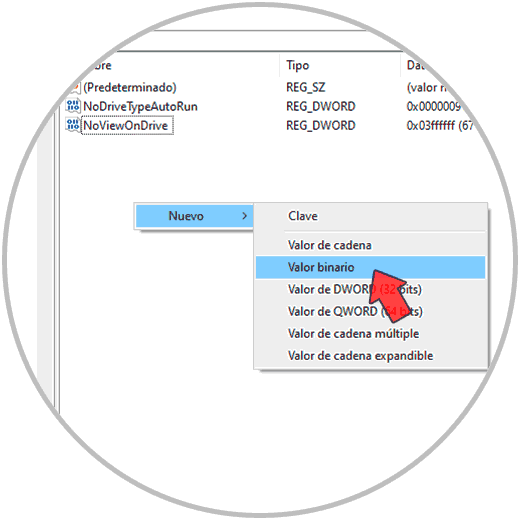
Now we right click and select "New - Binary Value":
Step 6
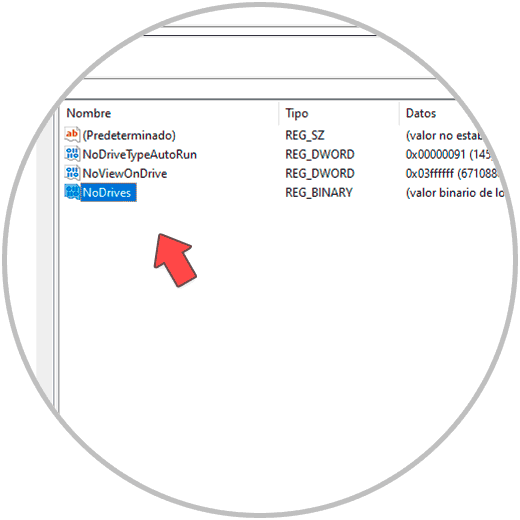
We call it "NoDrive":
Step 7
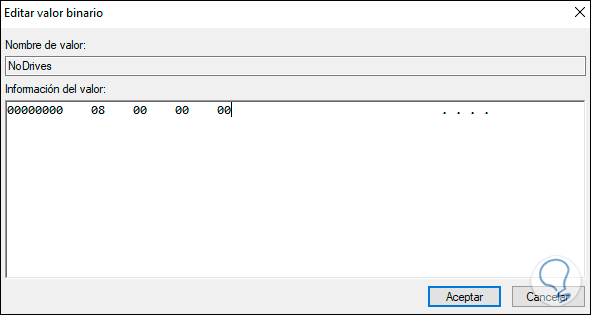
We edit its value and enter the value based on the letter of the drive to hide, the options are:
A: 01 00 00 00 B: 02 00 00 00 C: 04 00 00 00 D: 08 00 00 00 E: 10 00 00 00 F: 20 00 00 00 G: 40 00 00 00 H: 80 00 00 00 I: 00 01 00 00 J: 00 02 00 00 K: 00 04 00 00 L: 00 08 00 00 T: 00 10 00 00 N: 00 20 00 00 Or: 00 40 00 00 P: 00 80 00 00 Q: 00 00 01 00 R: 00 00 02 00 S: 00 00 04 00 T: 00 00 08 00 U: 00 00 10 00 V: 00 00 20 00 W: 00 00 40 00 X: 00 00 80 00 Y: 00 00 00 01 Z: 00 00 00 02
Step 8
In this case unit D is the value 08 00 00 00:
Step 9
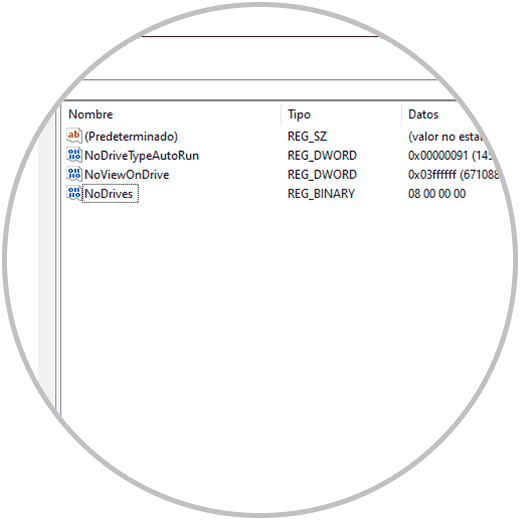
Apply the changes.
Step 10
In Explorer check that the drive is inaccessible or hidden:

With these two options it is possible to protect disk drives from unauthorized access in Windows 10.