When accessing websites and applications, which is a daily task, they leave the DNS cache locally hosted in which different components of the site or applications are stored, such as server names, IP addresses and others. variables of the site or program..
DNS searches are generated when the browser sends the request for access to the site, be it a website, an FTP server or any remote device, one of the functions of the DNS cache is to optimize the performance and speed of the applications, but this can be affected when the website changes its IP address or configuration, which instead of improving access can have the opposite effect.
getFastAnswer will explain two methods to see the DNS cache in Windows 10.
To stay up to date, remember to subscribe to our YouTube channel! SUBSCRIBE
1. How to view DNS cache from CMD
Step 1
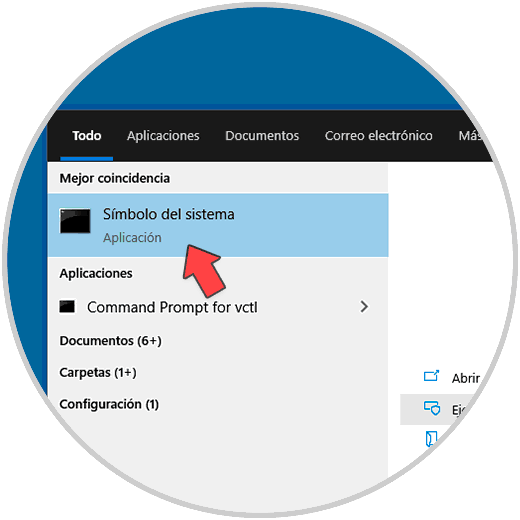
To use this method we are going to open CMD as administrators:
Step 2
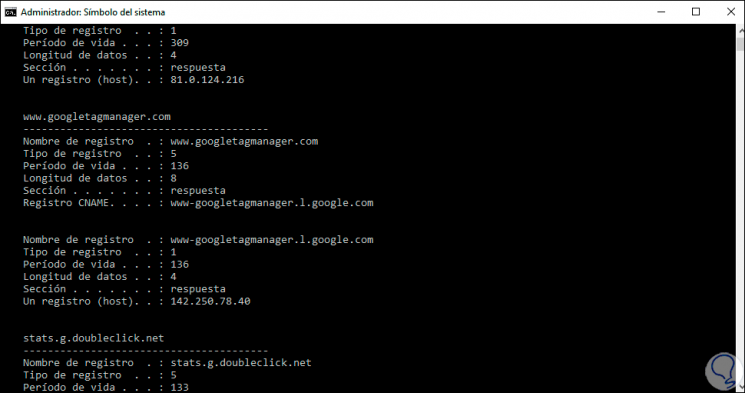
In the console we execute the following command:
ipconfig / displaydns
Step 3
We can see details of each line such as:
- Record name: is the domain or DNS name
- Type of record: it can be a number or a name, in DNS, each record has a number.
- Lifetime: refers to the time in seconds in which the record will expire in the cache
- Data length: refers to the length in bytes of the DNS
- Section: is the DNS response to the query
- CNAME record: indicates the canonical name of the site
Step 4
In Windows 10 it is possible to export the results with the following command:
ipconfig / displaydns> dnscache.txt
2. How to view DNS cache from PowerShell
Step 1
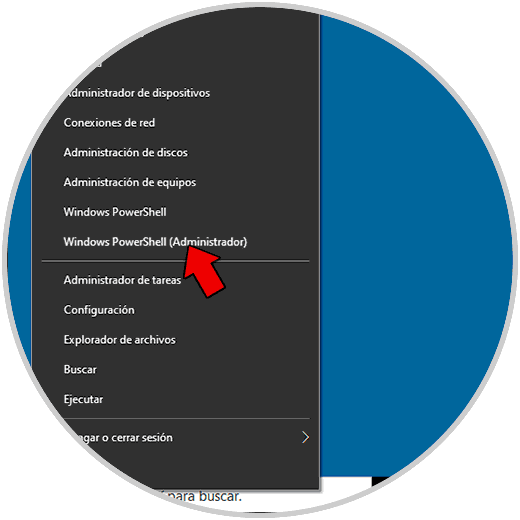
For this method we open PowerShell as administrators:
Step 2
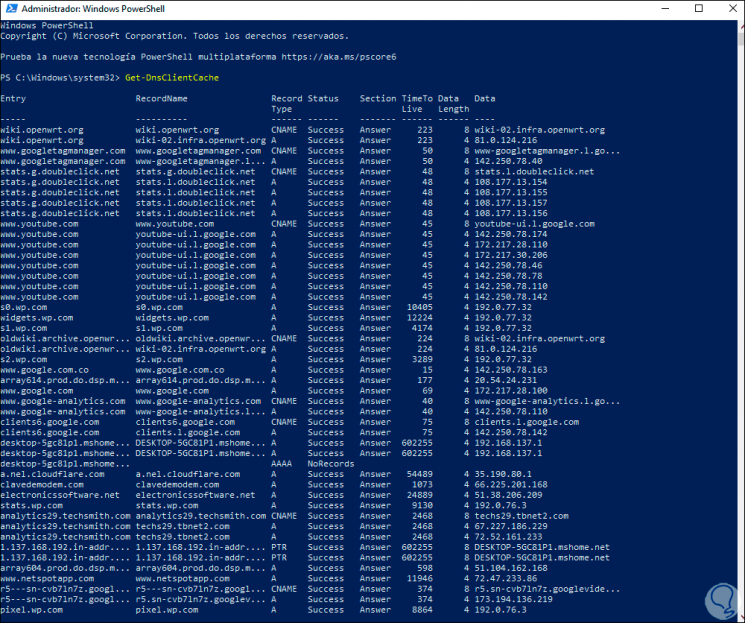
In the console we are going to see the cache list with the following cmdlet. There we can see each section identical to the one already seen in CMD.
Get-DnsClientCache
Step 3
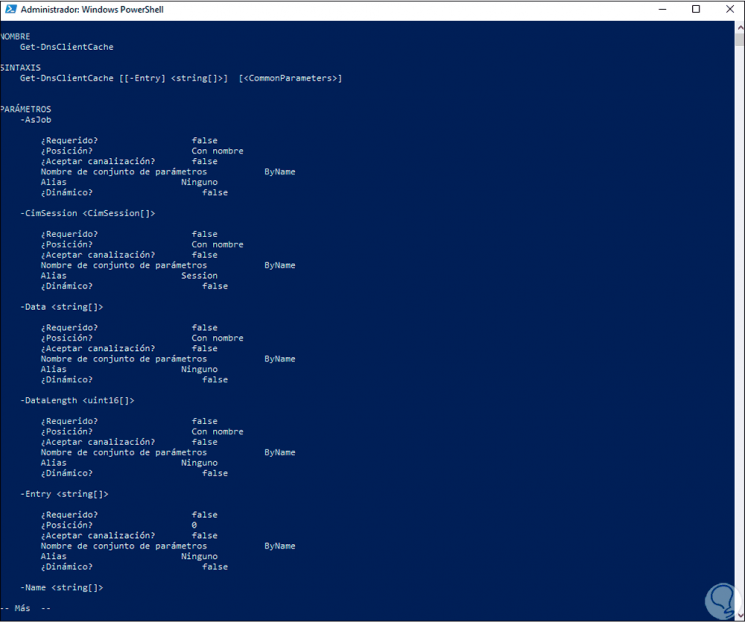
You can list the help for the command with the following cmdlet:
Help Get-DnsClientCache -full
These are the methods available to view the DNS cache in Windows 10 and determine if we can carry out support tasks such as clearing the cache or not..