Windows 10 gives us the possibility of creating a dual boot with other systems, whether Microsoft or other developers, this allows us to have two different systems, but with the same hardware resources saving money and by default, when using this function , the operating system displays the dual boot menu or operating system selection menu so that it is possible to select the operating system with which we want to log in..
For various reasons, it is possible that after an update this system selection menu is not available and through this tutorial we will see how to activate this dual boot again.
To stay up to date, remember to subscribe to our YouTube channel! SUBSCRIBE
1. Activate Dual Boot Windows 10 from CMD
Step 1
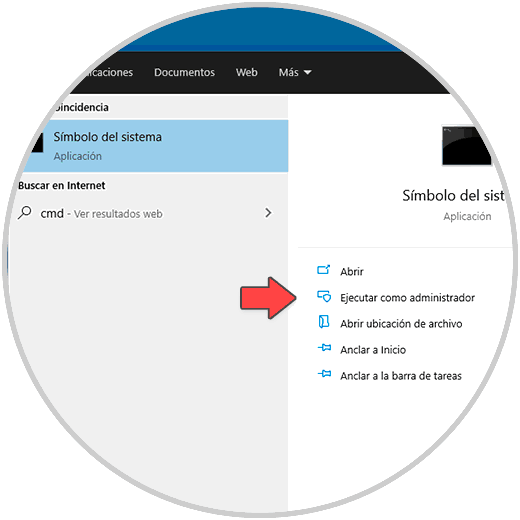
For this we access the CMD as administrators:
Step 2
In the console run:
bcdedit / set {bootmgr} displaybootmenu yes 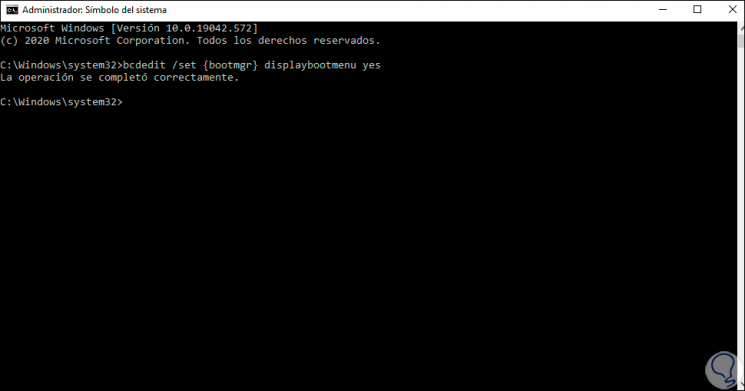
Step 3
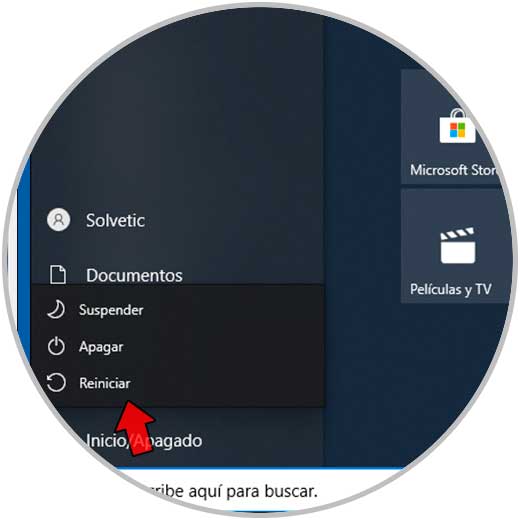
After this we restart Windows 10 to choose which system to start with:
Step 4
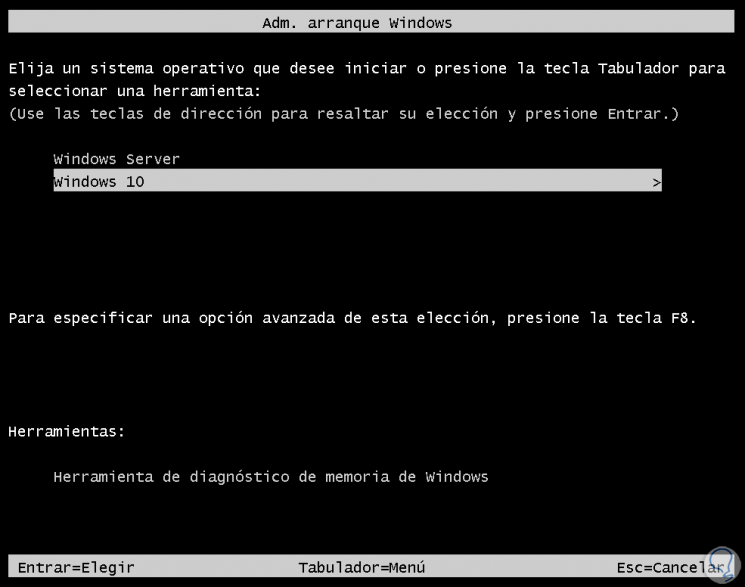
When restarting we will see the selection menu:
Step 5
There we select the system with the direction arrows and press Enter to start with it:

2. Activate Dual boot Windows 10 from Menu
Step 1
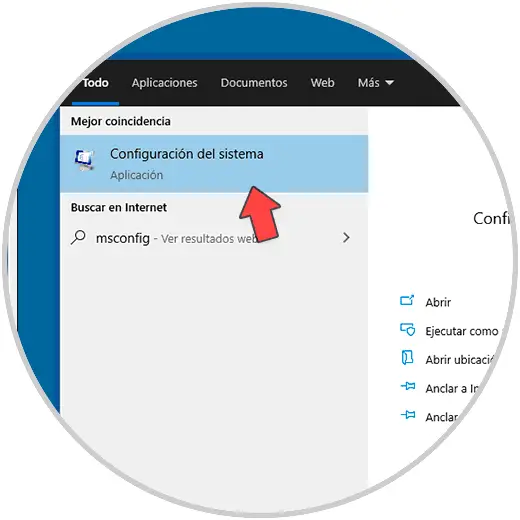
To use this method in the Start search we enter "msconfig":
Step 2
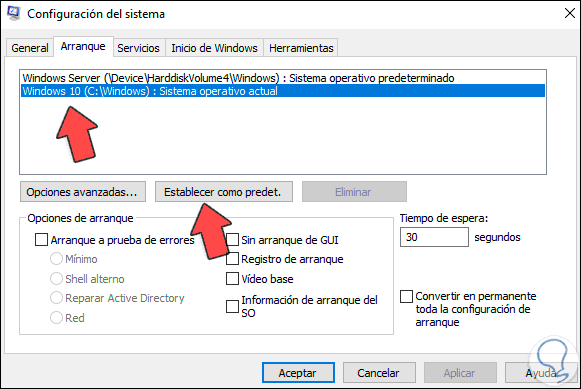
Open the configuration utility, in the Startup tab we select the operating system that will be established by default:
Step 3
Click on "Set as default" to configure it as such:
Step 4
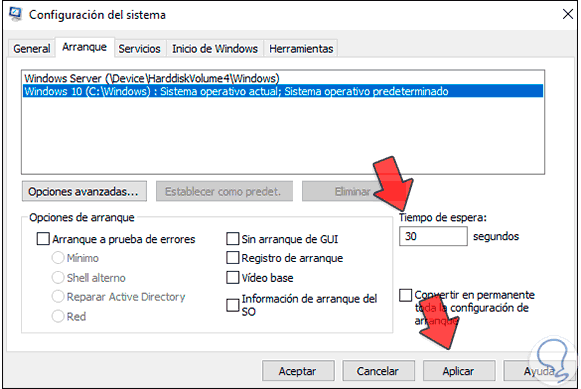
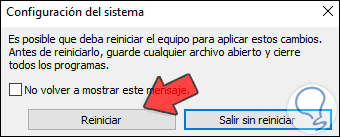
Define the waiting time of the systems in which we can choose the system in the "Waiting time" field, apply the changes and we will see the following:
Step 5
Restart the computer to open the chosen system:

Step 6
We log in to the selected system:

These are the two processes to activate dual boot in Windows 10..