The use of Gmail is closely linked to our Google account and Gmail not only serves to send or receive emails, it also allows access to platforms, make opinions and many more tasks. This logically implies using our user profile where certain personal data are established that can become vulnerable if they fall into the wrong hands, many times due to lack of knowledge or carelessness we can be vulnerable, situations such as:
Security problems
- Use the same password on different websites
- Download software from the Internet without knowing the developer (its reliability)
- Open links in email messages
All this allows the attacker to have the tools to breach security, so Google has implemented two-step verification to add an extra step of protection to our Gmail account..
Uses 2-step verification
By using this type of verification we have protection such as:
- Extra level of security since apart from the password it will also be necessary to use the telephone or the security key to enter the account
- Personalized verification codes which are created specifically for the linked account and are sent by means such as text message, voice call or using the Authenticator application.
To stay up to date, remember to subscribe to our YouTube channel! SUBSCRIBE
Let's see how to activate two-step authentication in Gmail on both PC and Android.
1. Activate Gmail PC Two-Step Verification
Step 1
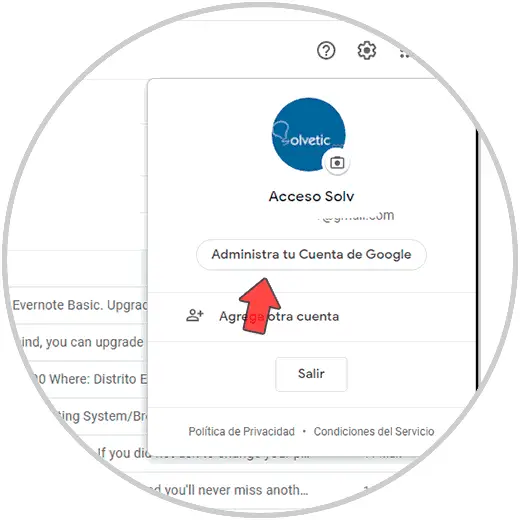
We open Gmail, then we click on the user's profile, we will see the following:
Step 2
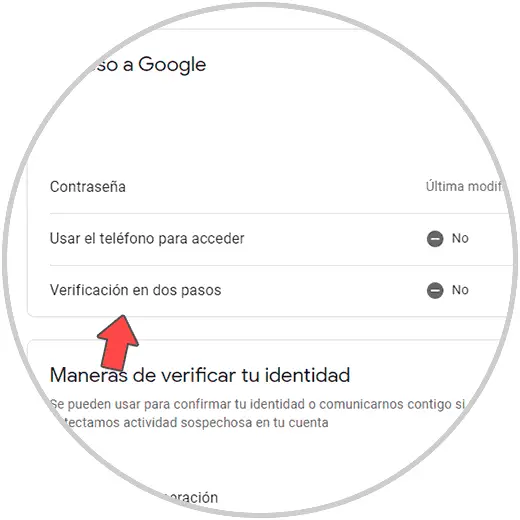
We select the option "Manage your Google account", in the next window that will open we go to the "Security" section where we have the following options:
Step 3
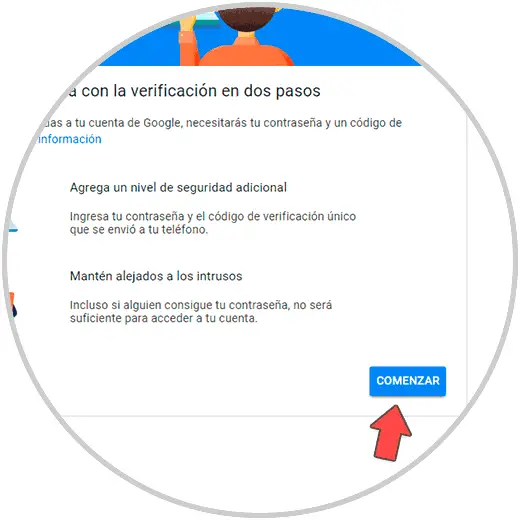
We click on "Two-step verification" and we will see the following:
Step 4
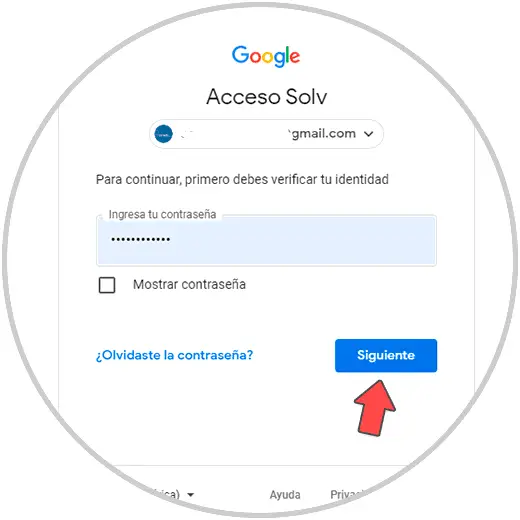
We see a brief summary of the function, we click on "Start" to start the process, the first thing will be to enter the credentials of the Gmail user:
Step 5
Click Next and now we select the mobile device to link:
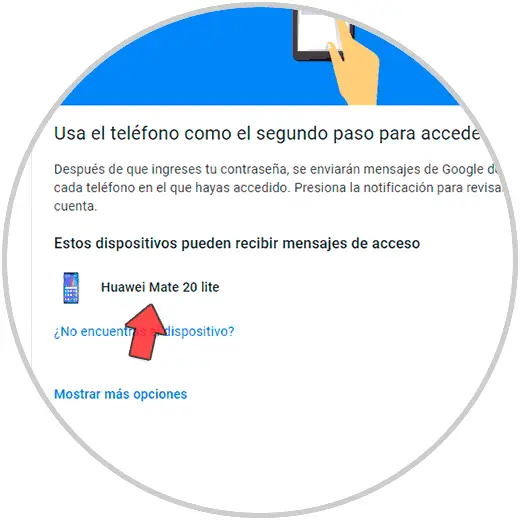
Step 6
Click Continue and enter the mobile number to use:
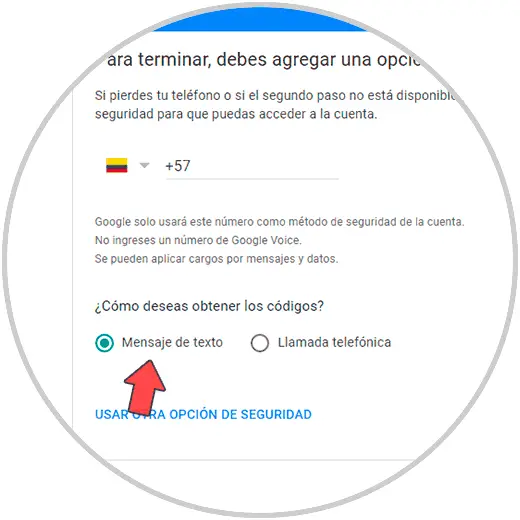
Step 7
Click on Send to receive the SMS with the verification code, we enter the received code:
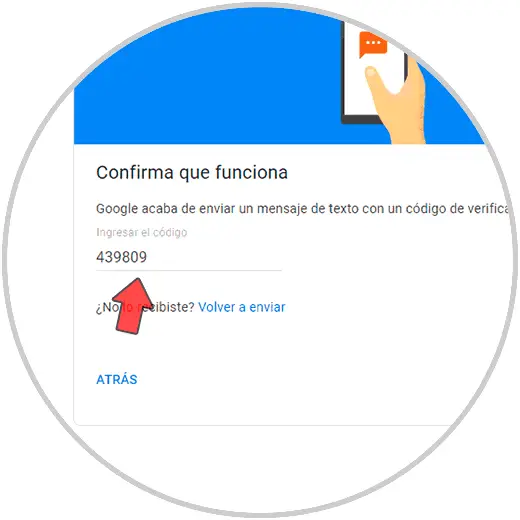
Step 8
Click Next to see this window:
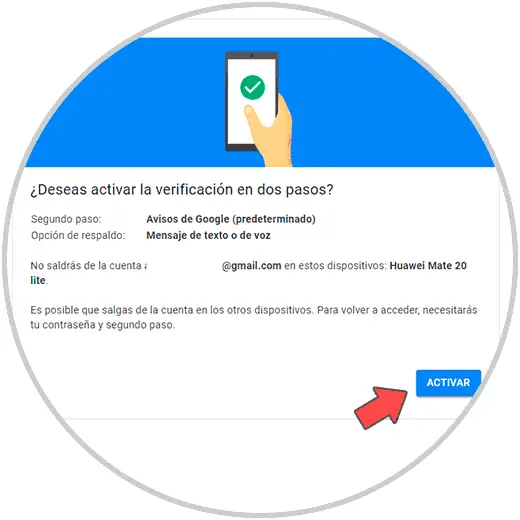
Step 9
We click on "Activate" to complete the process:
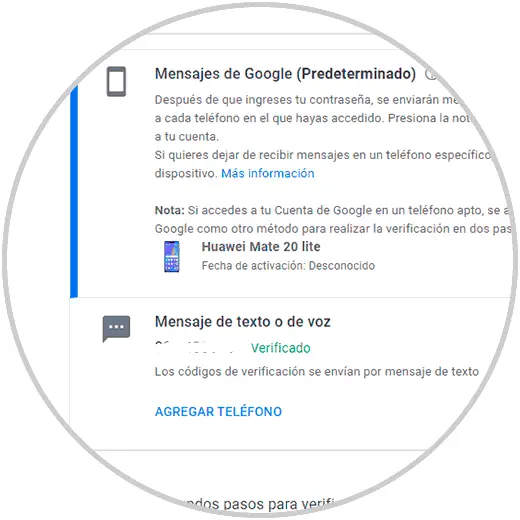
Step 10
There we can see that two-step authentication has been enabled in Gmail, in the lower part we have extra options for verification:
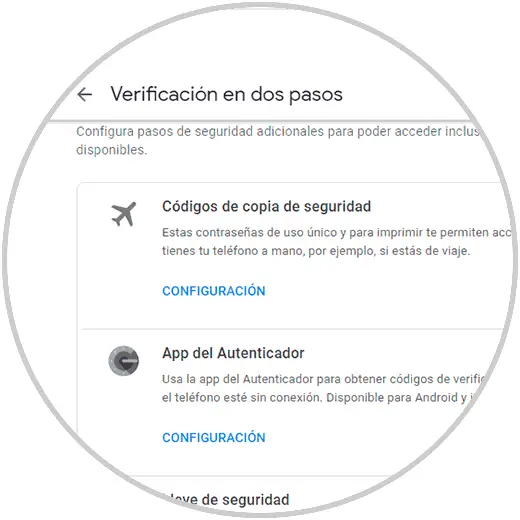
This has been the process to activate two-step authentication in Gmail on PC.
2 . Enable two-step verification Gmail Android
Step 1
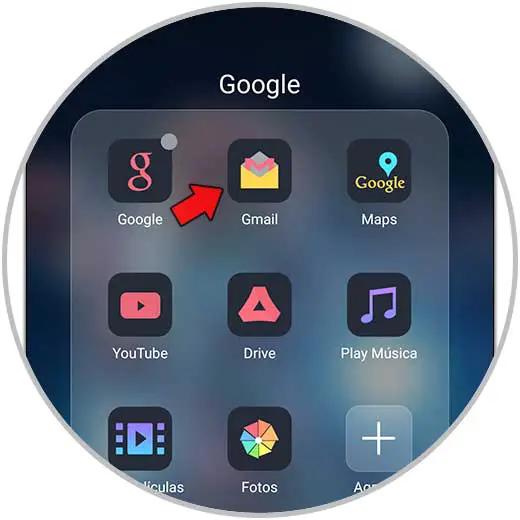
In the case of Android, the first thing to do is open Gmail on your mobile:
Step 2
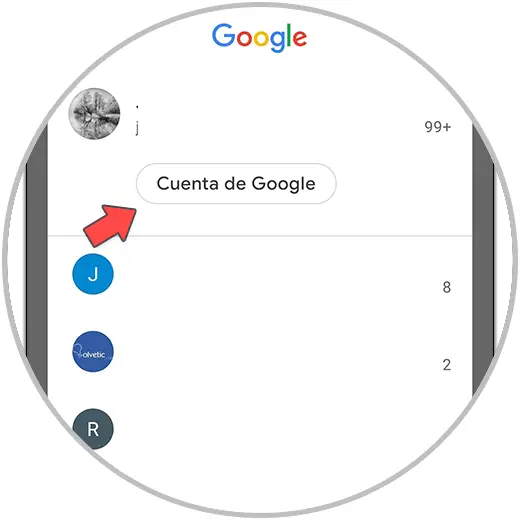
Then we click on the profile and select the account to activate the verification:
Step 3
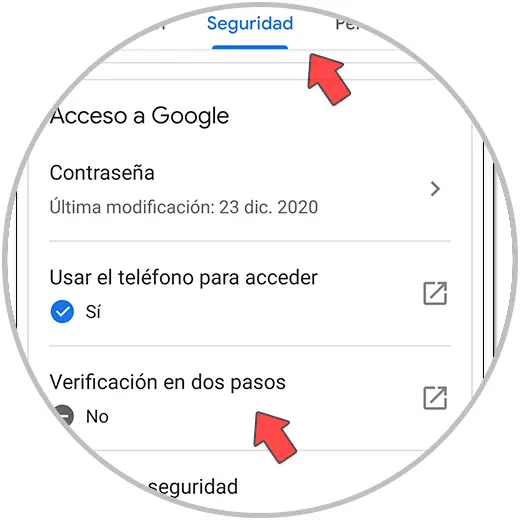
Click on the profile and select "Google Account", then we go to the "Security" section. As we can see, the option "Two-step verification" is disabled.
Step 4
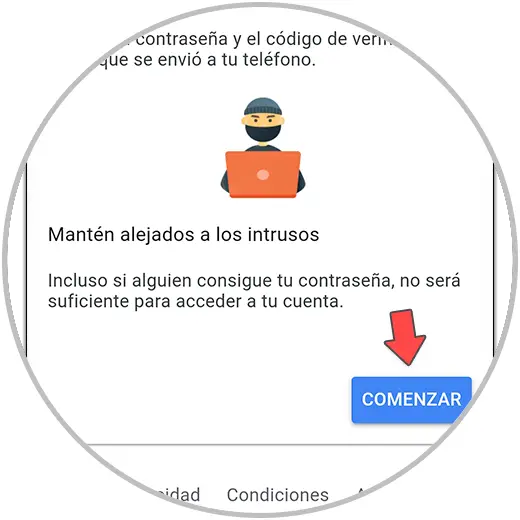
Click there and we will see the following:
Step 5
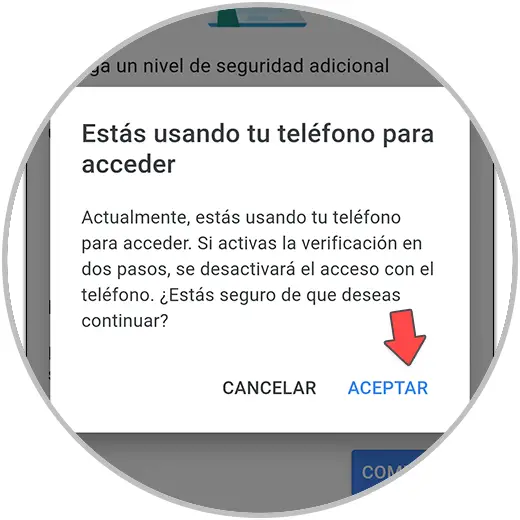
Click on "Start" and we will see the following message:
Step 6
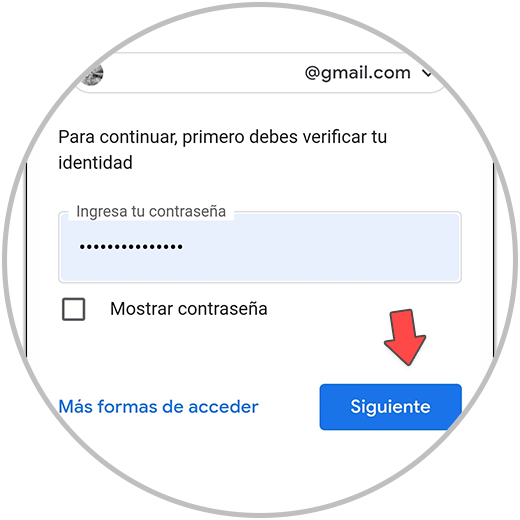
Click OK and then enter the user's password:
Step 7
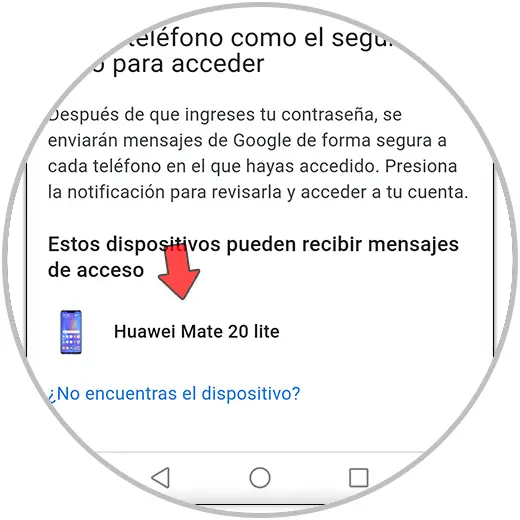
Click Next and in the next window select the mobile device to use:
Step 8
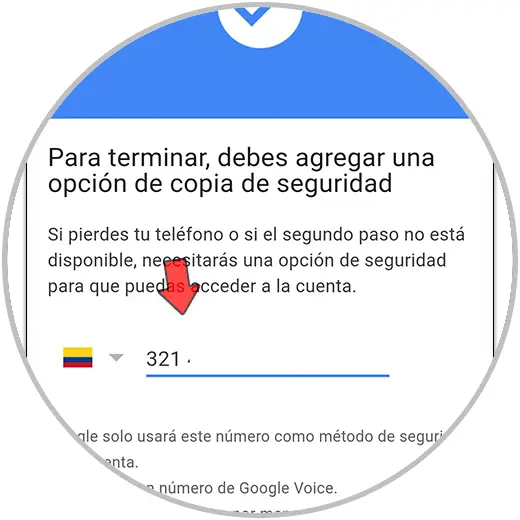
Tap Next and then enter the phone number to receive the verification code:
Step 9
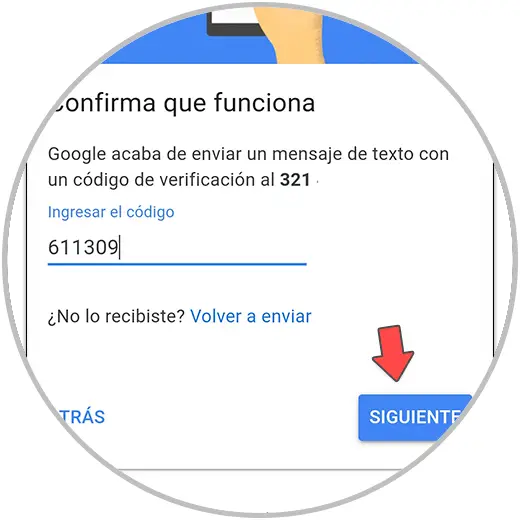
Click on Send and now enter the received code:
Step 10
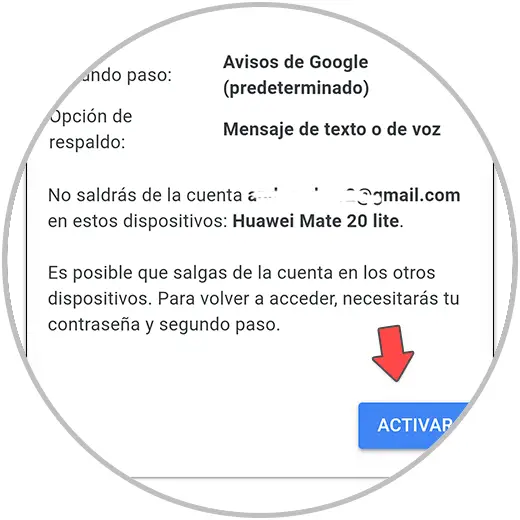
Click on Next and we will see this:
Step 11
Click on "Activate" to complete the process, the following will be displayed:
Step 12
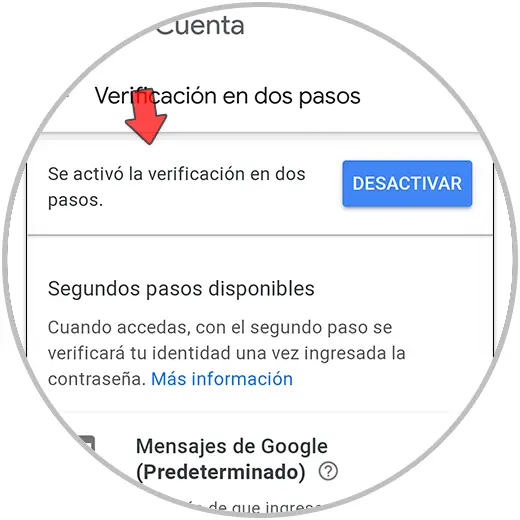
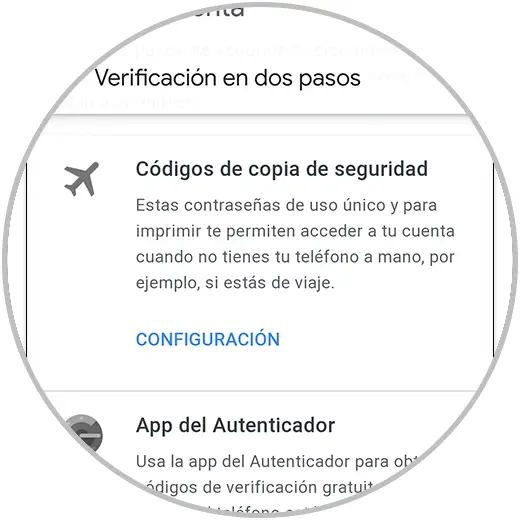
We validate that two-step verification has been activated in Gmail, it is possible to select other verification methods:
Step 13
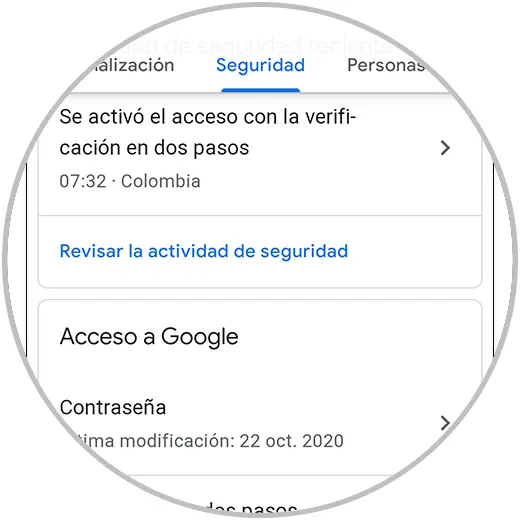
Check the two-step validation in Gmail on Android:
With these steps we have activated two-step verification for Gmail on both PC and Android..