Having a good operating system is something that is important to all of us, since in this way we will work correctly and comfortably on our computer whenever we need it. There is no doubt that one of the most used worldwide is Windows 10 ..
Windows 10 brings by default certain settings established by default that allow it to be different from the other operating systems on the market and with which the user feels identified. One of these is the popular folders with a distinctive design and color.
As many users want to innovate, it is possible to set a new icon for folders in Windows 10. If you are one of those users who want to have things in another style, this tutorial will explain how to change the icon of folders in Windows 10..
To stay up to date, remember to subscribe to our YouTube channel! SUBSCRIBE
How to change the folder icon in Windows 10
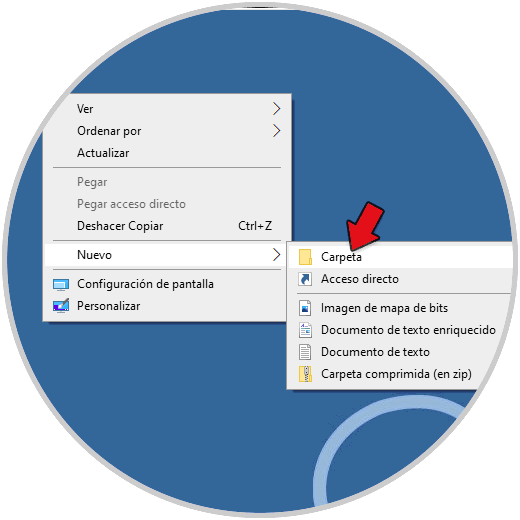
Step 1
The first thing we will do is create a new folder on the desktop, right-click somewhere free on the desktop and select New - Folder:
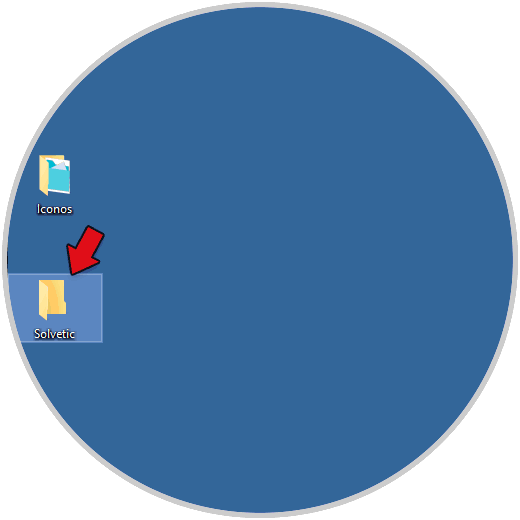
Step 2
We assign the desired name:
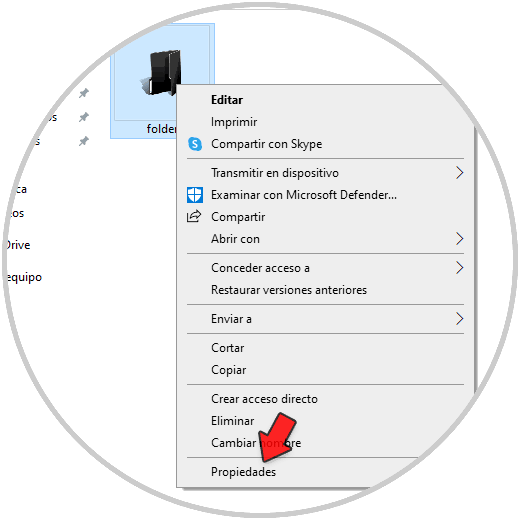
Step 3
Now we access the folder where we have the image with which it will be replaced, it must be in the .ico format for it to work, we right-click on the file to be established and select Properties:
Step 4
In the displayed window we validate that it is an .ico file:

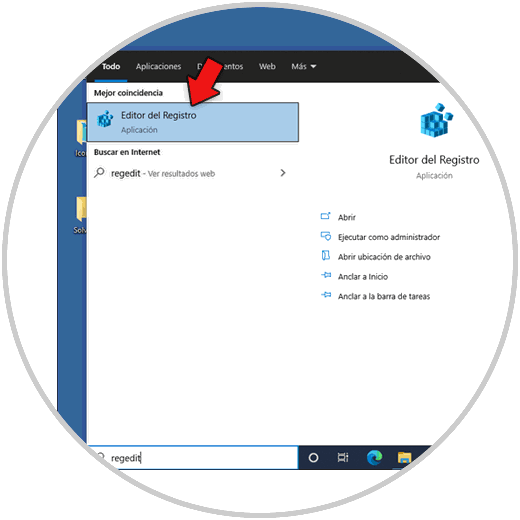
Step 5
Now, we access the registry editor from the Start menu:
Step 6
Let's go to the route:
HKEY_LOCAL_MACHINE \ SOFTWARE \ Microsoft \ Windows \ CurrentVersion \ Explorer - Shell Icons
Note: In case Shell Icons are not available we are going to right click on Explorer and select "New - Key":
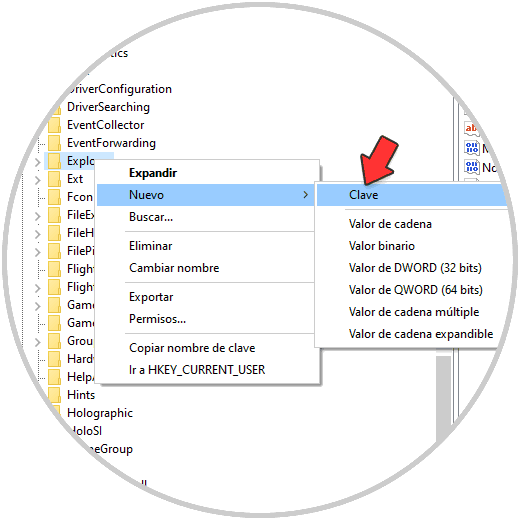
Step 7
To that key we assign the name Shell Icons.

Step 8
In the Shell Icons key, we will right click somewhere free and select the option "New - String value":
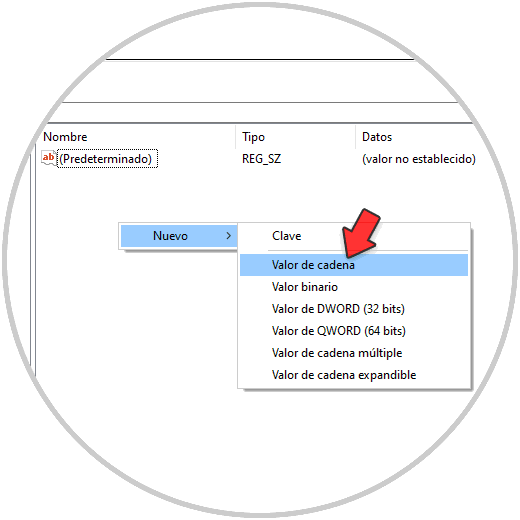
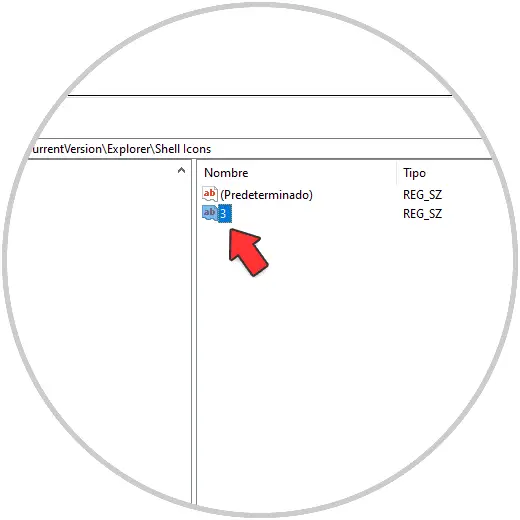
Step 9
We assign the name 3:
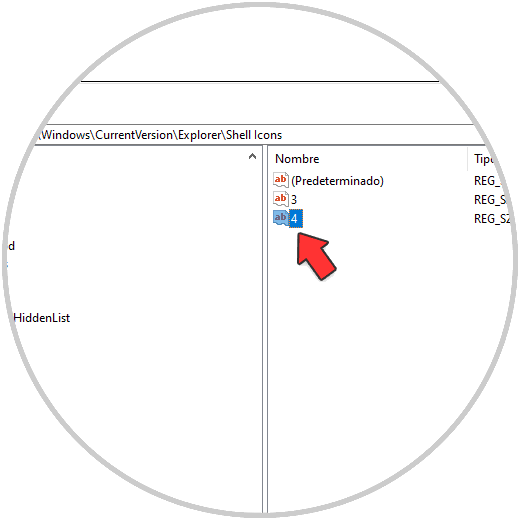
Step 10
Again we right click and select "New - String value" and assign the name 4, apply the changes:
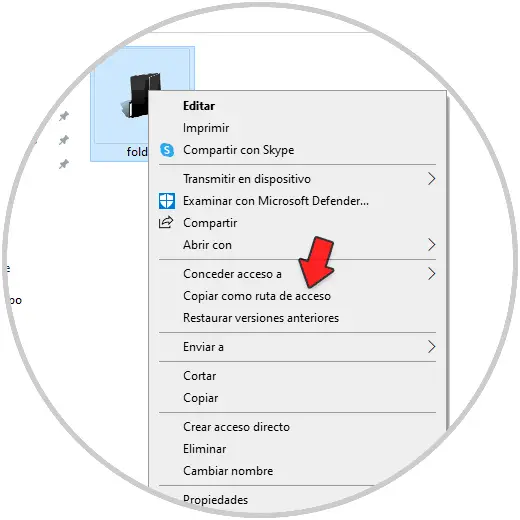
Step 11
We double click on the value 3 to edit its value, but we go to the folder where the file is, we use the Shift key + right click on the .ico file and select the option "Copy as path":
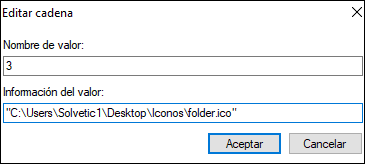
Step 12
We paste this data in the "Value information" field of value 3. We apply the changes.
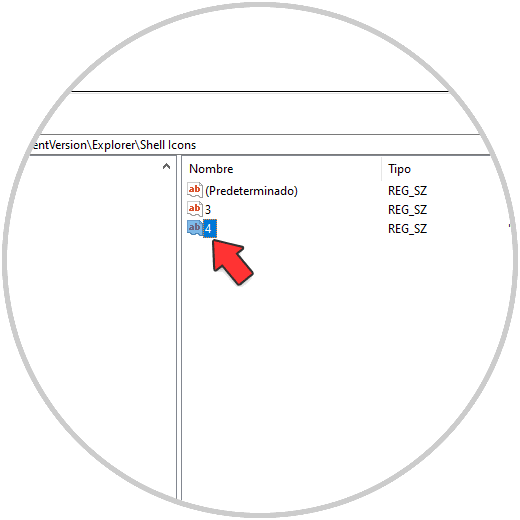
Step 13
We repeat the same process with the value 4:
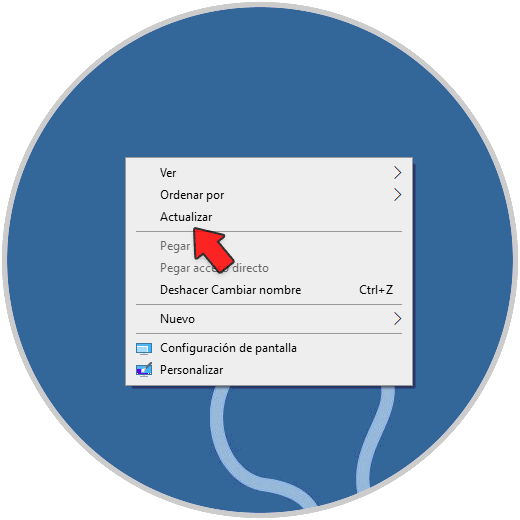
Step 14
We update the desktop by right clicking somewhere and selecting the Update option:
Step 15
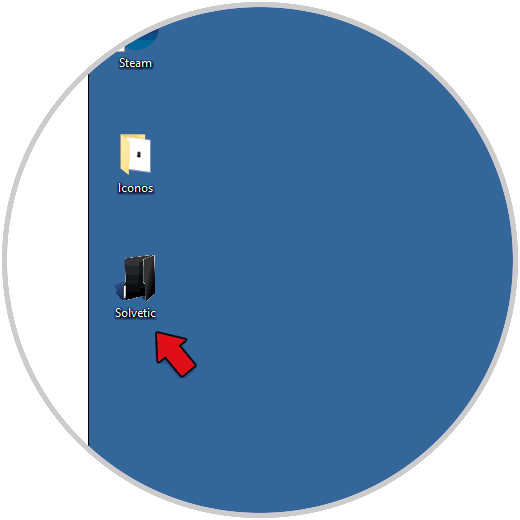
The new icon will be applied to the folder created previously:
Step 16
To be applied to the others, we open the File Explorer and go to the menu "View - Options - Change folder and search options":
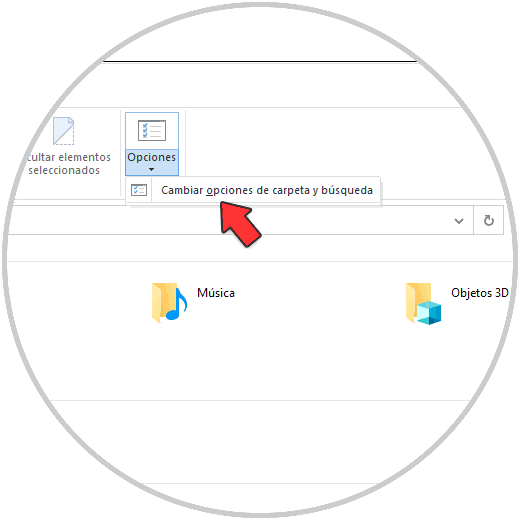
Step 17
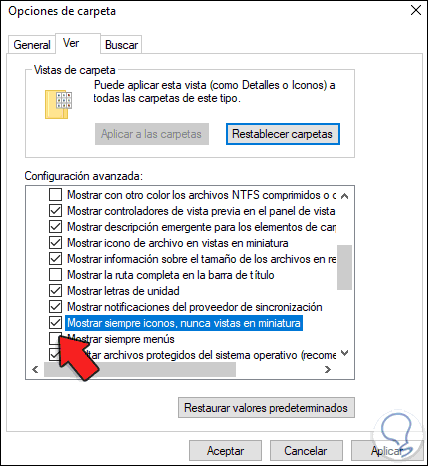
In the pop-up window that will be displayed, we will go to the section see and there we activate the box "Always show icons, never thumbnails" which by default is disabled. We apply the changes.
Step 18
Again we go to the desktop and update it, now all the folder icons will be updated:

This has been the process to establish our own icons for folders in Windows 10.