Windows Server offers us various utilities for its integral administration and one of them is RSAT. RSAT (Remote Server Administration Tools) are a set of tools with which it is possible to remotely manage server roles and characteristics and although it is a characteristic of Windows Server, it is possible to enable it in Windows 10 to remotely manage servers..
getFastAnswer will explain the step by step to activate RSAT in Windows 10 and thus have this function to manage Windows Server 2016, 2019 or 2022. RSAT allows us to do a server administration from a client device using Windows 10. It is necessary For this, both client and user computers must be on the same network and the one who will manage the server will have to be a domain administrator.
To stay up to date, remember to subscribe to our YouTube channel! SUBSCRIBE
How to install RSAT Server Manager in Windows 10
Step 1
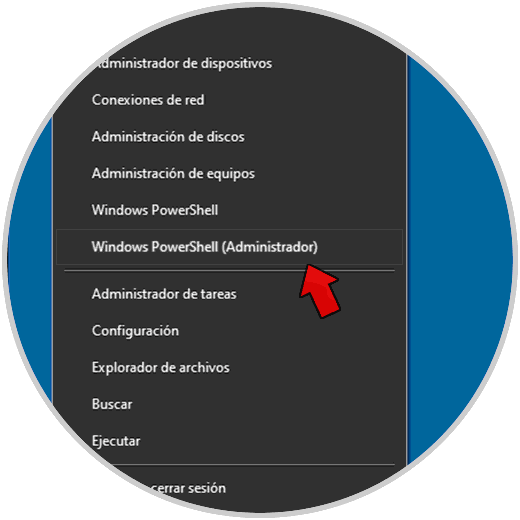
We open Windows PowerShell as administrator:
Step 2
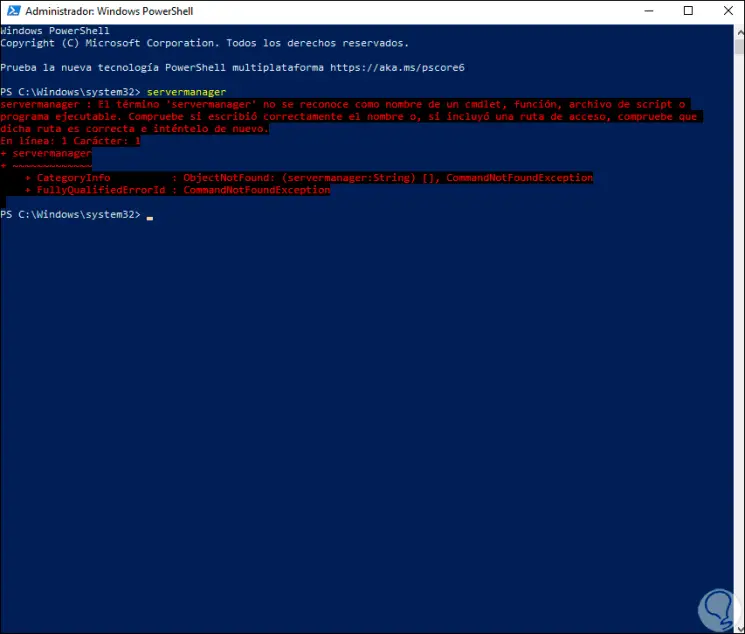
In the console we execute "servermanager" and we will see that an access error appears:
servermanager
Step 3
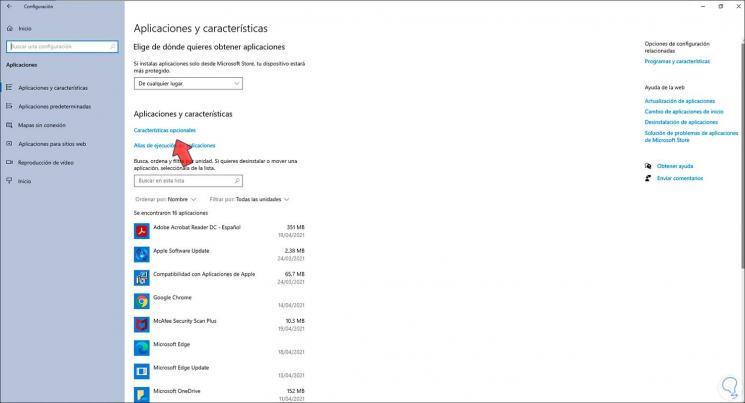
Now, to install RSAT in Windows 10, we go to the following menu and, we will see the following:
- Applications and Features
Step 4
We click on "Optional Features" and the following will be displayed:
Step 5
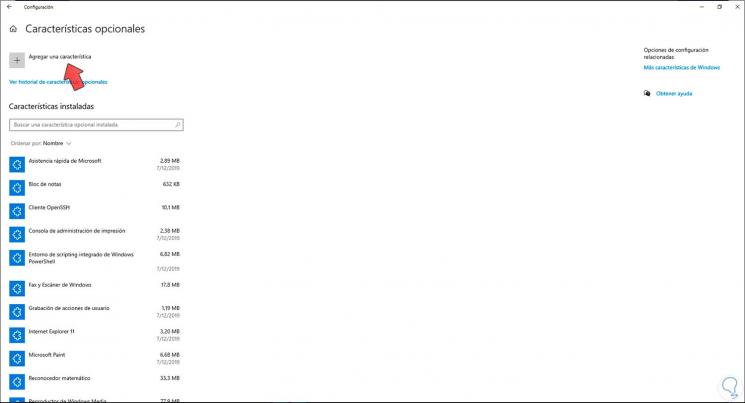
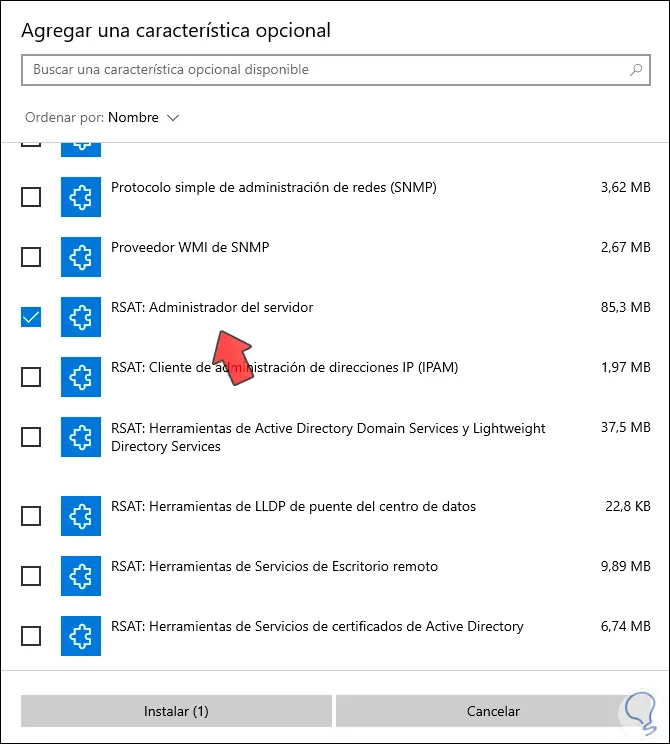
We click on "Add a feature" and in the pop-up window we select "RSAT: Server administrator":
Step 6
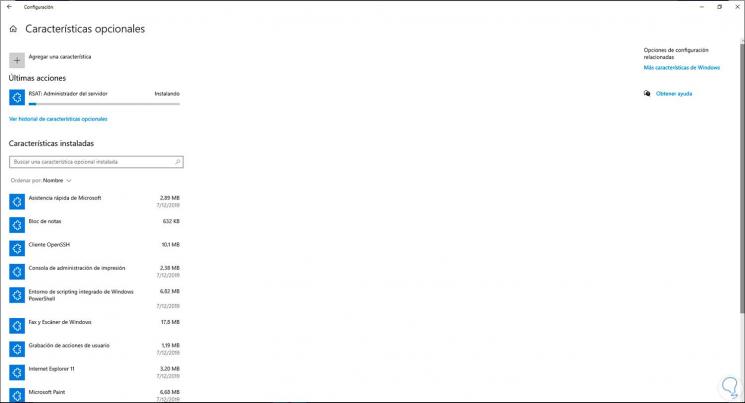
We click on "Install" to complete the installation process of this tool in Windows 10:
Step 7
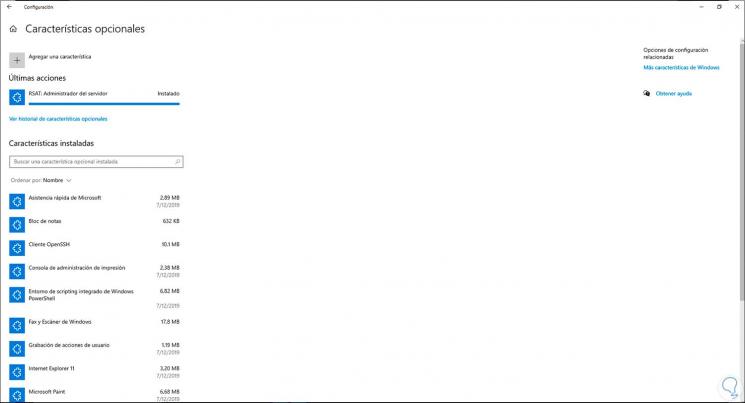
At the end of the process we will see the following:
Step 8
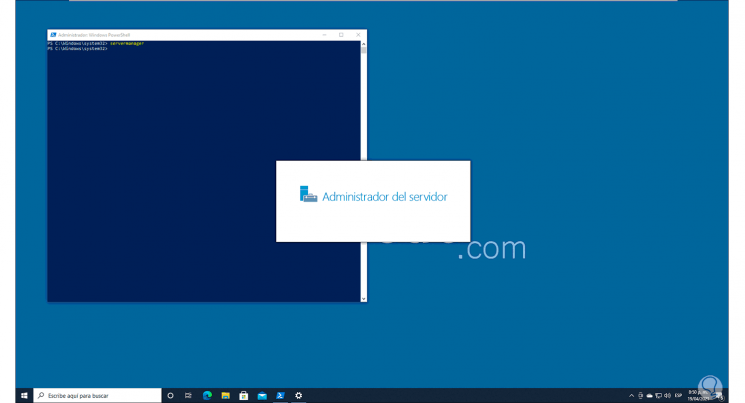
After this, it is possible to run "servermanager" again in PowerShell:
Servermanager
Step 9
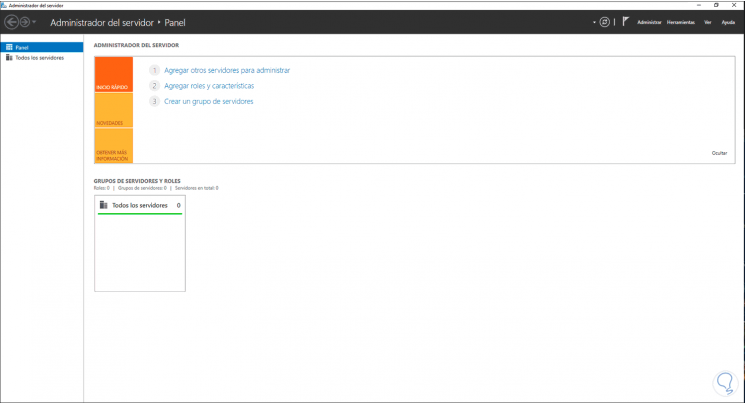
We can see that the Server Manager opens:
This has been the whole process to enable RSAT Server Manager in Windows 10..