Managing data is usually a somewhat complex task since there are many types of this data and in addition to them, parameters such as tables, queries and other elements must be created that link and relate the data to each other to provide the necessary answers when the time is right. To help manage all this in a simple but complete way, we have SQL Server 2019..
SQL Server 2019 consists of a platform to manage data with a follow, dynamic and modern approach, this is achieved since SQL Server has a reliable engine compatible with the T-SQL dialect so that as developers we are able to create resistant applications and high perfomance.
SQL Server 2019 Elements
SQL Server 2019 is made up of various elements that make it unique, such as:
- Adding the Platform Abstraction Layer (PAL) in SQL Server to run on Linux
- Support for Ubuntu, Red Hat Enterprise Linux, and SUSE operating systems
- Spark and Apache Hadoop File System (HDFS) support
- Integrates a server engine which can be run on Edge devices and the ARM platform
- Supports programming languages such as T-SQL, Java, C / C ++, Scala, Node.js, C # / VB.NET, Python, Ruby and .NET Core
Hardware
To use SQL Server 2019 correctly, the following will be necessary at the hardware level:
- 1GB memory (4GB recommended)
- 6 GB of available hard disk space
- 1.4 GHz or faster x64 processor (2 GHz recommended)
SQL Server 2019 has access to information through relational, non-relational, structured and unstructured data queries so that the access options to this type of details are not limited.
SQL Server 2019 is compatible with macOS and getFastAnswer will explain the step by step to install it there..
To stay up to date, remember to subscribe to our YouTube channel! SUBSCRIBE
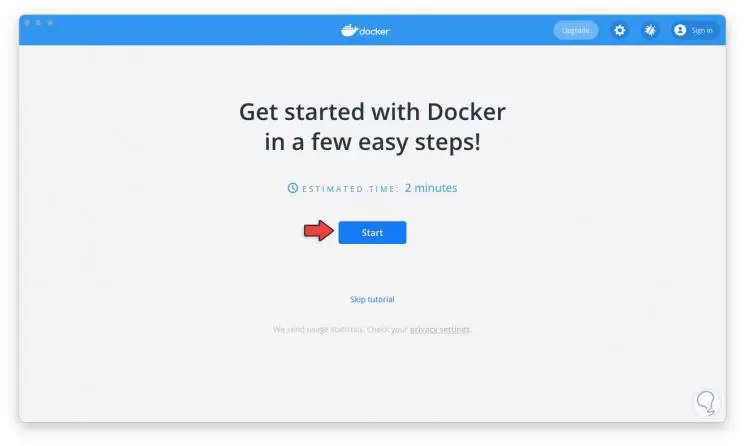
How to install SQL Server 2019 on macOS
Step 1
The first thing will be to install Docker, this is an application with which it is possible to create and share applications and microservices in containers directly in the system, Docker integrates functions and plug-ins such as Docker Engine, Docker CLI Client, Docker Compose, Notary, Kubernetes and Credential Helper .
Docker has a set of certified templates and image libraries in Docker Hub to make use of secure repositories and to extend the capabilities of applications to the maximum.
Docker has features such as
- Ease of containing and sharing various applications on any cloud platform, various languages and frameworks available
- Integrate the latest version of Kubernetes
- Ability to work natively on Linux via WSL 2 on Windows machines
- Reliable performance for native Windows Hyper-V virtualization
- Volume mount for code and data
- Containerized development and debugging with supported IDEs
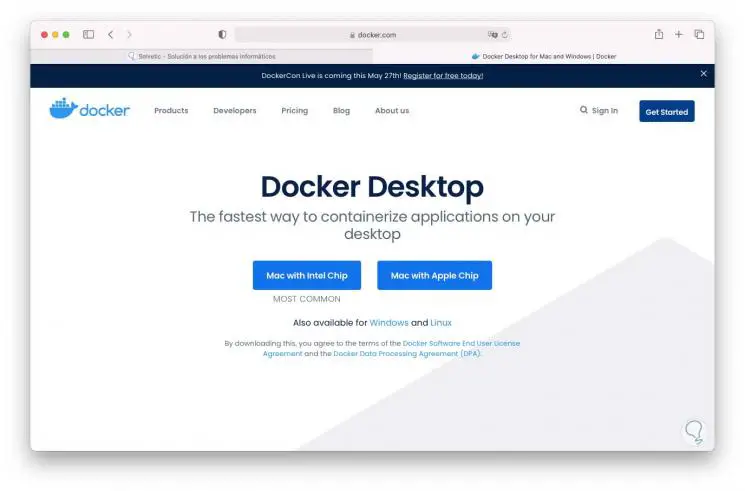
We are going to download Docker for macOS at the following link:
Docker
Step 2
There we select if our macOS has an Intel or Apple chip, then by clicking on the correct version we will see the following. Click Allow to download Docker.
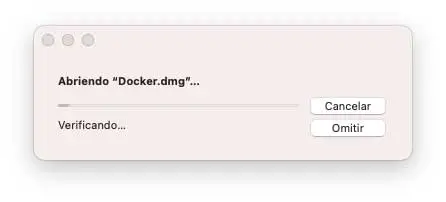
Step 3
We execute the downloaded file and it will be verified:
Step 4
After this verification, we will see the following:
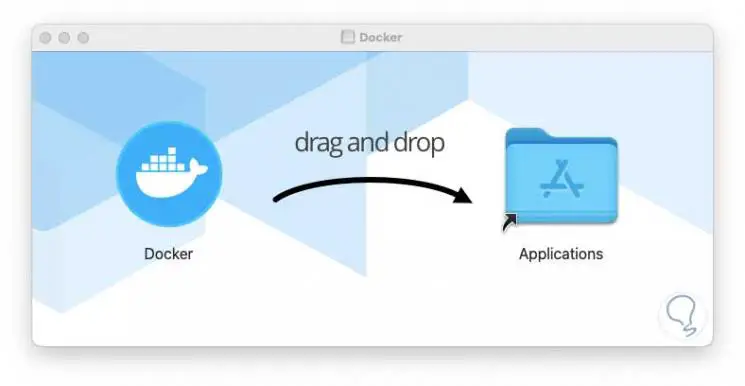
Step 5
We drag the executable to Applications, the copy process will take place:

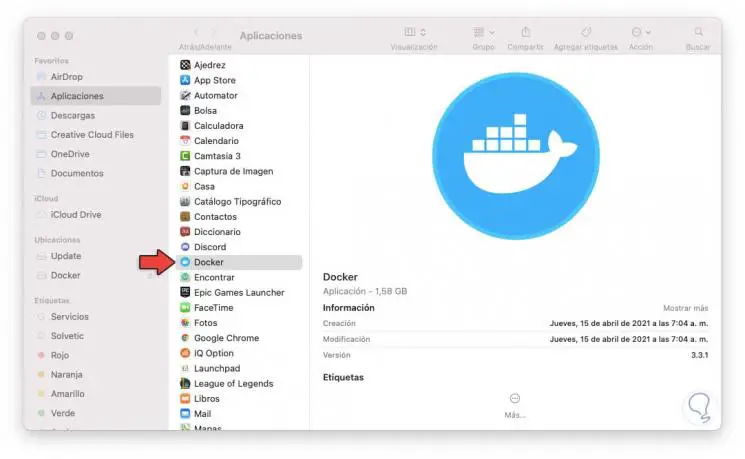
Step 6
We access Applications and open Docker there:
Step 7
Docker verification will start:

Step 8
At the end, the following message will be displayed:
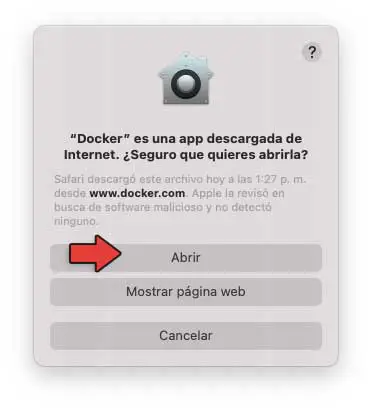
Step 9
We click Open to access and we will receive the following warning:
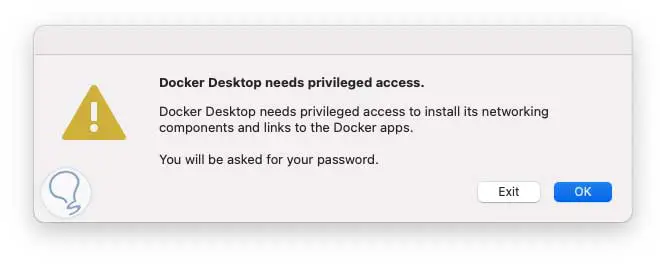
Step 10
We click OK and enter the administrator password:
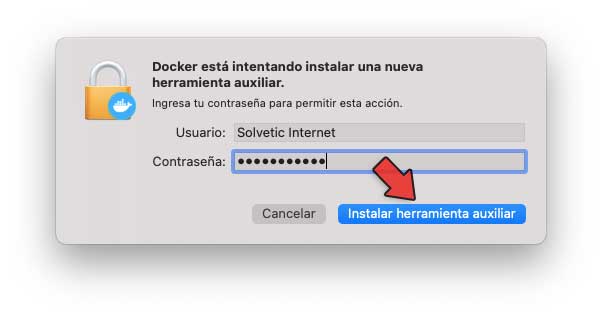
Step 11
We click on "Install auxiliary tool" to complete the process and open Docker in macOS:
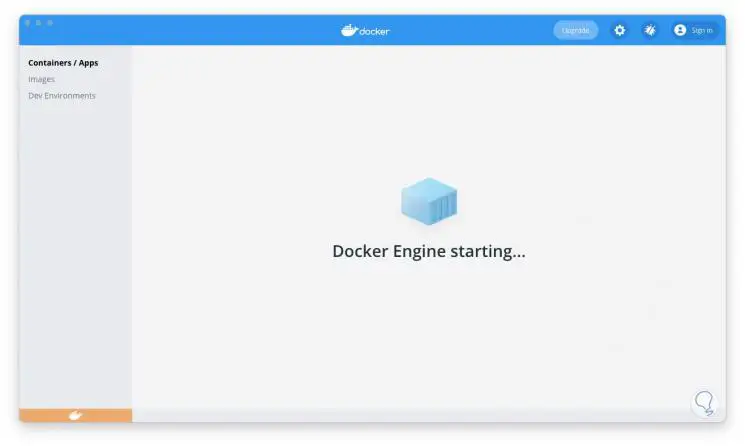
Step 12
When loading the configuration we will see this:
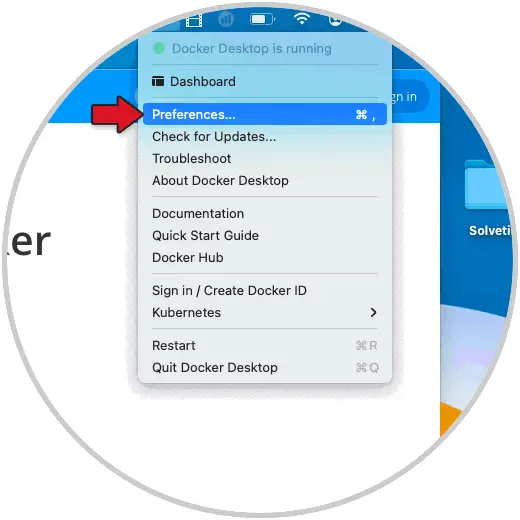
Step 13
Click on the Docker icon and select "Preferences":
Step 14
In the "Resources" section we expand the RAM memory. We click on "Apply & Restart" to complete the process.
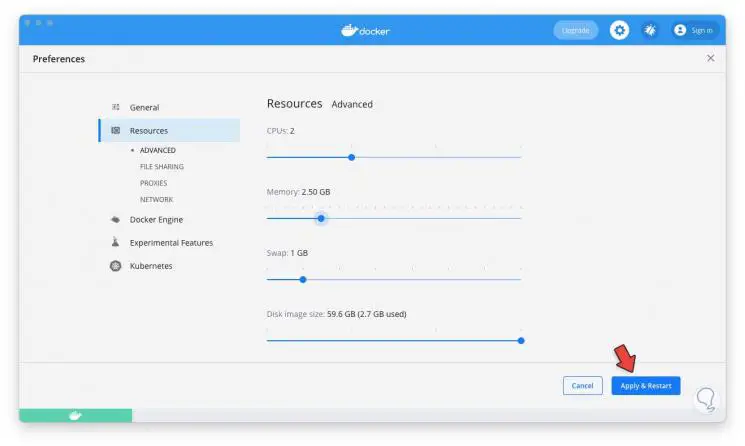
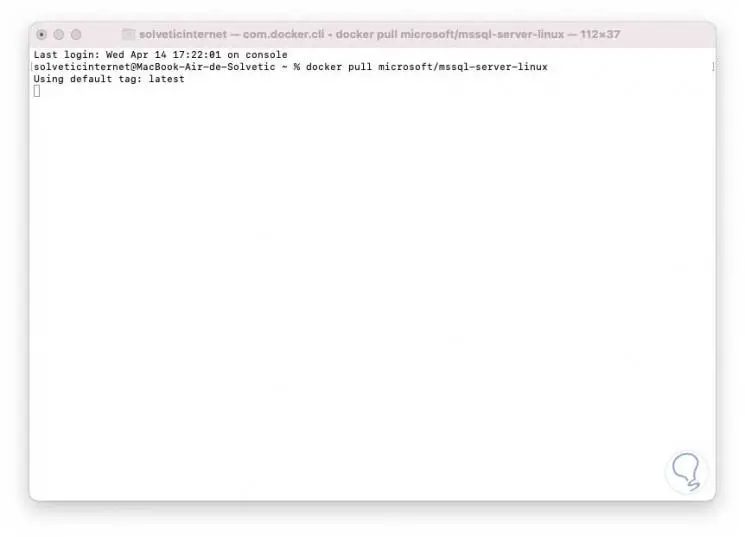
Step 15
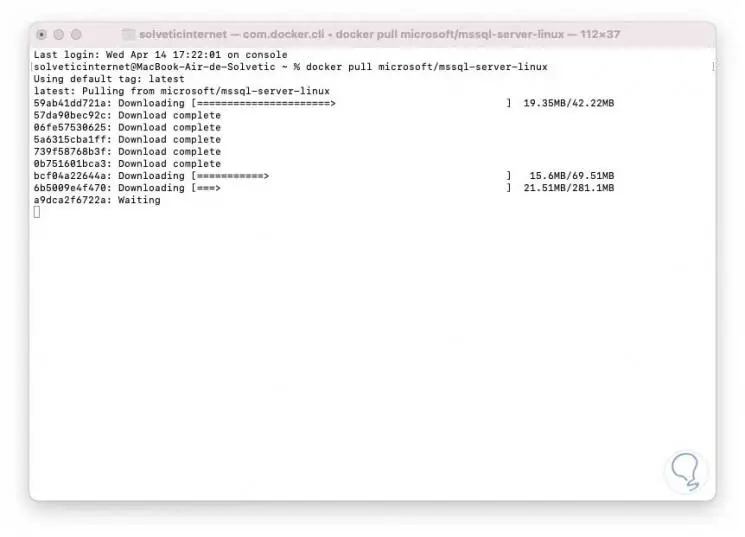
After this we access the terminal in macOS and download the version of SQL Server for Linux:
docker pull microsoft / mssql-server-linux
Step 16
The process of downloading, removing and installing the components will take place:
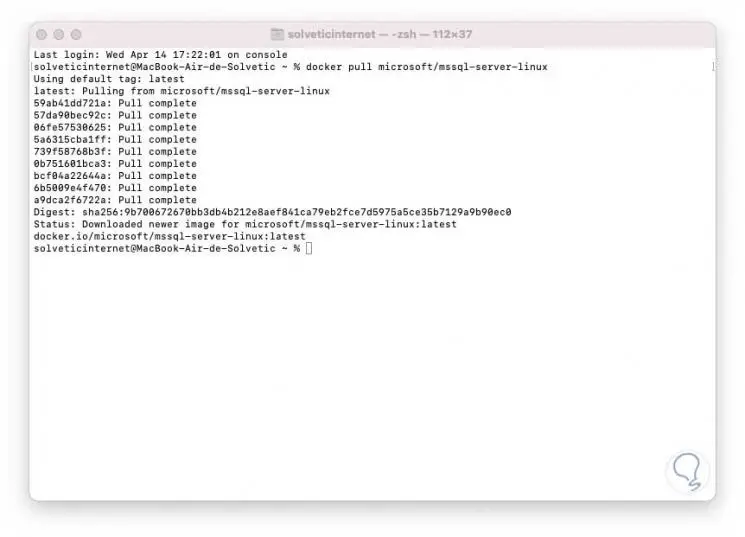
Step 17
At the end of the process we will see the following:
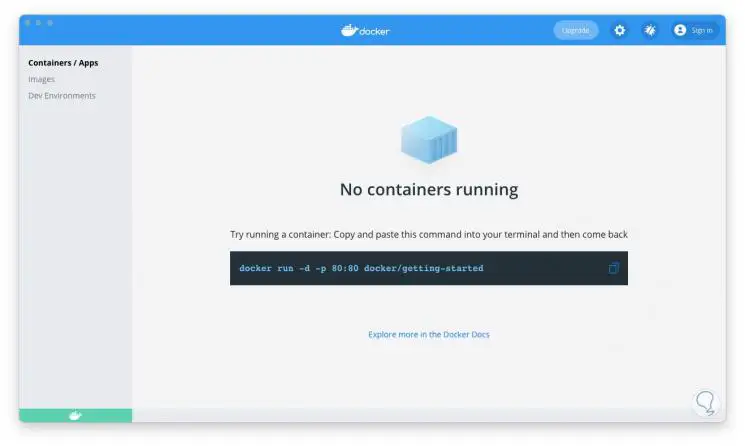
Step 18
At the end of this we will access the Docker dashboard and we will see that there is no active container:
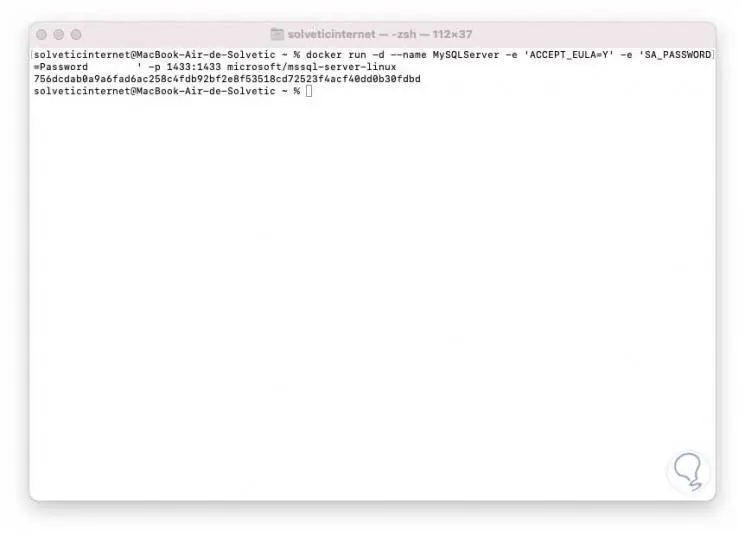
Step 19
Let's go back to the terminal, there we run the SQL Server 2019 container:
docker run -d --name MySQLServer -e 'ACCEPT_EULA = Y' -e 'SA_PASSWORD = Passwordxxxxxx #' -p 1433: 1433 microsoft / mssql-server-linux
Parameters
The parameters described here are:
- -e ACCEPT_EULA = Y: Refers to our acceptance of Microsoft's EUA (End User License Agreement).
- -e SA_PASSWORD: the system administrator password for SQL Server is set there, this password must be at least 8 characters long and have characters from at least 3 sections such as uppercase letters, lowercase letters, numbers and symbols
- The -p parameter allows to use 1433 as the TCP port number
- --name defines the instance name in sqlserver2019
- -d runs the docker in daemon mode, this is used to run the container in the background
Note
We assign the desired password in Password.
Step 20
We access the Docker dashboard again and the container will be active:
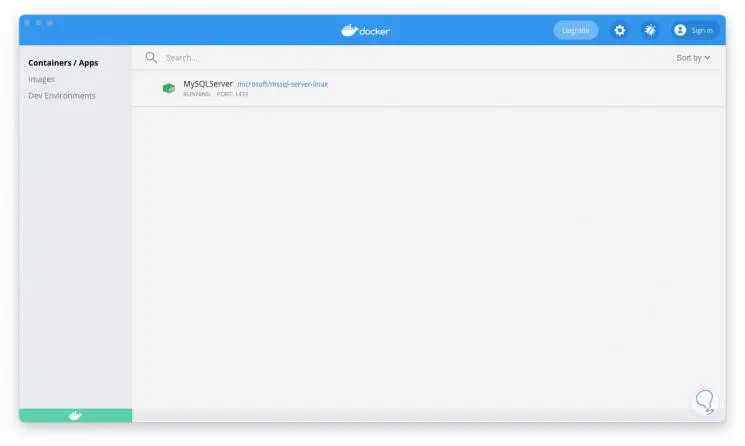
Step 21
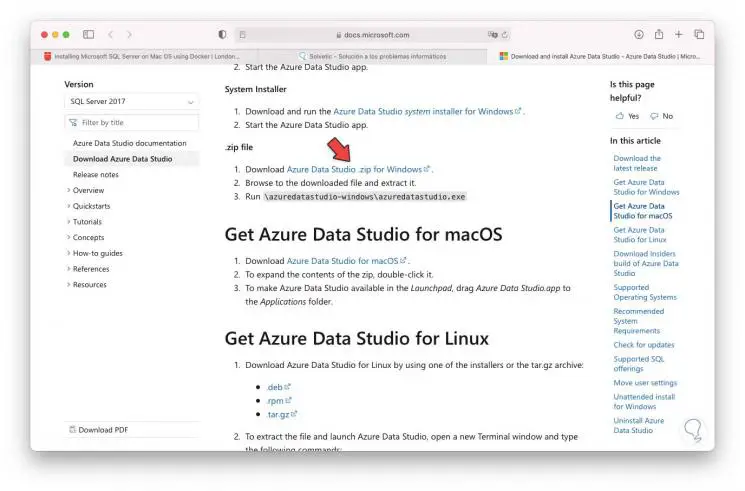
The next step will be to download Azure Data Studio for macOS, Azure Data Studio is a database tool for various platforms with which it is possible to manage local data and in the cloud on systems such as Windows, macOS and Linux, its download is available at the following link:
Azure Data Studio
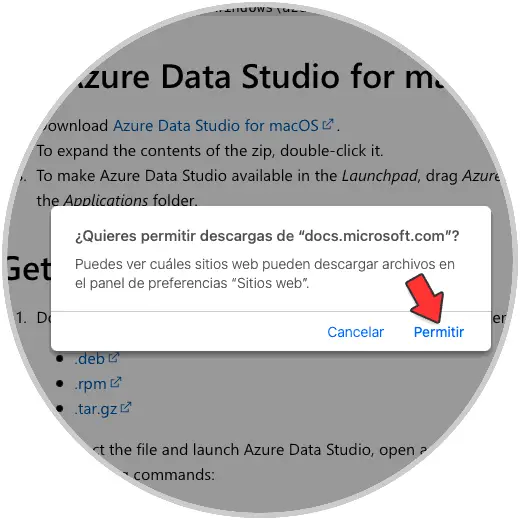
Step 22
We download the ZIP file, we must accept the download:
Step 23
Once downloaded, we run Azure Data Studio:
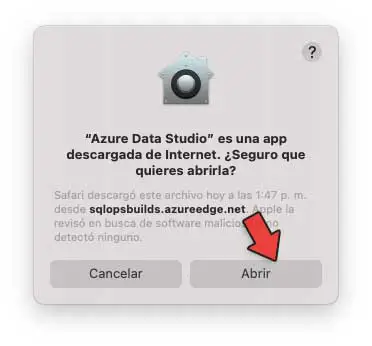
Step 24
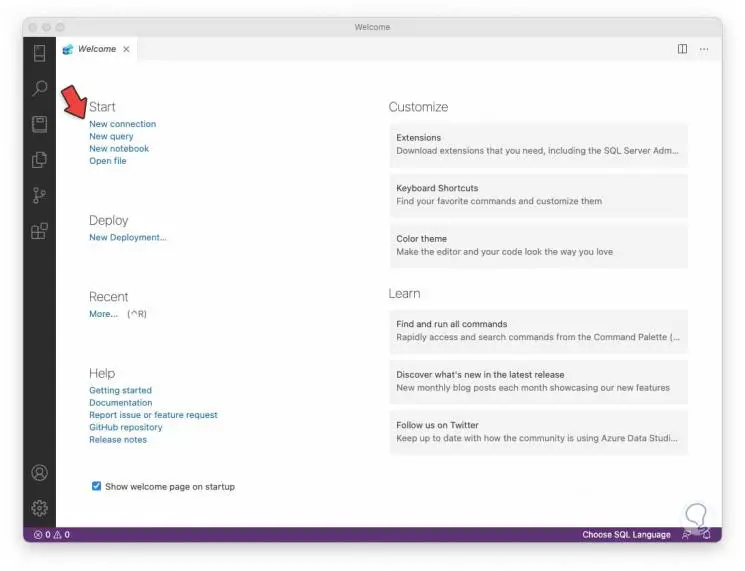
Click on Open to proceed with the opening, we will see the following. We click on "New connection"
Step 25
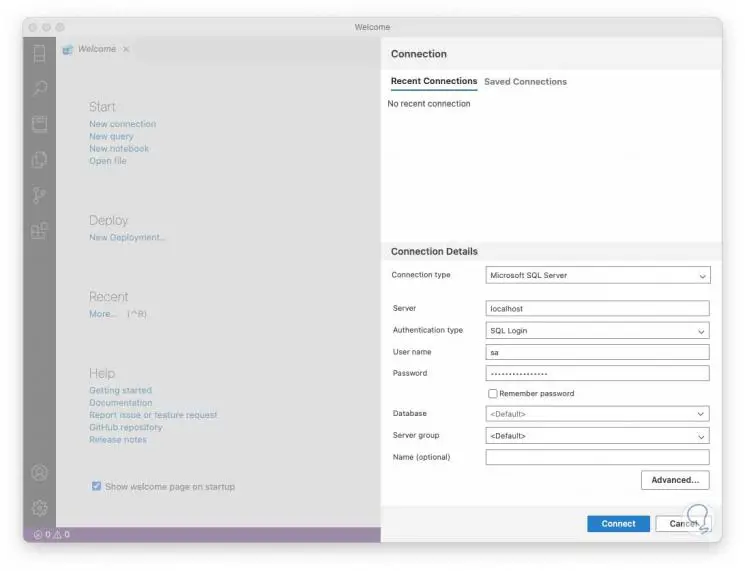
We enter the values:
- authentication type: SQL Login
Step 26
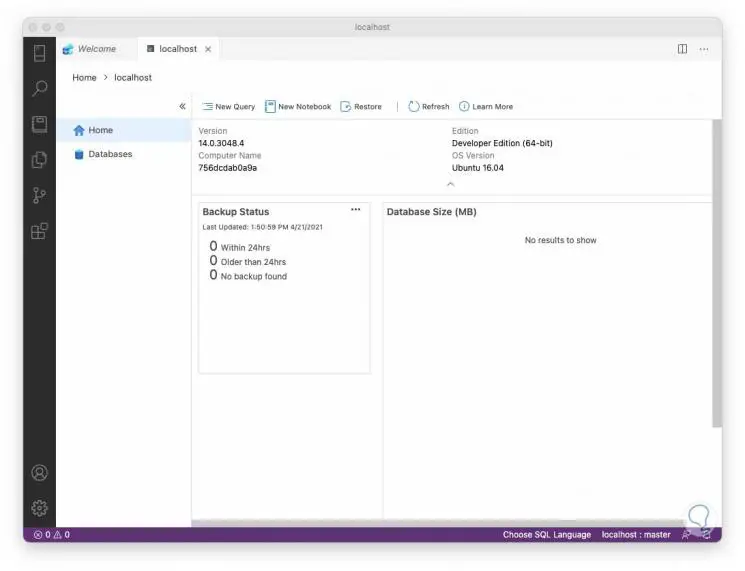
We create the connection by clicking on "Connect", this will link with SQL Server 2019:
Step 27
We navigate in the different options of use:
Step 28
From Home it is possible to access the structure of SQL Server 2019:
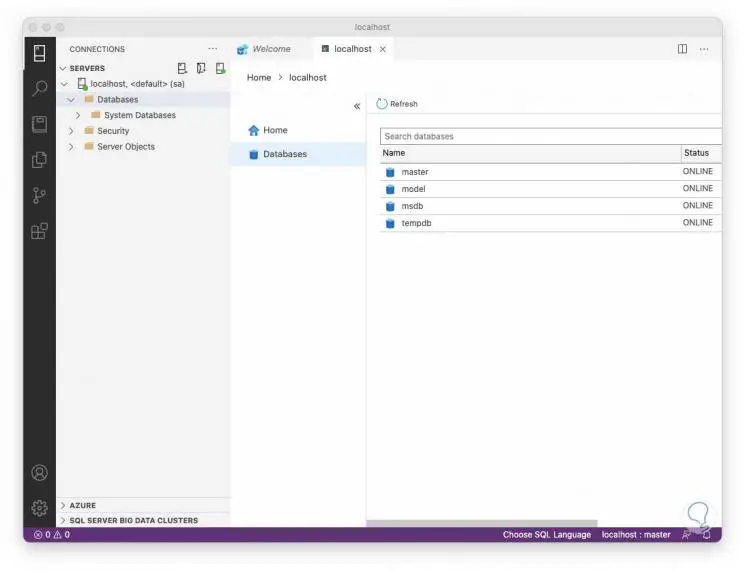
Step 29
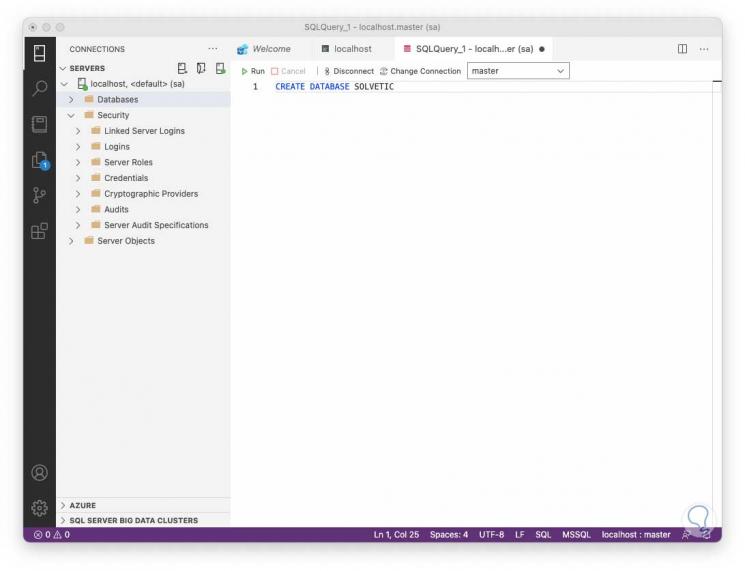
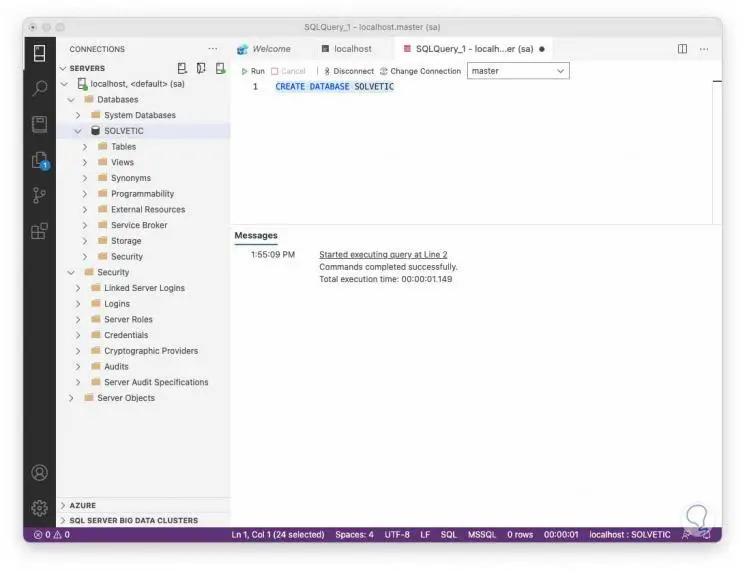
We click on "New Query", we will create the database with the syntax "CREATE DATABASE Name":
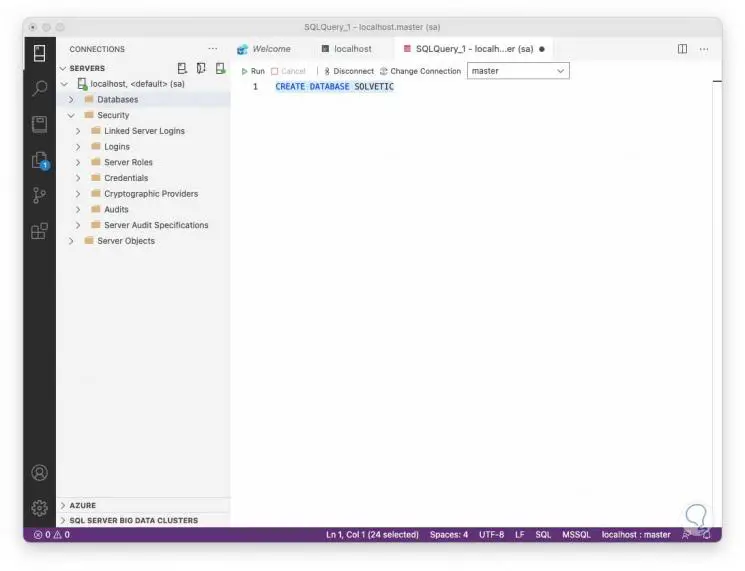
Step 30
We select the line and click on Run to execute it:
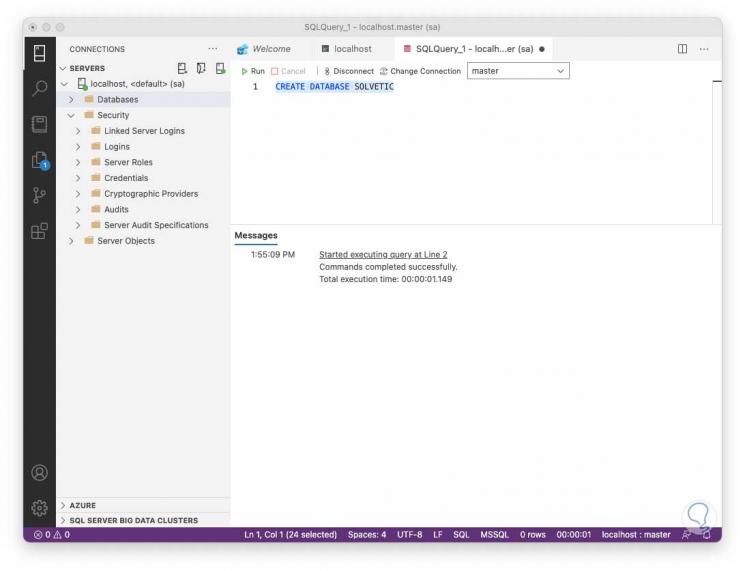
Step 31
When executed we will see the following:
Step 32
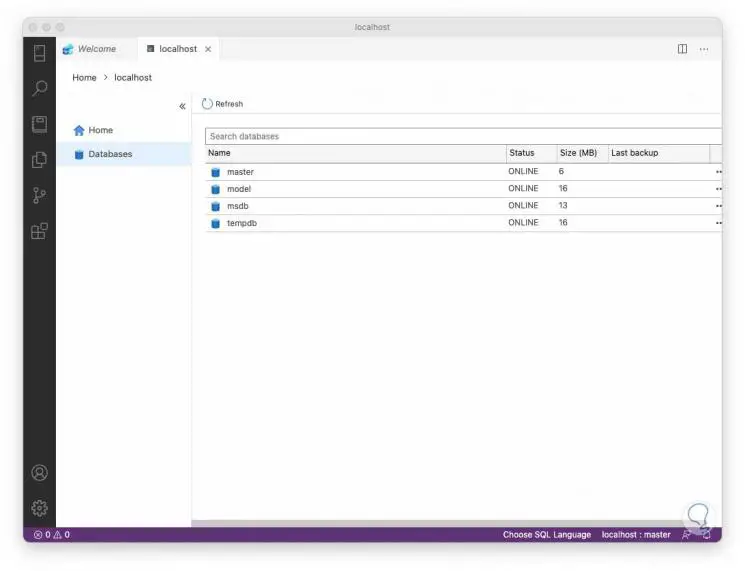
We right click on Databases and select the "Refresh" option in order to see the database created:
This has been the step by step to install one of the most popular tools to manage data such as SQL Server 2019.