Desktop environments for Linux operating systems are essential for the end user to have the best menu options, design and functionality, for Ubuntu we have various environment options and one of these is LXQt. LXQt has been developed as a lightweight Qt desktop environment which has an application launcher at the bottom left, a system tray which is available at the bottom right and the open windows will be visible in a row between the two active ones. . In addition to this, it assumes each component of its menu as a widget to deliver a dynamic user experience..
LXQt is available for most Linux and BSD distributions and let's remember that LXQt is a fusion between LXDE-Qt, an initial Qt version of LXDE, and Razor-qt, which was a project that sought to develop a desktop environment based on Qt so its performance is light but comprehensive.
To stay up to date, remember to subscribe to our YouTube channel! SUBSCRIBE
LXQt Features
Some of its characteristics are:
- Lxsession session manager
- Integrates a pcmanfm-qt file manager, a Qt port for pcmanfm and libfm
- Supports multiple international languages
- Integrates lxqt-runner which is a fast application launcher
- It has lxterminal being a terminal emulator
- Supports various keyboard shortcuts
- Packages built against Qt 5.11.
- Improved Lxqtcompilersettings
- Improved libfm-qt file manager
- New component lxqt-themes
Let's see how we can install LXQt on Ubuntu 21..
How to install LXQt on Ubuntu 21.04
Step 1
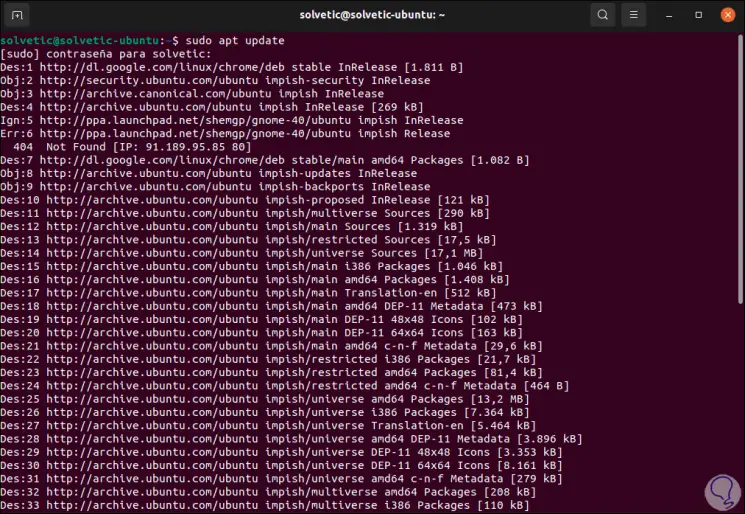
The first thing will be to open the terminal in Ubuntu and then update the system with the command:
sudo apt update
Step 2
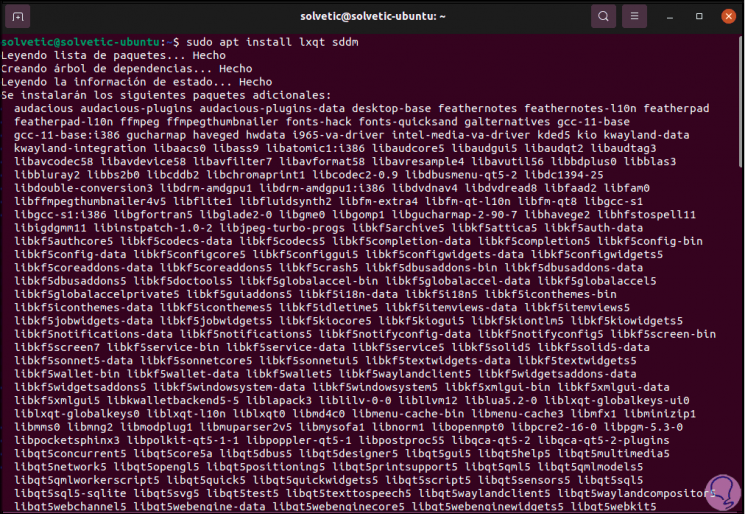
Now we are going to install the LXQt environment with the command:
sudo apt install lxqt sddm
Step 3
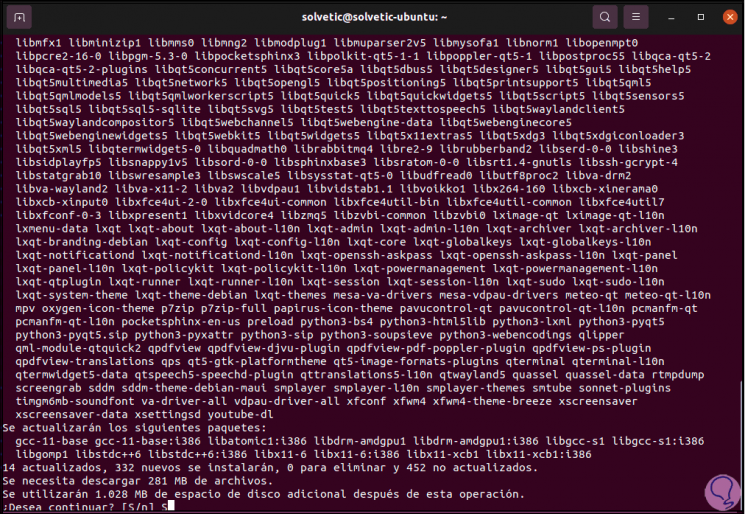
After loading the processes we will see the following:
Step 4
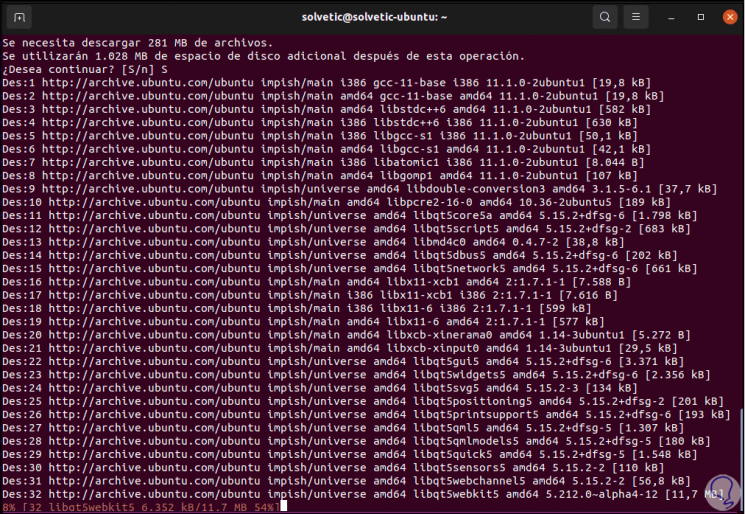
Apply the changes by entering the letter S to proceed with the download and installation of the LXQt environment:
Step 5
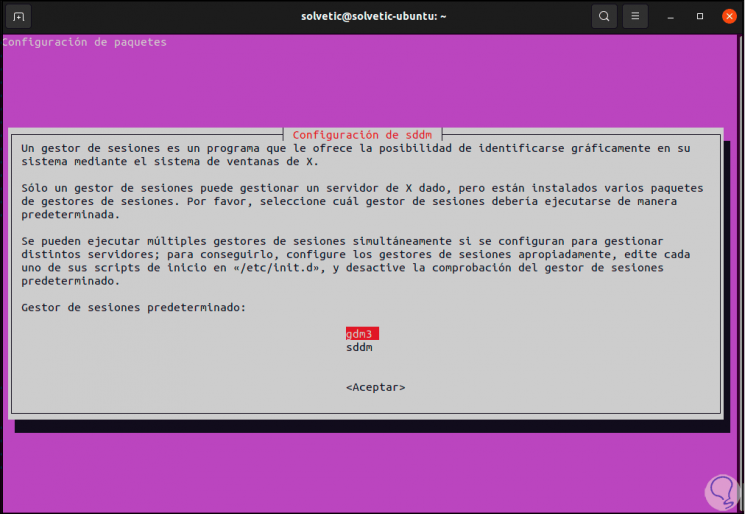
After this we must select the desired manager:
Step 6
In this case we select sddm and click OK, the installation process will be completed:

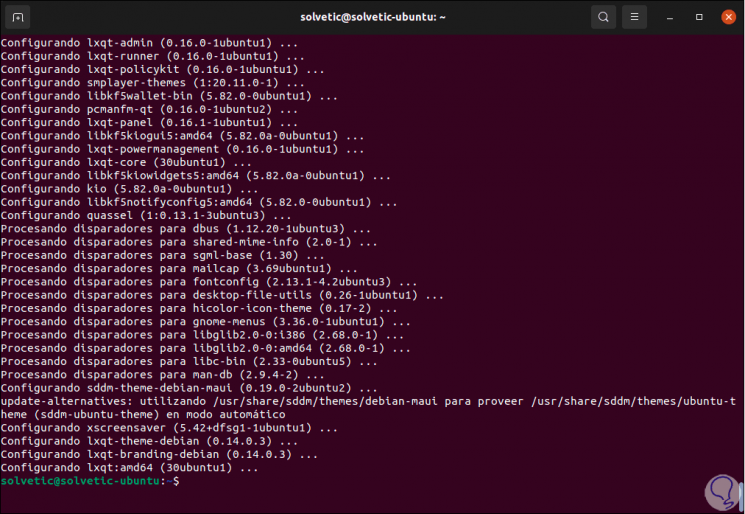
Step 7
At the end we will see the following:
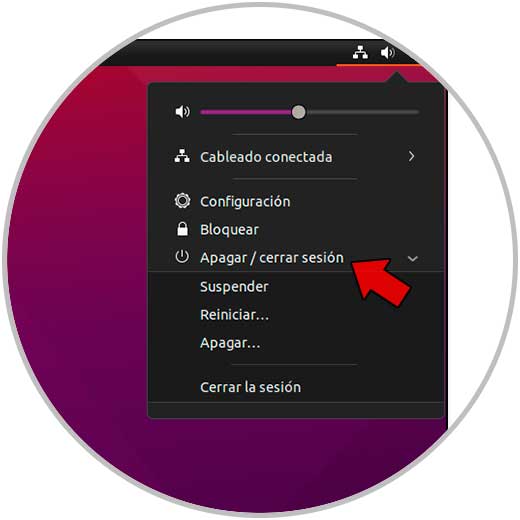
Step 8
We close the terminal and log out of Ubuntu:
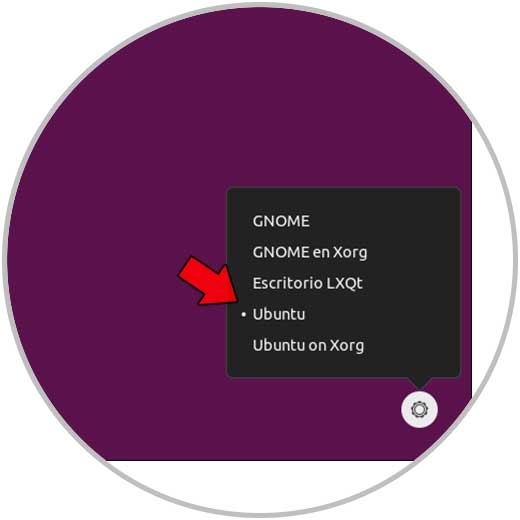
Step 9
When logging in, we go to the selector and there we select the new LXQt environment:
Step 10
By clicking on LXQt Desktop we enter the access password to access the new LXQt environment in Ubuntu:

Step 11
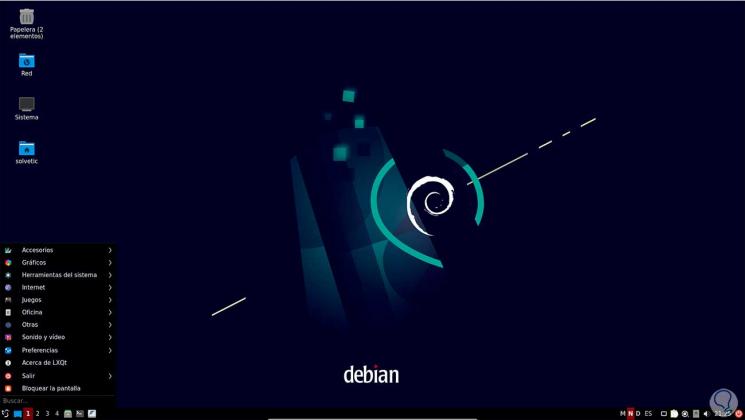
We initially select the administrator and then the system will load:

Step 12
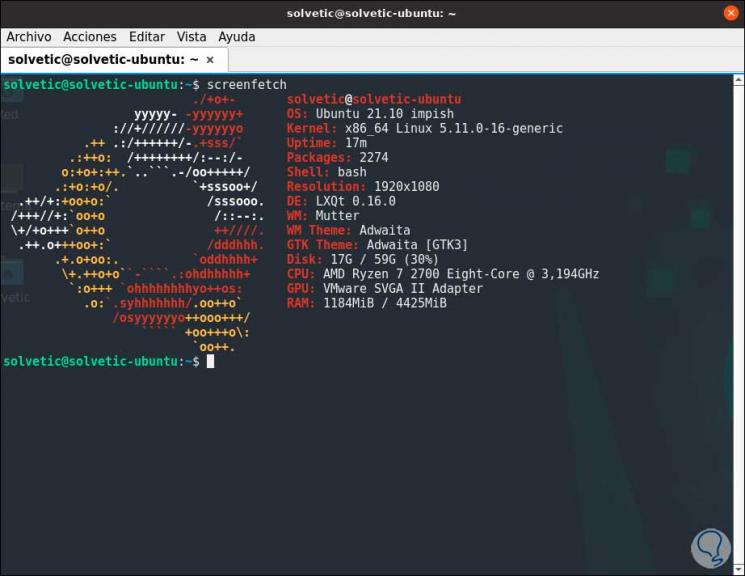
Although it says Debian is Ubuntu and this is due to the development of LXQt, now open the terminal and run "screenfetch" to see the environment:
Step 13
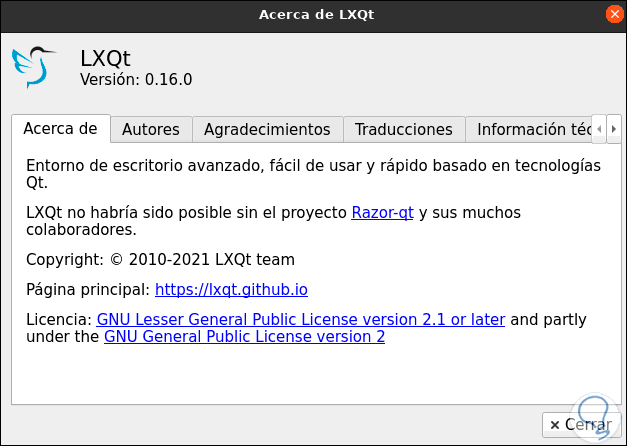
From the menu access the properties of the LXQt environment:
Step 14
We will see this:
With these steps we have installed LXQt in Ubuntu 21.04 ,.