When Windows 10 is installed, at one point in the process it is requested to enter an email from Hotmail or Outlook so that when logging into the system it is done with this user online. This has been developed to allow the synchronization to be available from all the devices from where you log in with that account and so that the applications and the process in general are done in a comprehensive way..
But there is the possibility that several accounts have been added in Windows 10 which results in multiple users, various processes and in the end some of these users no longer log in to the computer. That is why in this tutorial we are going to see how we can delete and unlink a Microsoft account in Windows 10 so that in this way you know how to delete that account in the event that it is no longer necessary.
To stay up to date, remember to subscribe to our YouTube channel! SUBSCRIBE
How to delete Microsoft account in Windows 10
Step 1
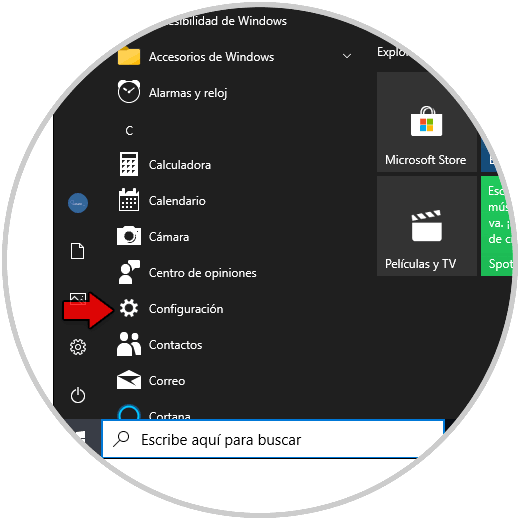
The first thing to do is go to "Start - Settings":
Step 2
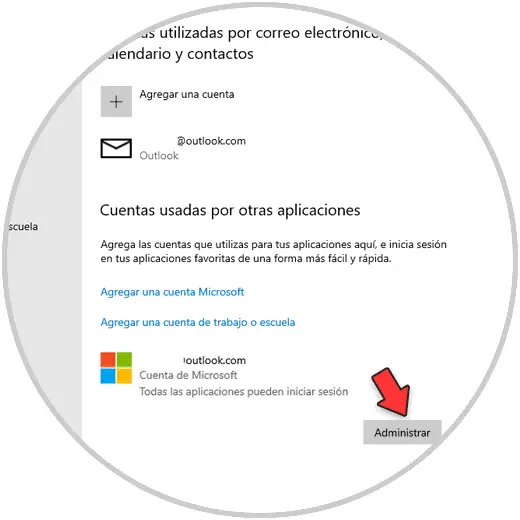
There we access "Accounts - Email and accounts", click on the current account and then click on "Manage":
Step 3
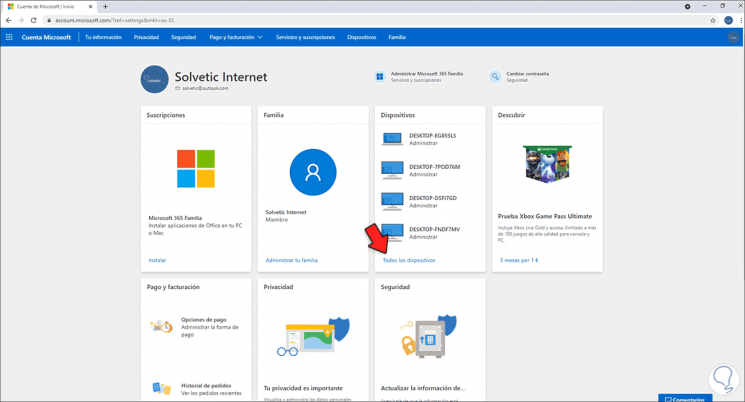
This will open the Microsoft website with our account settings:
Step 3
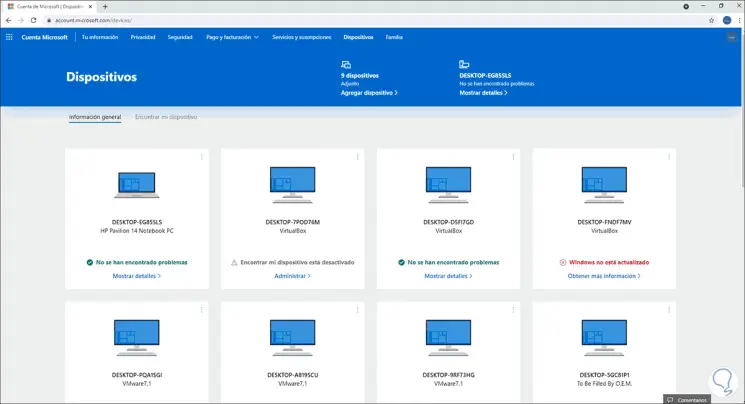
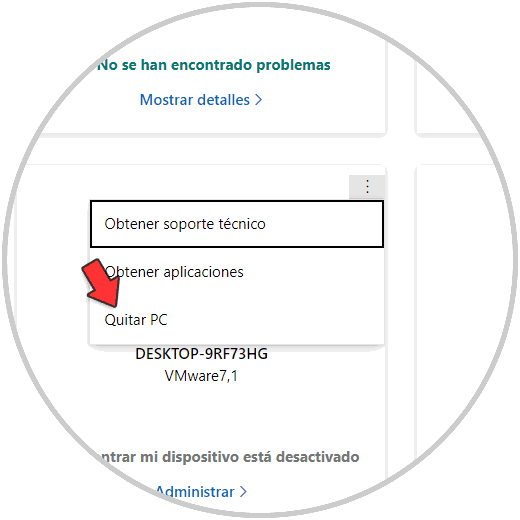
In the "Devices" section we click on "All devices". In the next window we locate the computer where the account to be deleted is:
Step 4
There we go to the contextual menu of the computer and click on "Remove PC" or "Remove laptop" depending on the type of device:
Step 5
The following pop-up window will open, in it we activate the "I'm ready to remove this PC" box:
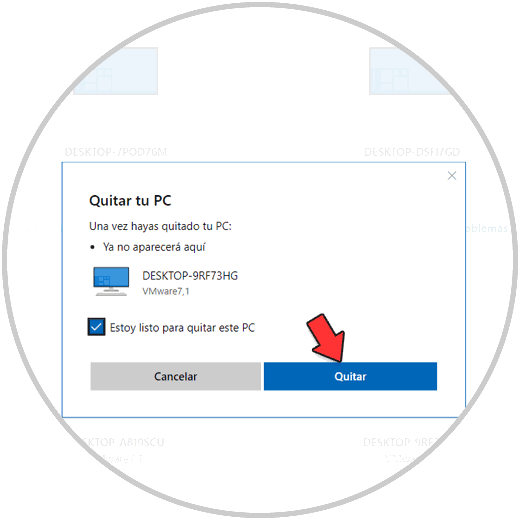
Step 6
We click on "Remove" to confirm the process.
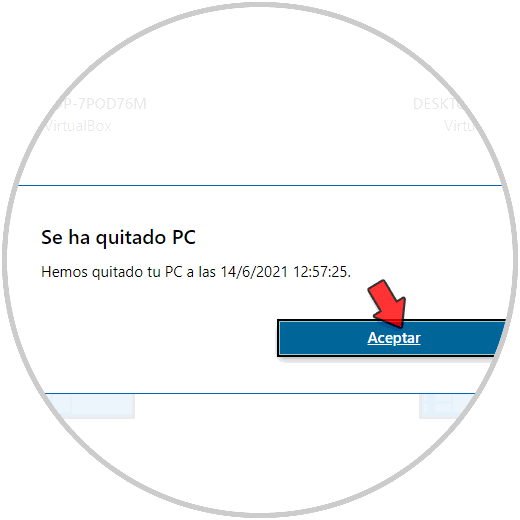
Step 7
This will first unlink the computer to the account that we are going to delete.
We exit the browser.
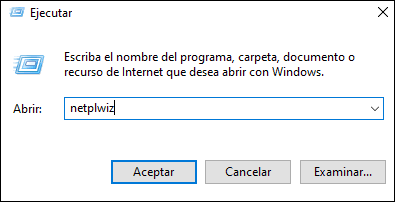
Step 8
Now we open Run and there we enter "netplwiz":

Step 9
Click on OK and the following window will open:

We check that the account cannot be removed.
Step 10
We go back to "Settings - Accounts" and this time we go to the "Your information" section, we will see the following:
Step 11
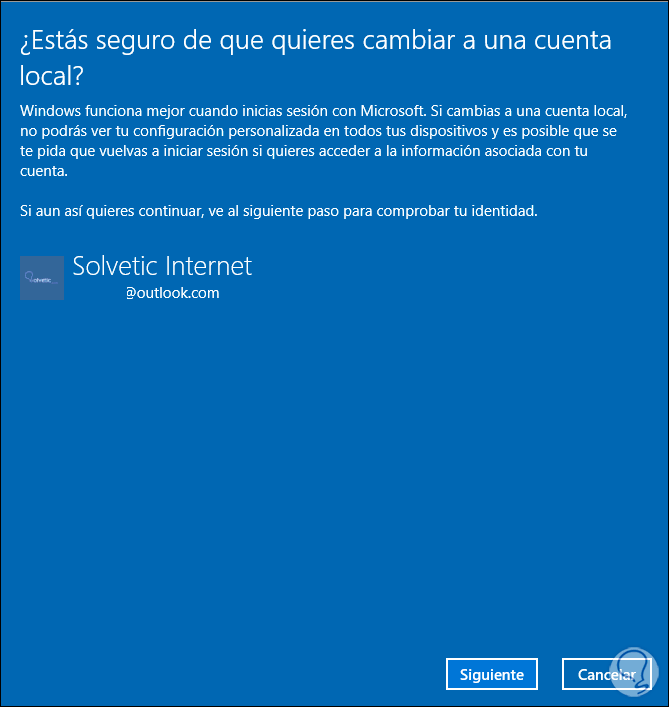
We see that the account is online with Microsoft, we click on "Sign in with a local account instead" and the following pop-up window will open:
Step 12
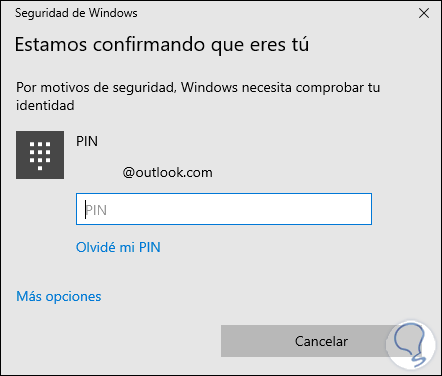
We click Next and we must enter the password or PIN of the equipment:
Step 13
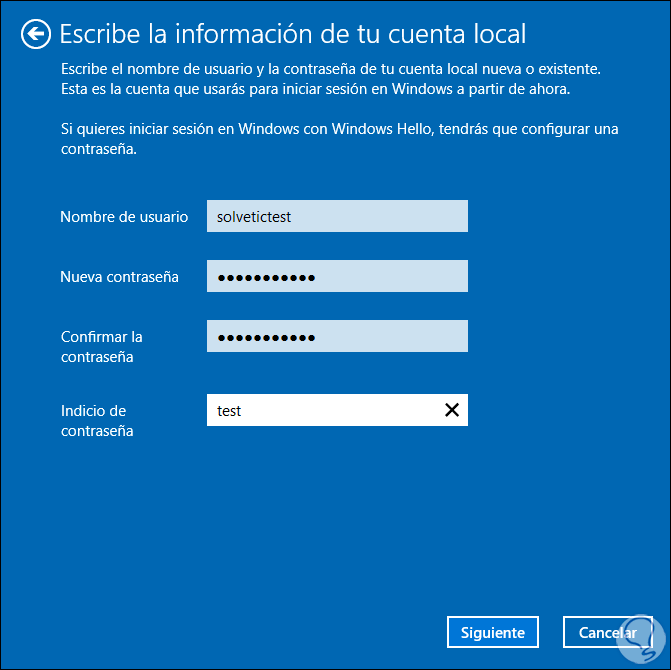
After this we fill in the data of the new local user in Windows 10:
Step 14
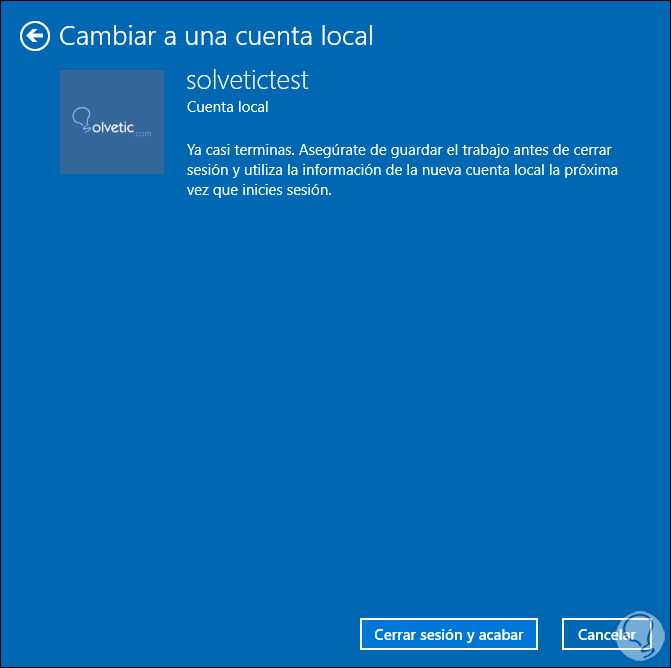
We click Next to see a summary of the new type of account:

Step 15
We click on "Close session and finish" to apply the changes, we close the session:
Step 16
After this we log in again:

Step 17
Once we log in we go back to "Settings - Accounts" and in "Your information" we check that it is now a local account:
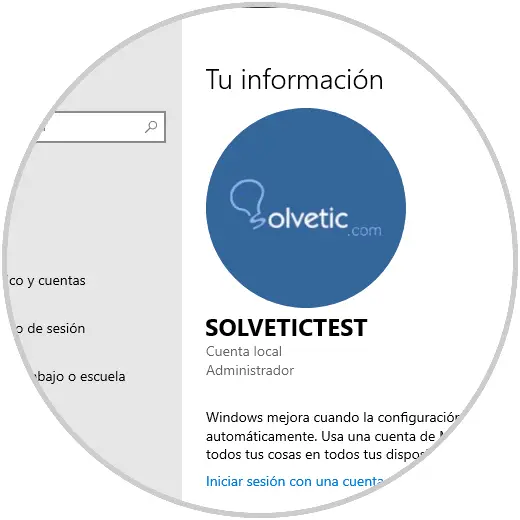
Step 18
We go to the section "Email and accounts", there we click on the account and now it is possible to click "Remove":

Step 19
The following message will be displayed:
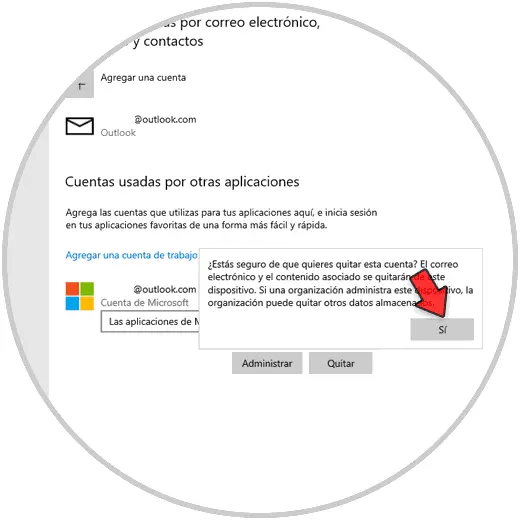
Step 20
Apply the changes by clicking Yes and the account will be deleted:

These are the complete steps to delete a Microsoft account in Windows 10..