Virtualization is one of the most functional technologies for millions of users since it gives us the opportunity to test new operating systems or the behavior of applications in them without affecting the real environment at any time. In addition to this, when using virtualization, we avoid spending on hardware resources..
Apple has recently released its new version macOS Monterey (macOS 12) in a beta version which means that it is still unstable, but it is available so under this scenario getFastAnswer recommends you use virtualization to know everything that macOS Monterey has to offer .
macOS Monterey is based on everything that the current version macOS Big Sur gives us, but improvements and new features have been added so that the end user has the best alternatives for use..
What's New and Enhancements in macOS Monterey
Some of the improvements and new features of macOS Monterey are:
- Broad spectrum mode in FaceTime to capture all ambient sounds
- Voice Isolation Mode in FaceTime
- New options to share items through Safari, Apple News, Apple Podcasts, Apple TV and more
- Smart search field integrated into the browser
- Universal control to use keyboard, mouse and trackpad on Mac and iPad
- New shortcuts function to add key combinations in the most common actions in macOS
macOS Monterey
All this is functional but we must know that macOS Monterey will be available for the following computers:
- iMac - Late 2015 and later
- Mac Pro - Late 2013 and later
- Mac mini - Late 2014 and later
- MacBook Air - Early 2015 and Later
- MacBook - Early 2016 and Later
- MacBook Pro - Early 2015 and Later
If you do not have one of these computers, virtualization is for you, we clarify, you will not have 100% of the functions and performance but without a doubt it will be a great advance to know macOS Monterey.
One of the most versatile virtualization platforms is VirtualBox which is available for free at the following link:
VirtualBox
getFastAnswer will explain how to install macOS Monterey in VirtualBox and thus have access to this new Apple system..
Previous requirements
In order to install macOS Monterey in VirtualBox it is required to have the ISO, but this ISO Apple does not manage it for users, Apple works with the system installers which is available at the following link:
Apple Developers
Once the installer is downloaded, we will create the ISO image from this installer at the following link:
This allows us to have the ISO image.
Extension Packs
Now, in VirtualBox we must have the Extension Packs to allow VirtualBox to be compatible with the system in which the virtual machine will be installed, in this case Windows 10. Let us remember that macOS is not compatible due to the file system and parameters of the equipment. , for this the Extension Packs are ideal, we download them in the following link:
Extension Packs
It is important to have the latest version of both VirtualBox and Extension Packs.
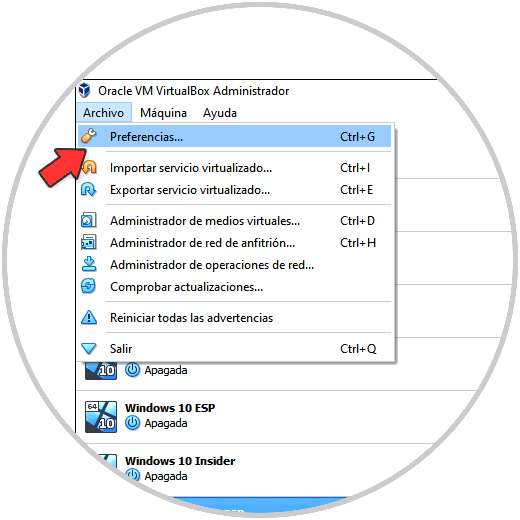
Step 1
To check this we open VirtualBox and go to the "File - Preferences" menu:
Step 2
Then, in the "Extensions" section, we validate that there is the most recent version of these:
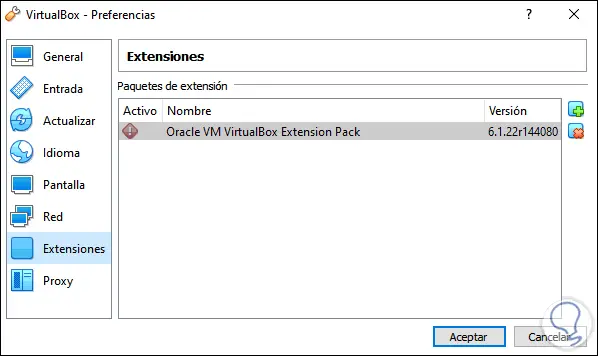
If not, we click on the + sign and install them locally.
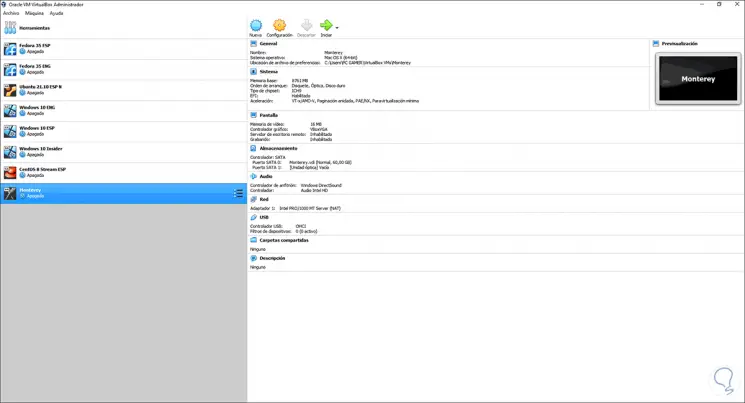
We are ready to install macOS Monterey.
To stay up to date, remember to subscribe to our YouTube channel! SUBSCRIBE
How to install macOS Monterey on VirtualBox
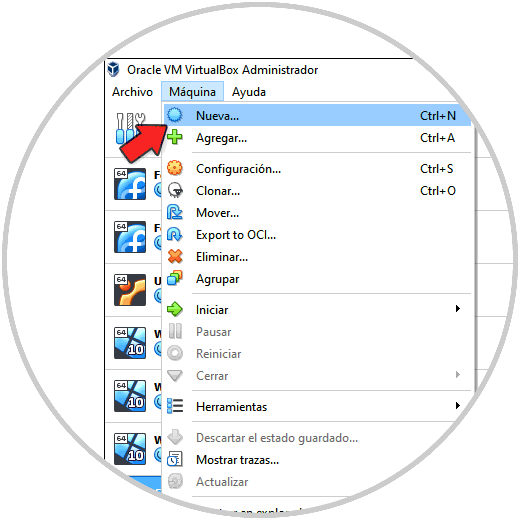
Step 1
Now we are going to create a new virtual machine using any of the following options:
- From the Machine - New menu
Step 2
In the pop-up window we assign:
- In Type we select Mac OS X
- In version we set Mac OS X (64 bits)
- We activate the box "Create a virtual disk now"
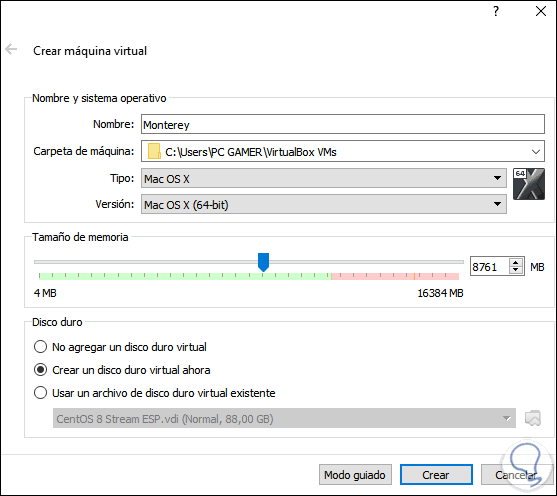
Note: to access this window we must activate the Expert mode button.
Step 3
We click on Create and define:
- Virtual hard drive location
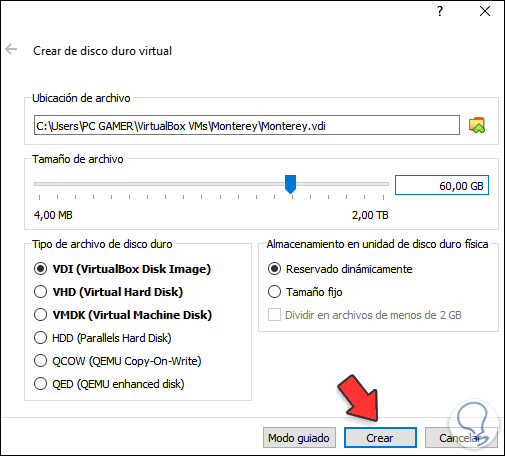
Step 4
Again we click on "Create" to complete the process:
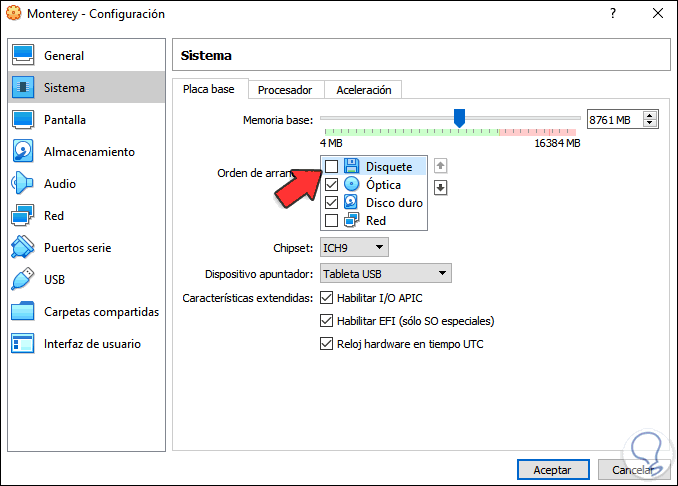
Step 5
We go to the configuration of the machine from the "Configuration" button, in the System section uncheck the "Floppy" box:
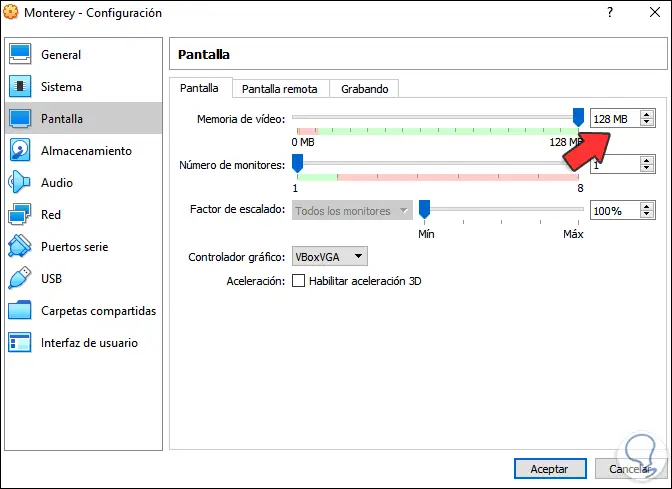
Step 6
Let's go to the Screen section, there in "Video memory" assign 128 MB:
Step 7
In Storage we select the CD drive:
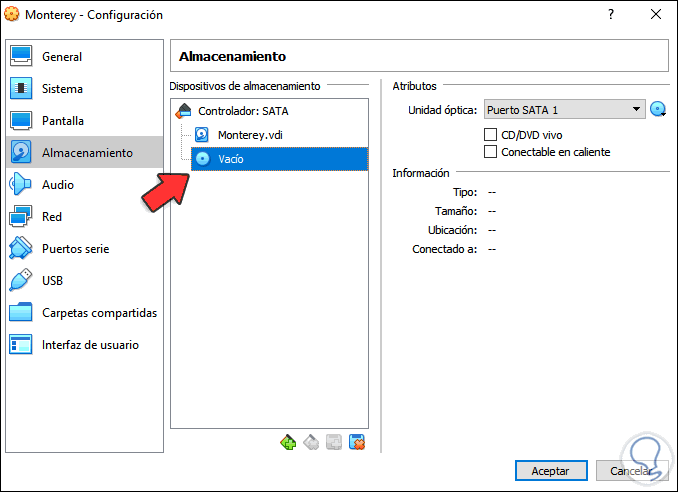
Step 8
We click on the side icon to select the ISO of macOS 12 Beta (Monterey):
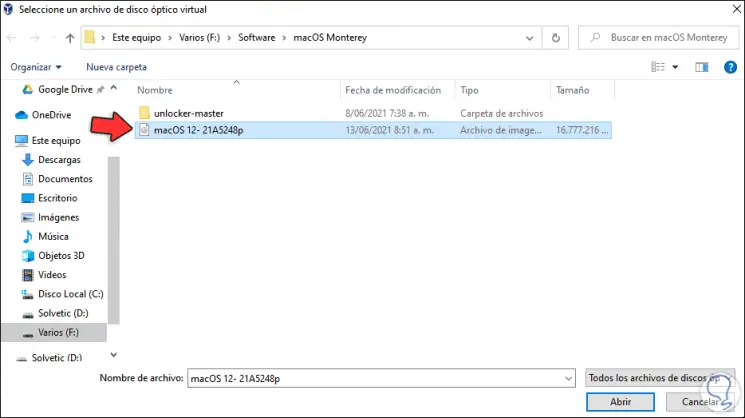
Step 9
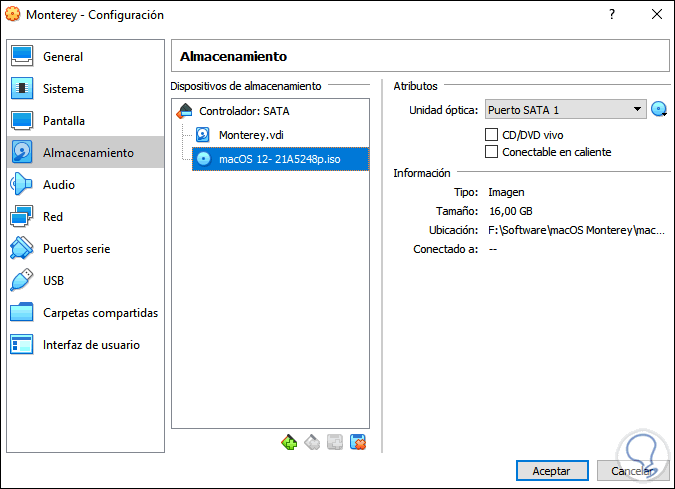
We click Open to add it:
Step 10
In the Network section we activate the bridge adapter to establish a connection with the physical equipment:
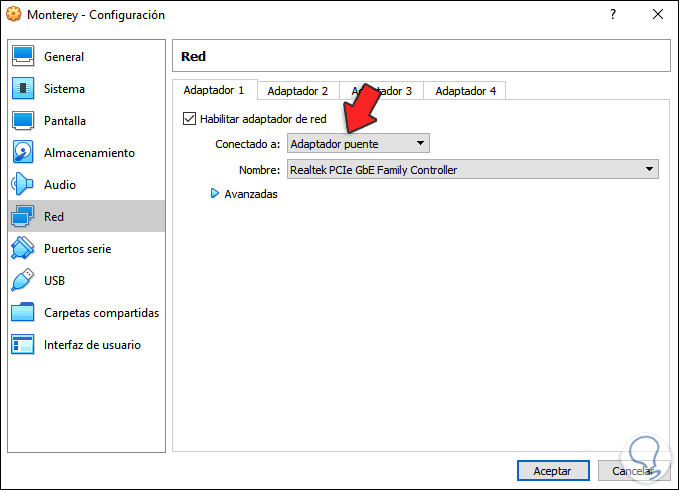
Step 11
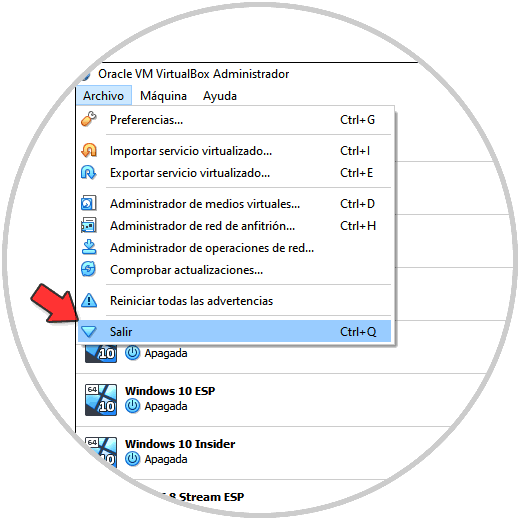
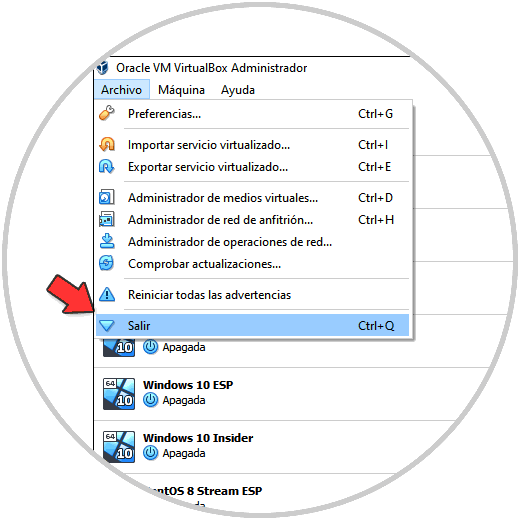
We apply the changes.
We leave VirtualBox:
Step 12
It is time to configure the virtual machine so that macOS can run in Windows 10, for this we access the CMD as administrators and there we are going to execute the following:
cd "C: \ Program Files \ Oracle \ VirtualBox \" VBoxManage.exe modifyvm Monterey --cpuidset 00000001 000106e5 00100800 0098e3fd bfebfbff VBoxManage setextradata Monterey "VBoxInternal / Devices / efi / 0 / Config / DmiSystemProduct" "VBoxManage Monterey,3" "itratexBoxManage11 "VBoxInternal / Devices / efi / 0 / Config / DmiSystemVersion" "1.0" VBoxManage setextradata Monterey "VBoxInternal / Devices / efi / 0 / Config / DmiBoardProduct" "Iloveapple" VBoxManage setextradata Monterey "VBoxInternal / Devices / Config / smc Key "" ourhardworkbythesewordsguardedpleasedontsteal (c) AppleComputerInc "VBoxManage setextradata Monterey" VBoxInternal / Devices / smc / 0 / Config / GetKeyFromRealSMC "1
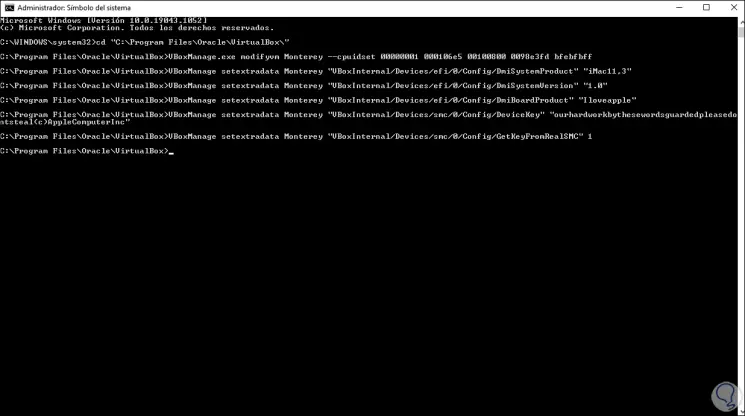
Note: Monterey must be changed to the name of the virtual machine.
Step 13
In case of using AMD processors, we must execute the following extra line:
VBoxManage modifyvm Monterey –-cpu-profile "Intel Core i7-6700K"
Step 14
We exit the CMD and open VirtualBox:
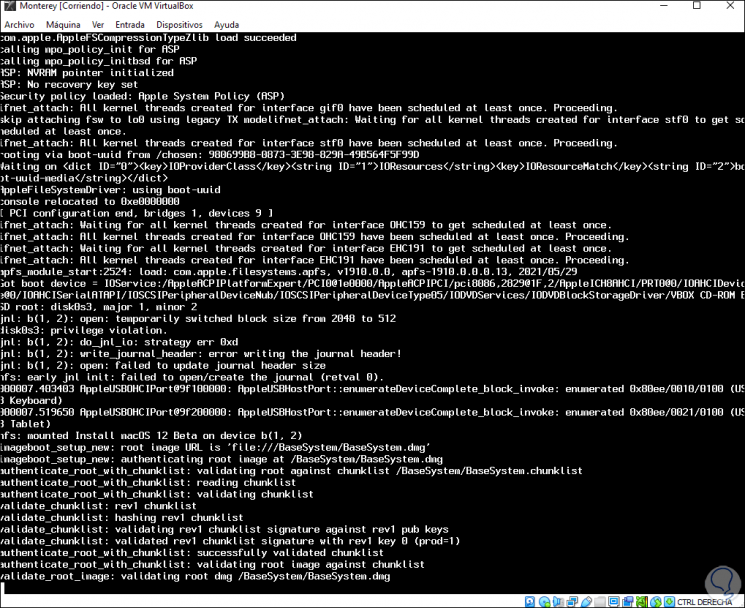
Step 15
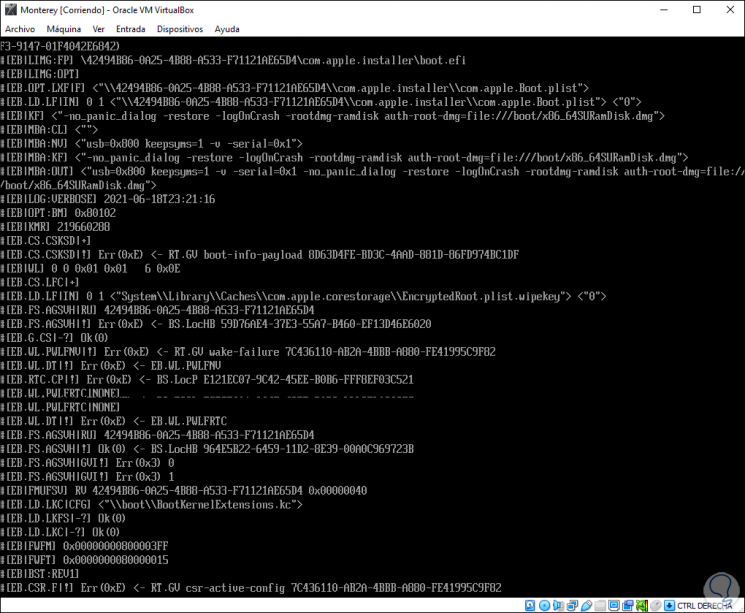
We start the virtual machine, the macOS Monterey process load will start:
Step 16
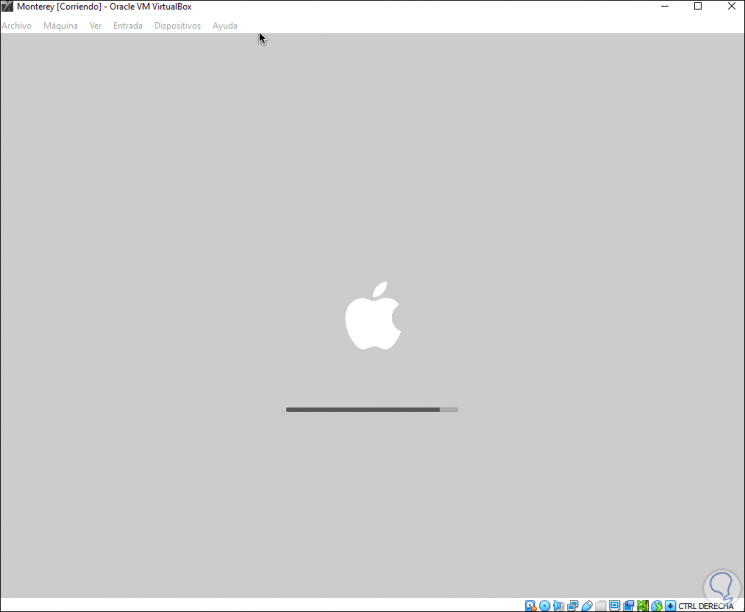
Then we will see the following:
Step 17
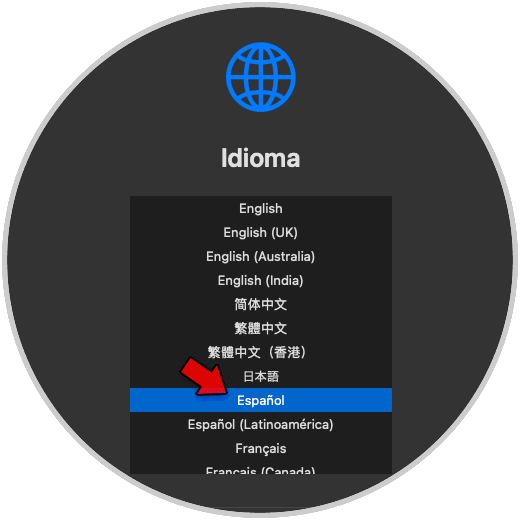
We select the installation language and click on the lower arrow, we will see the following menu:
Step 18
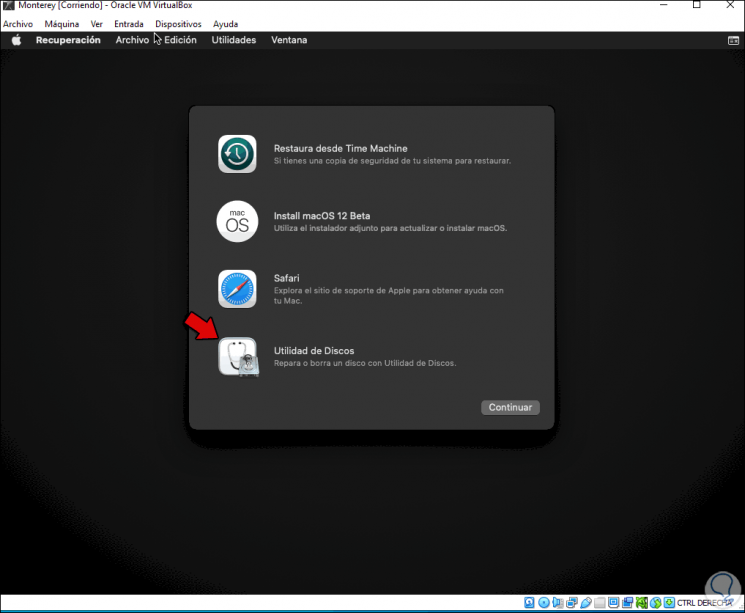
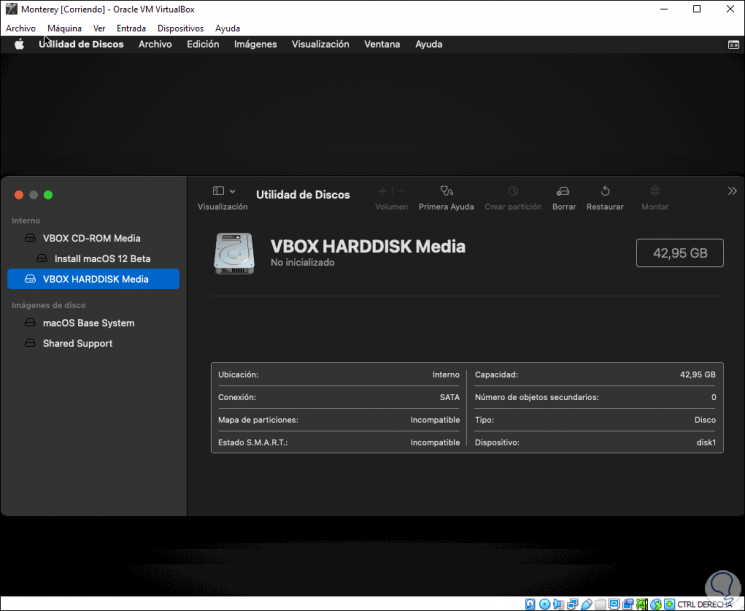
We select "Disk Utility" and then we select the virtual hard disk:
Step 19
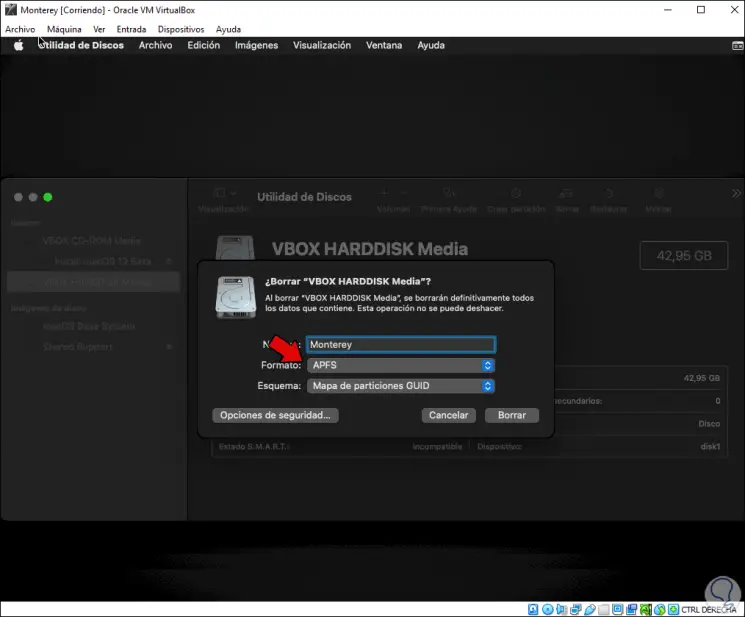
We click on "Delete", assign a name, leave the APFS format and apply the changes:
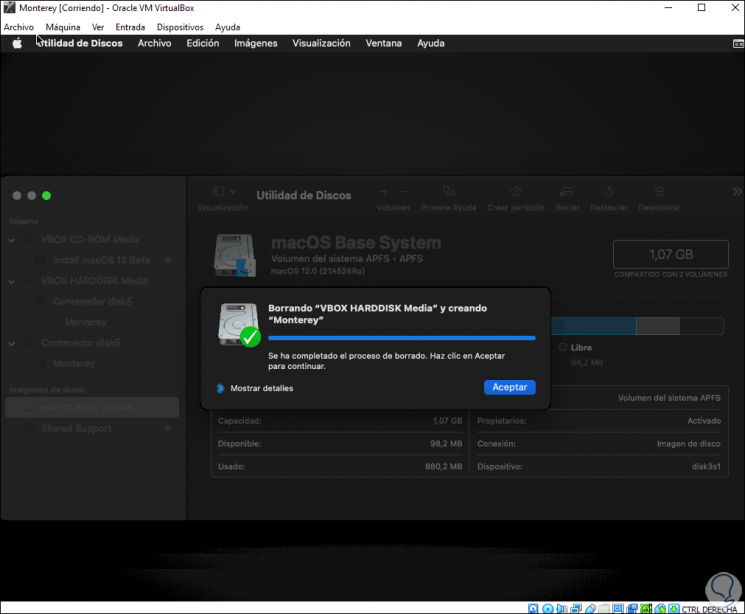
Step 20
Click Delete to complete the action:
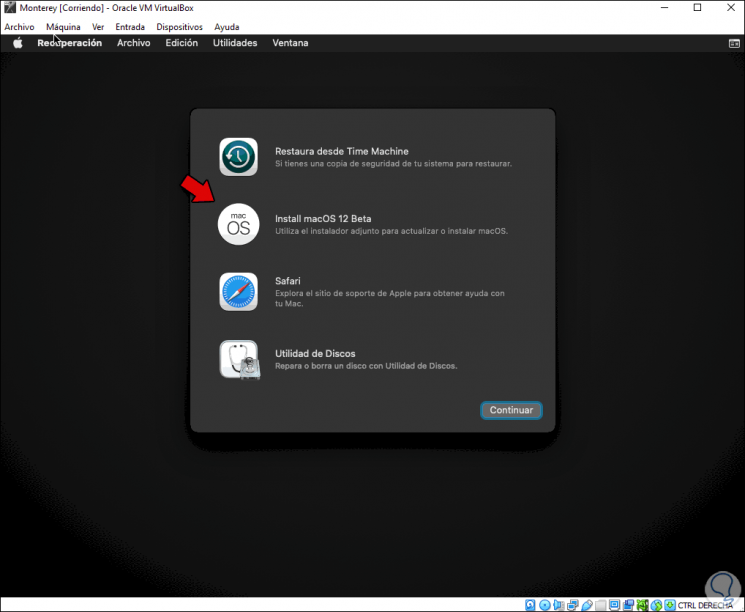
Step 21
We exit Disk Utility and now select "Install macOS 12 Beta":
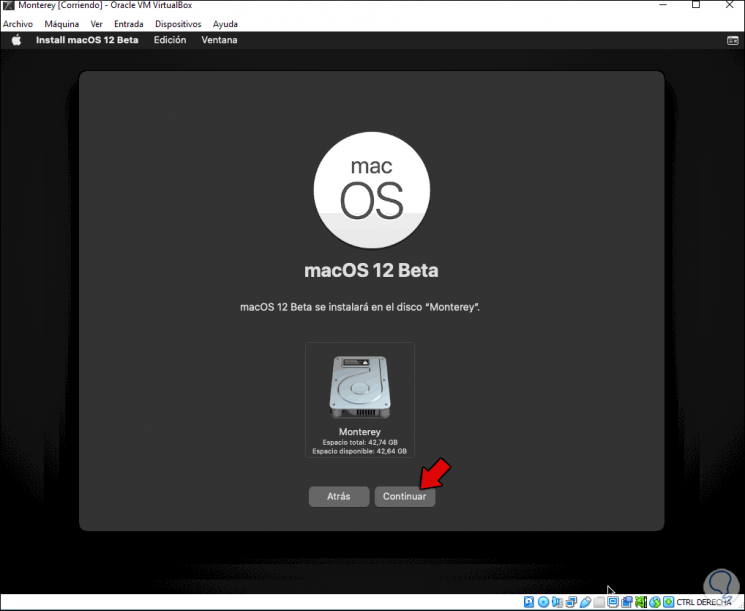
Step 22
We click on Continue and we will see the following:
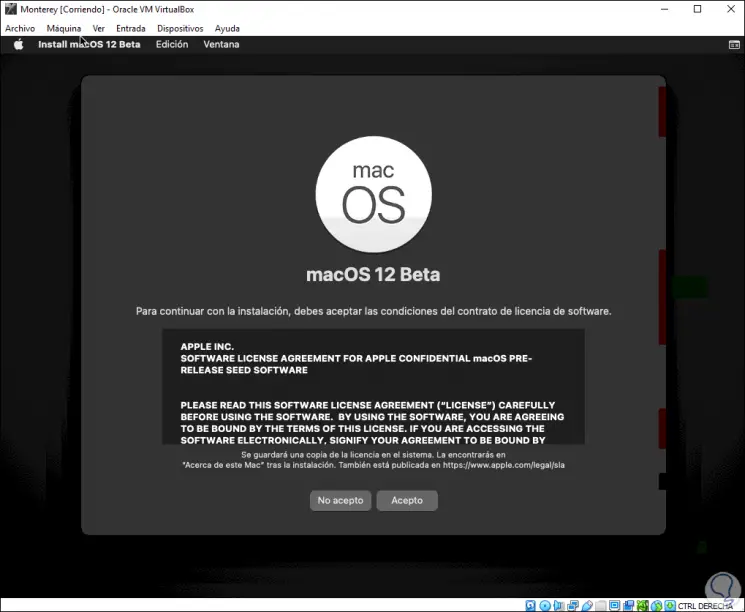
Step 23
We click I accept to confirm the license and a pop-up window will open to confirm:

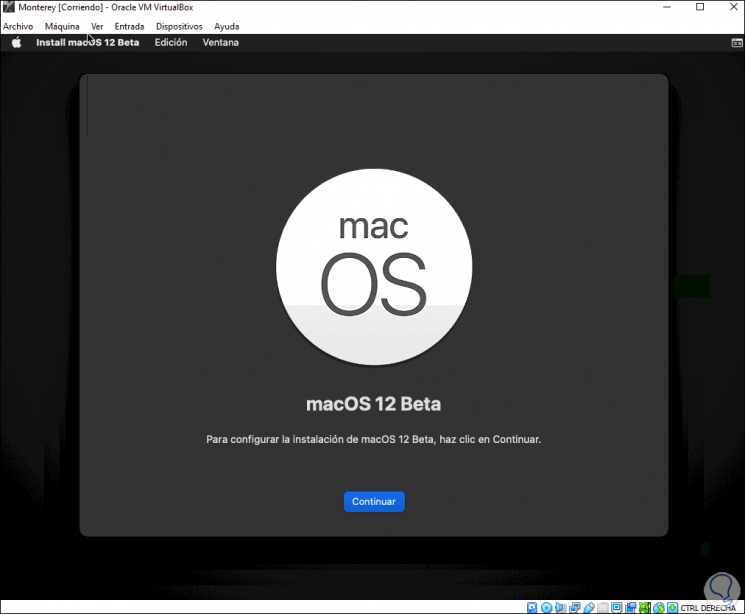
Step 24
We click I accept and we will see the following window:
Step 25
We click on Continue to select the disk where macOS Monterey will be installed:
Step 26
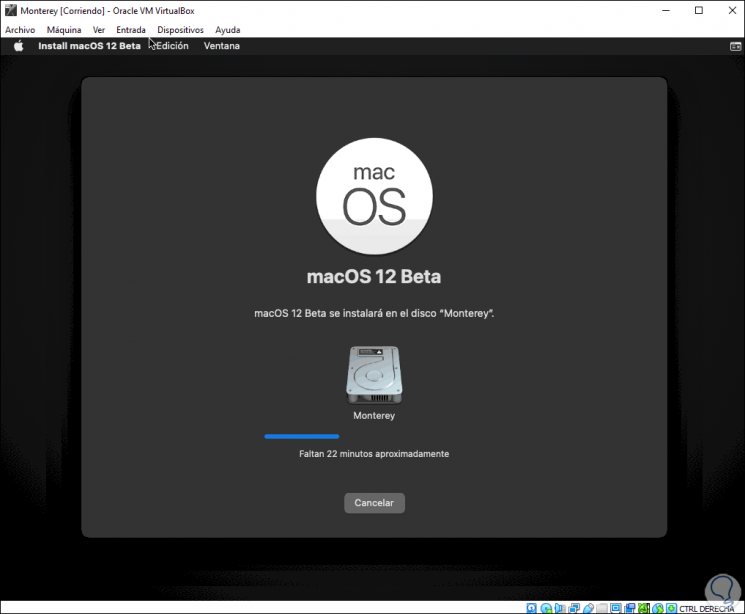
Once selected, click on Continue to start the installation process:
Step 27
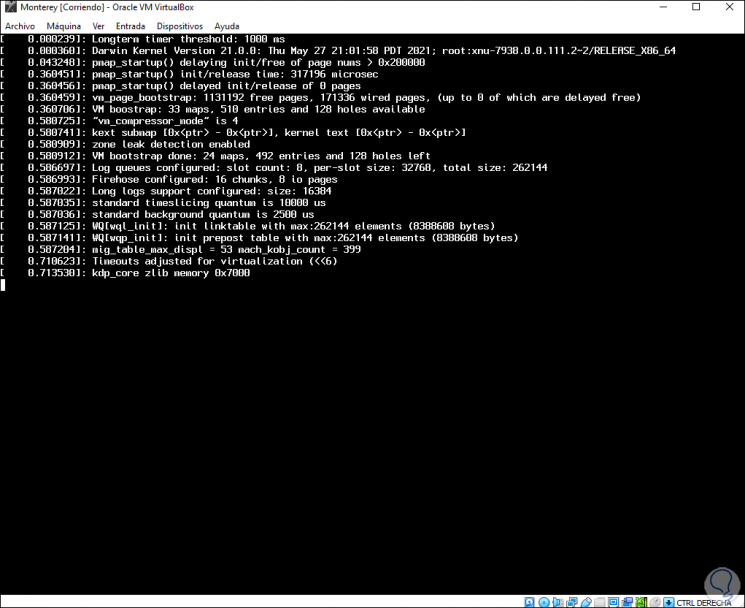
After this, the system will reboot to complete the process:
Step 28
The process will follow:
Step 29
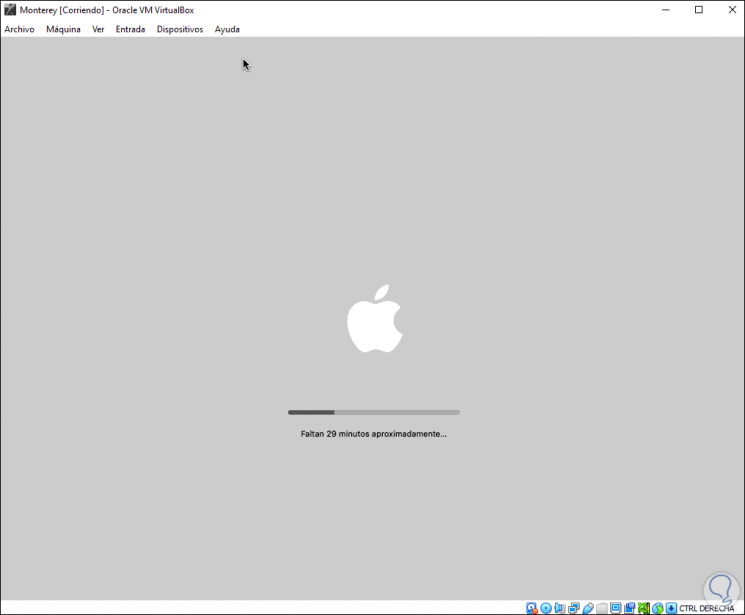
Again the virtual machine is restarted:
Step 30
Continue the process, this may take several hours:
Step 31
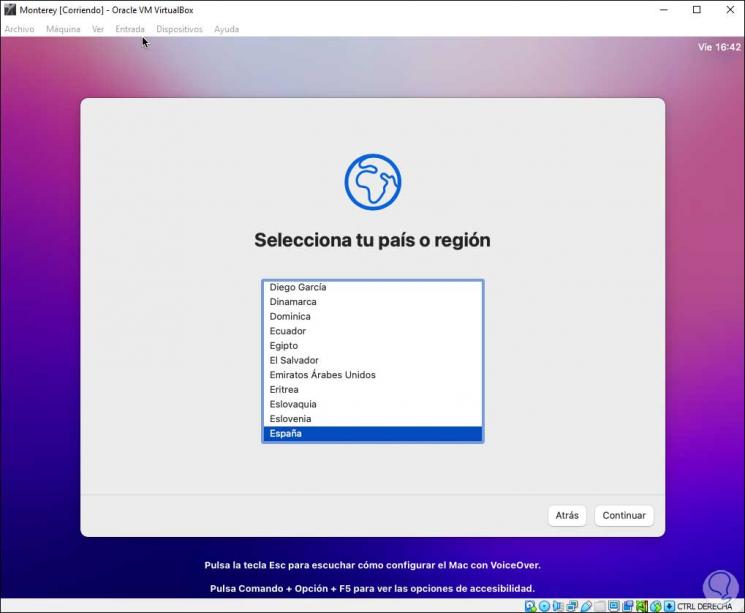
After it finishes we select the location:
Step 32
We click on Continue to configure the languages:

Step 33
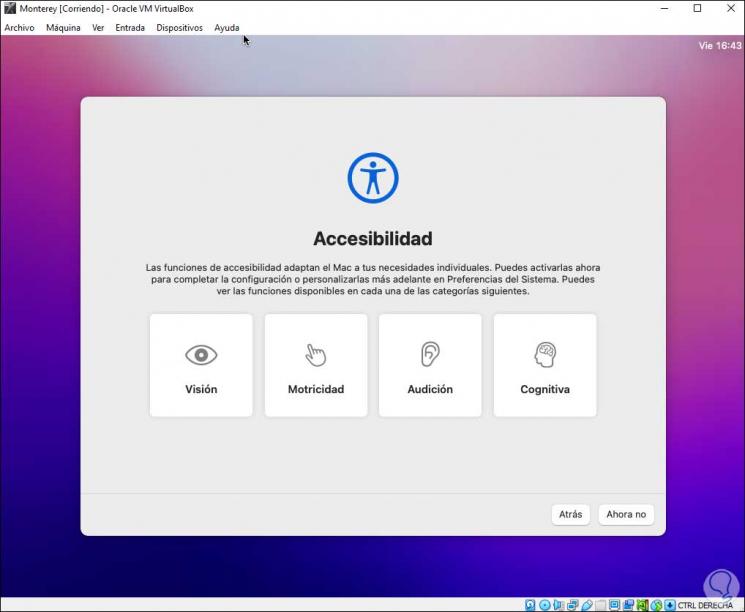
In the next window we manage the accessibility options:
Step 34
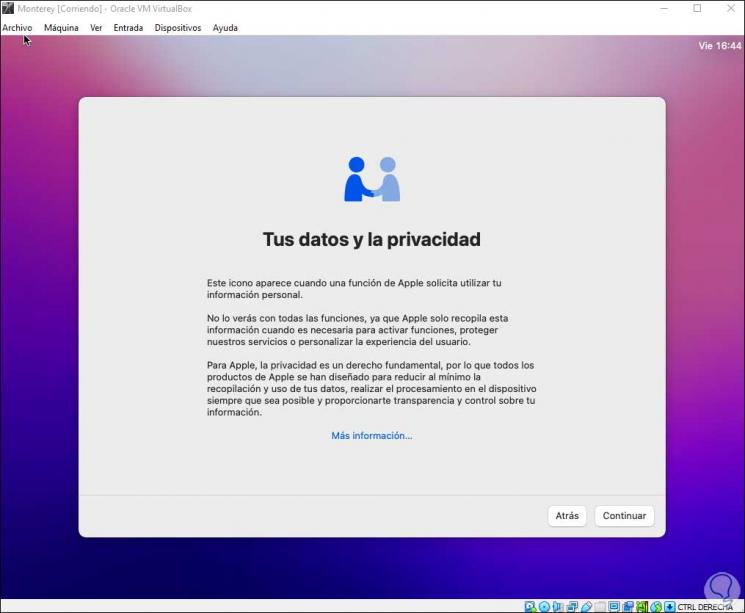
Then we define the privacy section:
Step 35
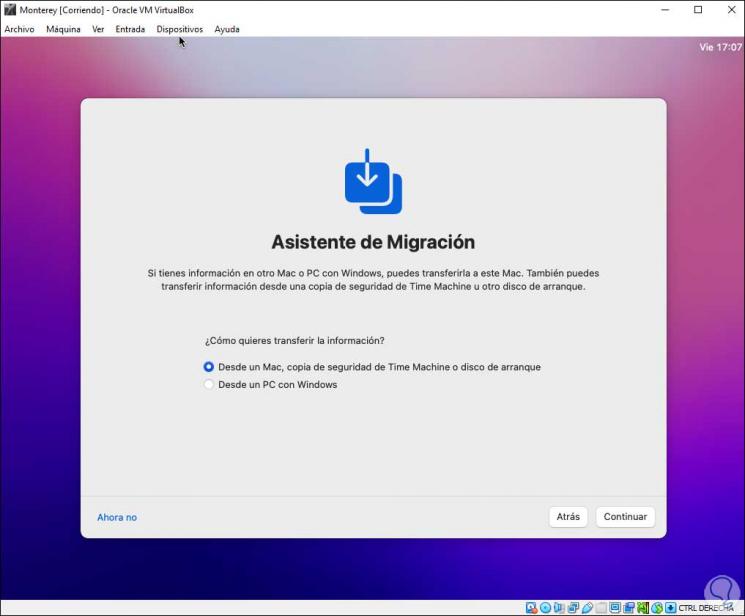
In the following window it is possible to configure, if we have it, the migration of the data:
Step 36
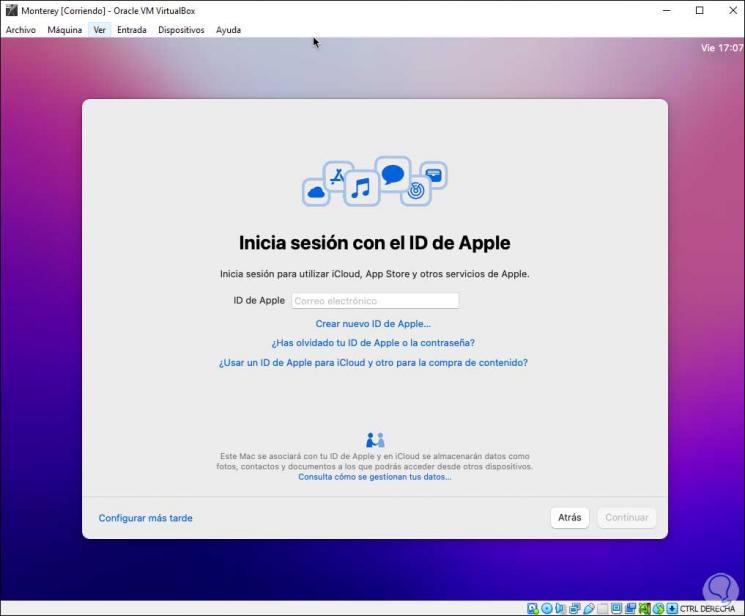
Now it is possible to log in with the Apple ID if we wish:
Step 37
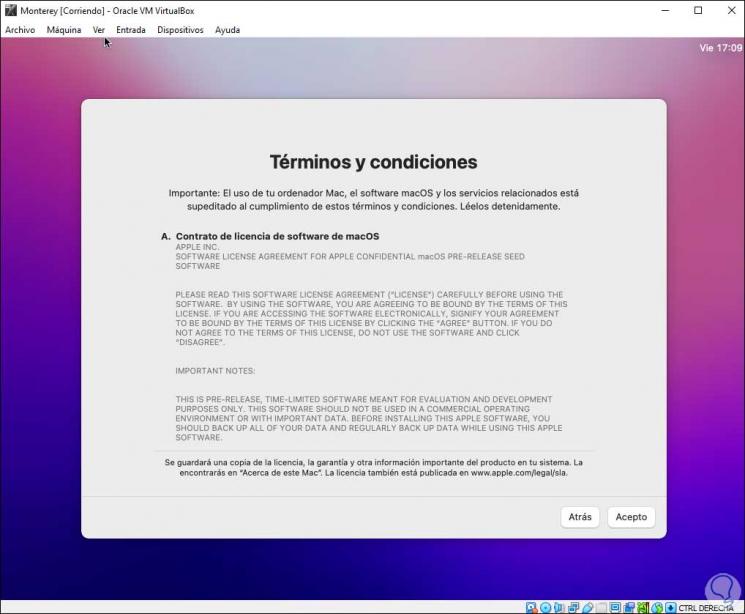
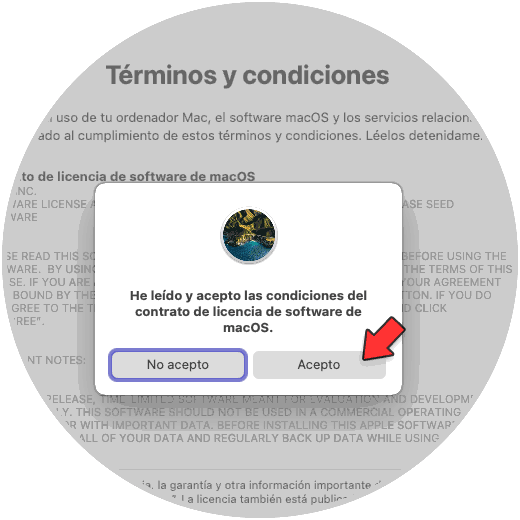
Now we must accept the terms of use of the system:
Step 38
We click I accept and we must confirm the operation:
Step 39
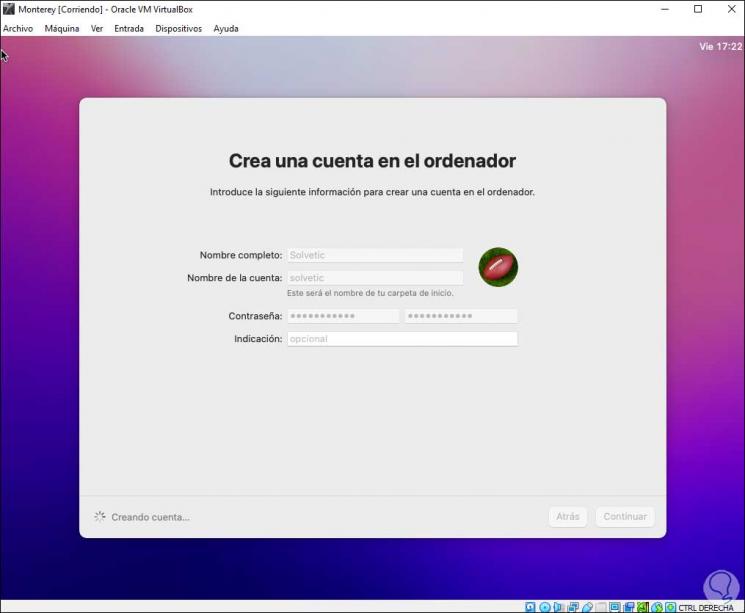
Now we are going to create the user with its password:
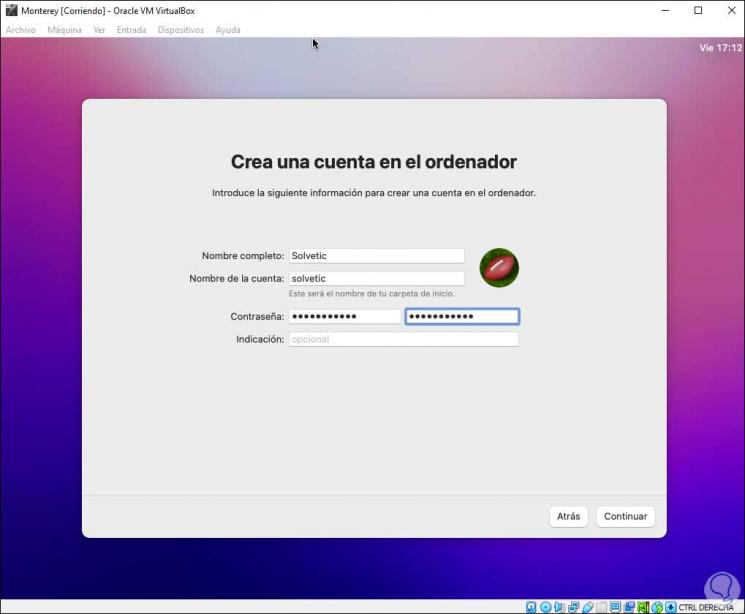
Step 40
Click Continue to create the account:
Step 41
Once created, we configure the location of the equipment:
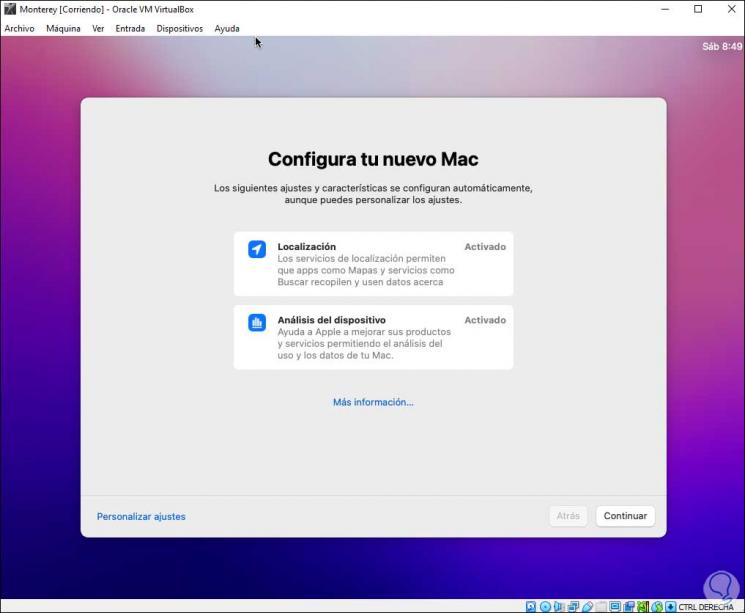
Step 42
In the next window we can activate the Siri assistant:

Step 43
Then define the environment to use on the macOS Monterey desktop:
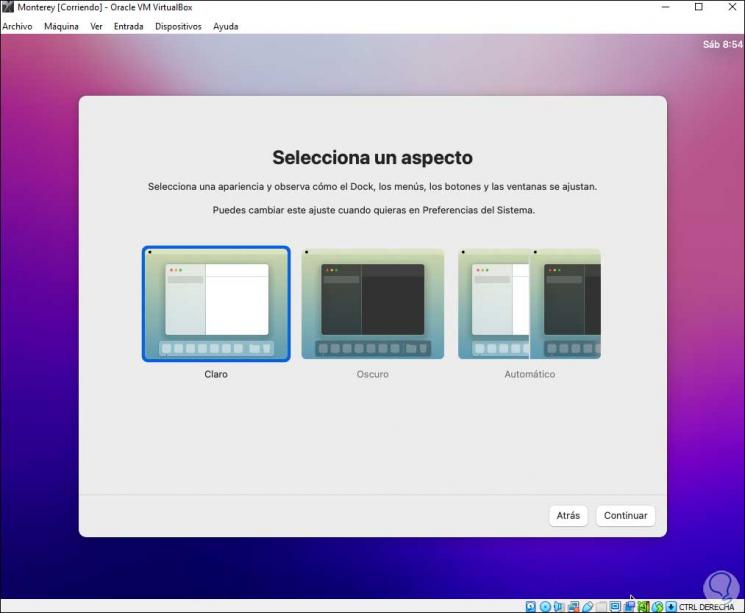
Step 44
Click Continue to access macOS Monterey:
Step 45
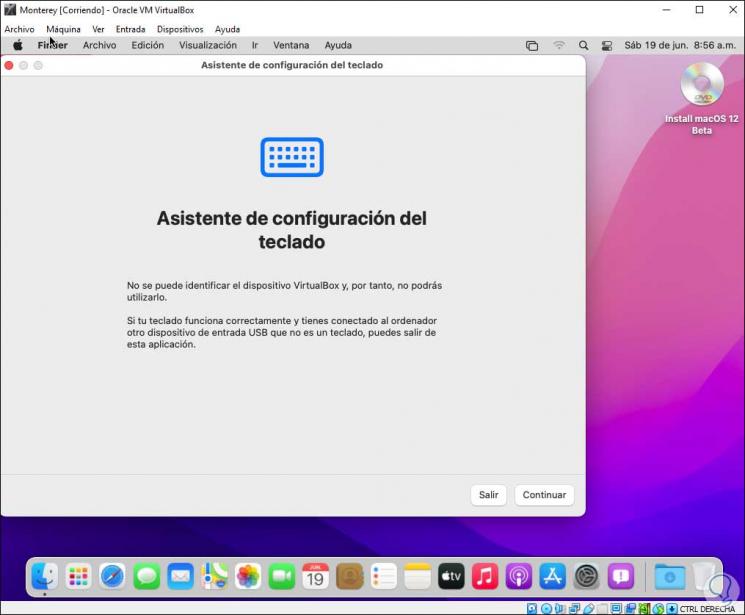
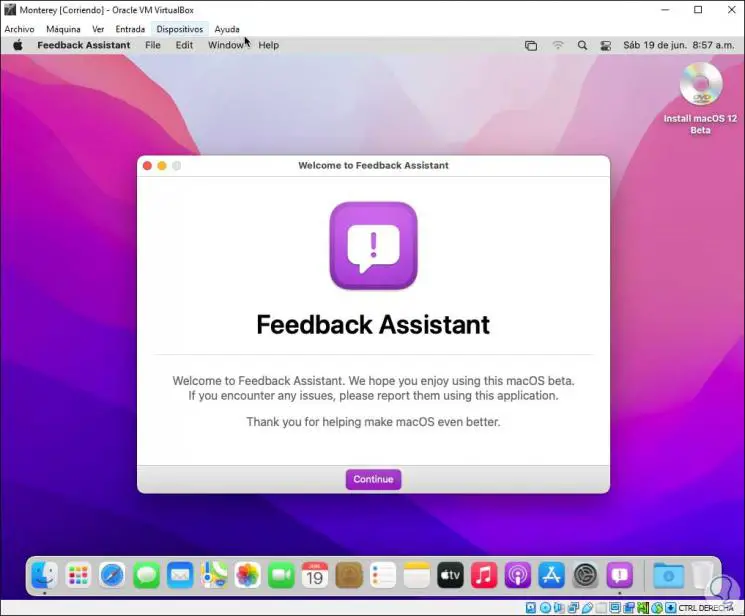
The comments wizard will be displayed:
Step 46
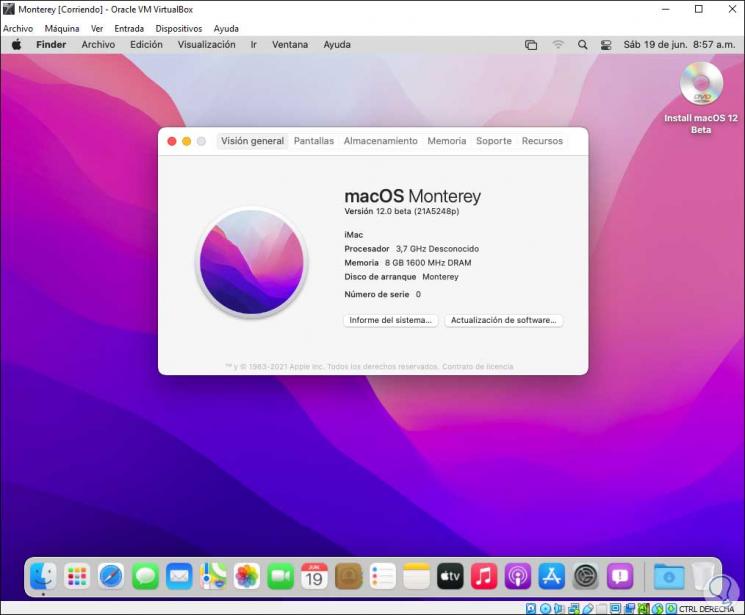
We validate the version from About this Mac:
Important note
The VirtualBox Guest Additions are a set of tools to interact with the physical equipment (drag and drop, shared folders) but since it is a recently released version they are not yet compatible, so it is only possible to know the news of macOS Monterey without the use of these.
This is the process to install the new macOS Monterey system in VirtualBox and thus explore what it has for each of us.