To prevent users from accidentally damaging the system, Apple has hidden important files and folders on the Mac. However, you can easily display these system files should you ever need them. We show you how it works.
But be careful: Changing or damaging these hidden system files can have serious consequences for the entire operating system!
Show hidden files with keyboard shortcut
The easiest way to show the hidden files is to use the key combination [cmd] + [Shift] + [.] . Just go to a folder in the Finder and press the shortcut. The hidden files will appear. They can be recognized by the fact that they are a little paler than the rest of the files. To hide the hidden files again, simply press the key combination [cmd] + [Shift] + [.] Again .
Show hidden files through the terminal
To have all the hidden files displayed in the entire Finder at the same time, you can also enter a command in the Terminal. To do this, follow our step-by-step instructions or take a look at the brief instructions ..
1st step:
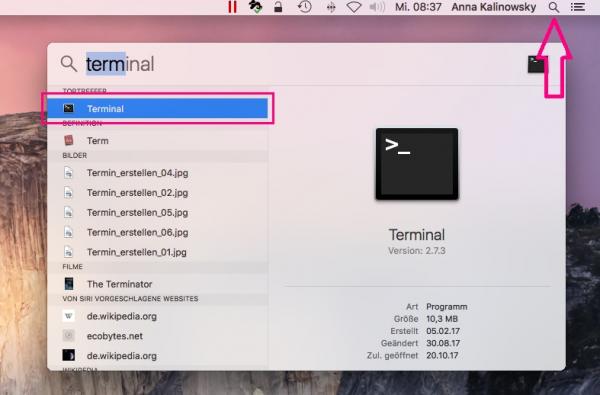 First open the terminal . The quickest way to do this is to use the Spotlight search . To do this, click on the small magnifying glass in the menu bar at the top right and enter " Terminal ". The terminal opens with a double click on the corresponding result.
 2nd step:
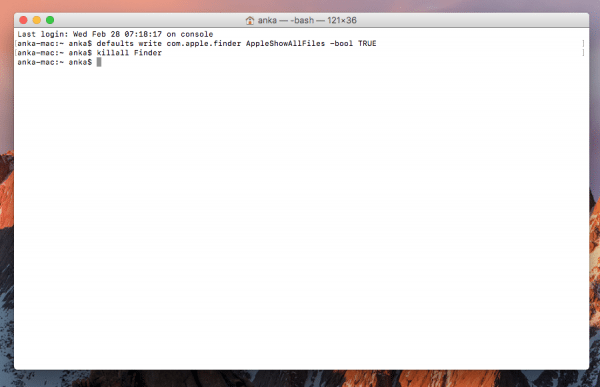 Now enter the command defaults write com.apple.finder AppleShowAllFiles -bool TRUE and confirm with [ Enter ]. Then you have to reload the Finder, this works with the killall Finder command , which you confirm with [ Enter ].
 3rd step:
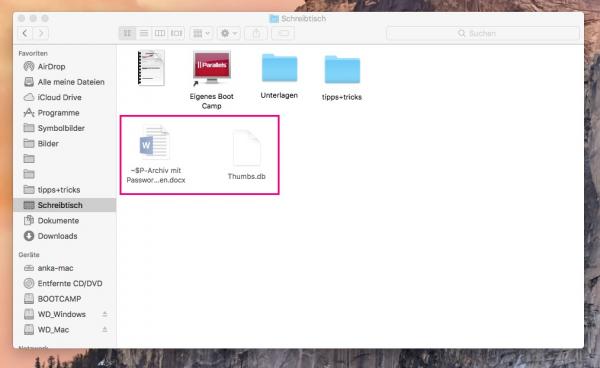 The hidden files will now be displayed in the Finder. They can be recognized by the fact that they are a little paler than the rest of the files.
 4th step:
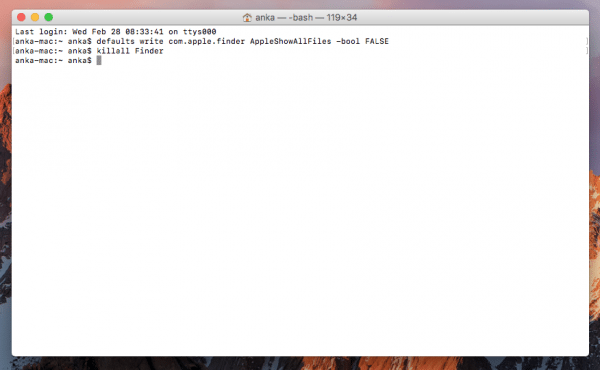 To hide the hidden files again, go back to the terminal and enter the commands defaults write com.apple.finder AppleShowAllFiles -bool FALSE and killall Finder and confirm each time with [ Enter ].
 Quick guide: Show hidden files via the terminal
- Open the Terminal via Spotlight Search .
- Then enter the command defaults write com.apple.finder AppleShowAllFiles -bool TRUE and confirm with [ Enter ].
- To restart the Finder, enter the command killall Finder killall Finder and confirm again with [ Enter ].
- The hidden files will then appear in the Finder.
- To hide the files again, enter the commands defaults write com.apple.finder AppleShowAllFiles -bool FALSE and killall Finder in the terminal.