Apple has a sophisticated backup solution for iPhone and iPad: Users can choose to save data locally via iTunes or pack it into the cloud with the automatically preset iCloud backup. Both variants have the advantage that they are basically automatic: If the iCloud backup is switched on, the device automatically creates a backup when it is connected to the charger and has WiFi access.
Enable iCloud backup
However, settings must be made for a full iCloud backup:
1st step:
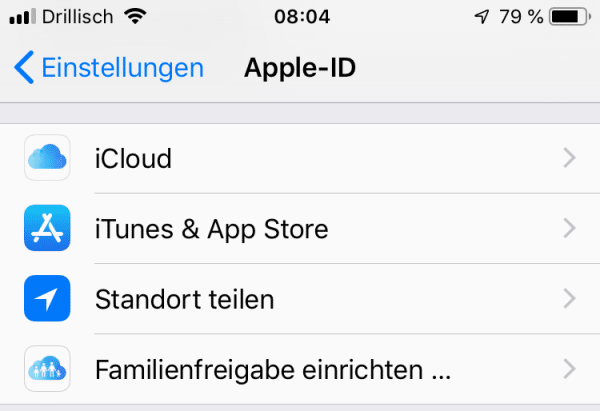 Open the iPhone settings and then tap on your Apple ID . Then select " iCloud ".
 2nd step:
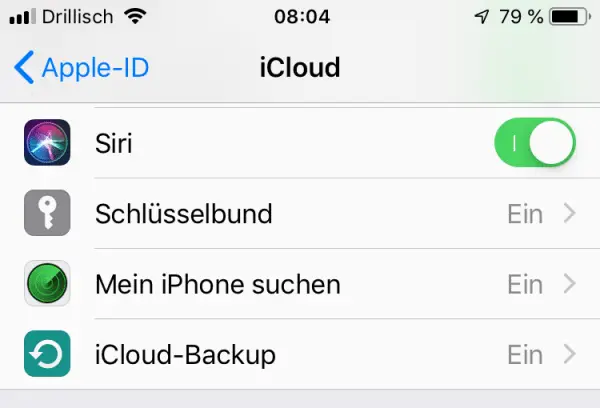 Make sure that “ iCloud Backup ” is activated. If not, you should switch on this backup solution, as it backs up all data at any time without any action on your part - without iTunes.
 3rd step:
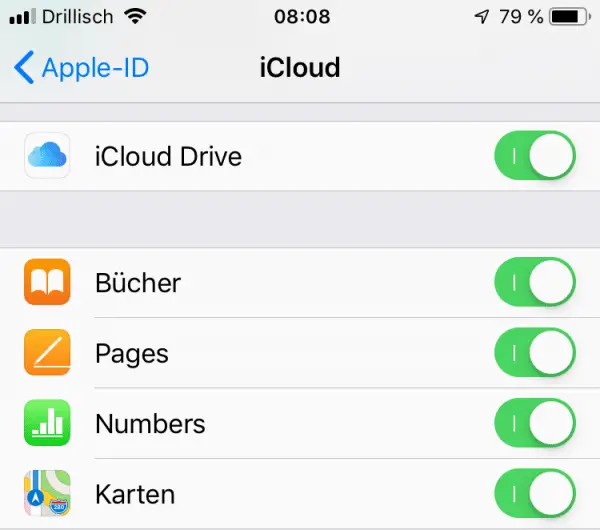 In addition, scroll down the list and activate or deactivate all apps that should have iCloud access - and thus automatically back up all data in the iCloud drive. You can find the list here under iOS 12, under iOS 11 and earlier it is hidden in " iCloud Drive ".
 Create iPhone backup on PC or Mac
However, the iCloud backup - just like its iTunes counterpart - has two major disadvantages: The backup always takes place when the iPhone is connected. And the backup overwrites the old backup version every time. In contrast to Apple's Time Machine, for example, there is no turning back: If you have changed data but only notice it after the second backup, the data is gone. Unless the app has its own version management, which is usually not the case. In addition: If you have to rescue data, you have to reset the entire iDevice and import the old backup. In theory, this technology may make backups particularly easy - but in practice it tends to be problematic. Therefore, when working with important data on iPhone or iPad, you shouldalso perform manual backups.
Set up manual version management in iCloud
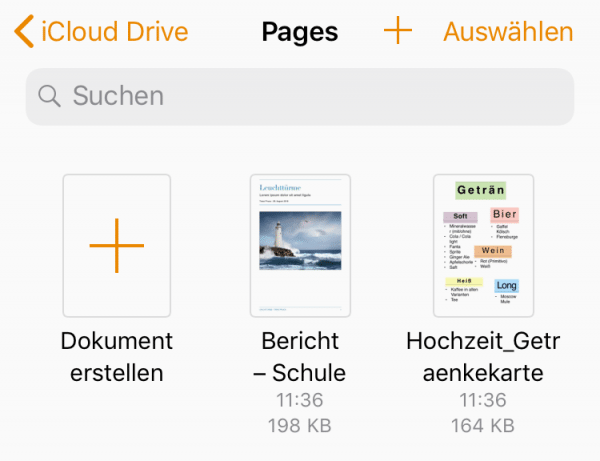
If you want to create backups of individual content without iTunes and iCloud, iCloud Drive is the method of choice. However, you have to manually follow a backup strategy and manually create security duplicates with which you can save the different versions of a document, if the app allows this. This is how it works with a Pages document , but the path is the same for Keynote and Numbers as well as many other productivity apps:
1st step:
 Open the document on your iPhone (or iPad) and edit it as usual. The old version in the cloud is overwritten every time via autosave.
 2nd step:
 In order to save a certain status, you have to leave the document again to get to the document overview.
 3rd step:
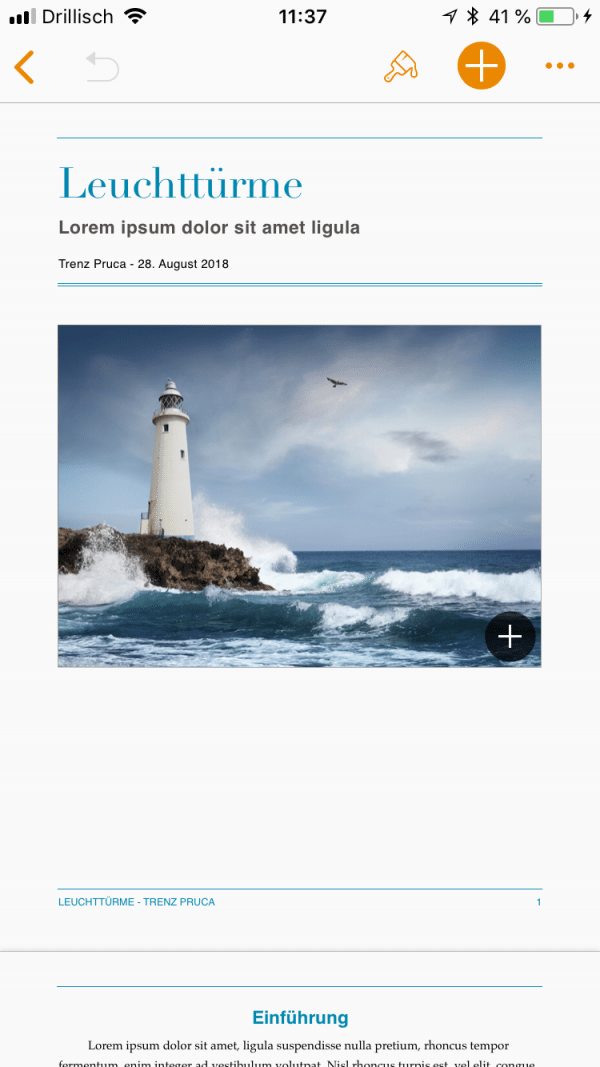
 Now tap on the document and hold it down until the context menu appears. Select " Duplicate " here. This creates a copy of the current processing status.
 4th step:
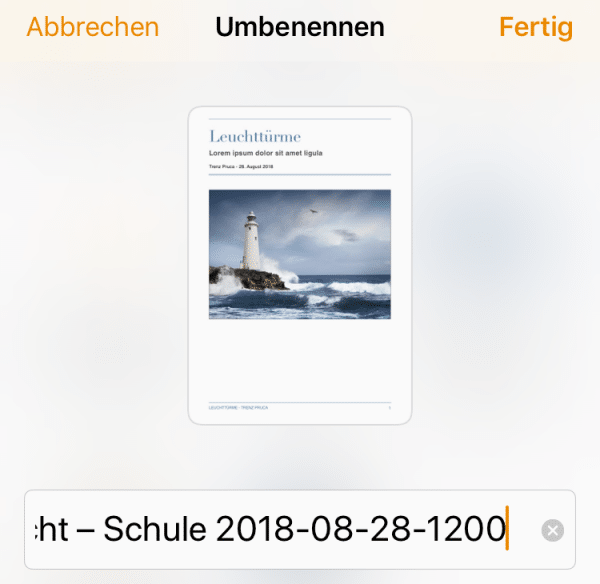 Tap the file named “ (Document Name ) 2 ” and assign a different name that contains the date , for example: “ (Document name) 2018-08-28-1200 ” for the backup copy on 08/28/2018 at 12 noon.
 5th step:
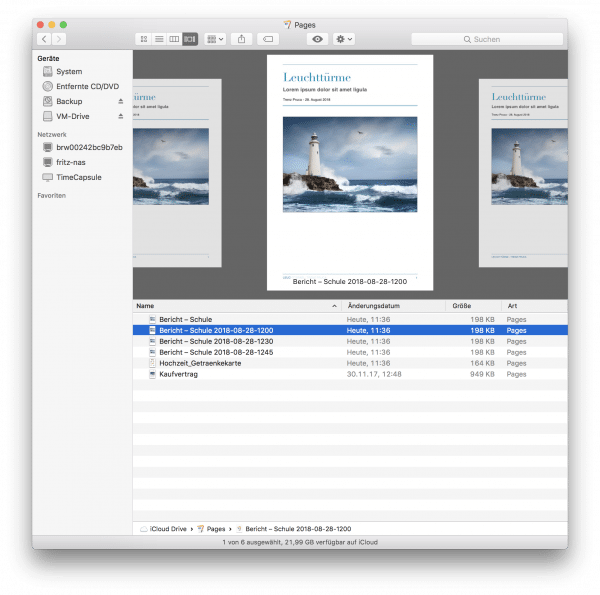 The "reverse" spelling of the date guarantees that the working copies appear in the correct order in the list view, for example in the macOS Finder or Windows Explorer. The copy is automatically kept in sync with iCloud. This means that you always have a secure working status of the document.
 6th step:
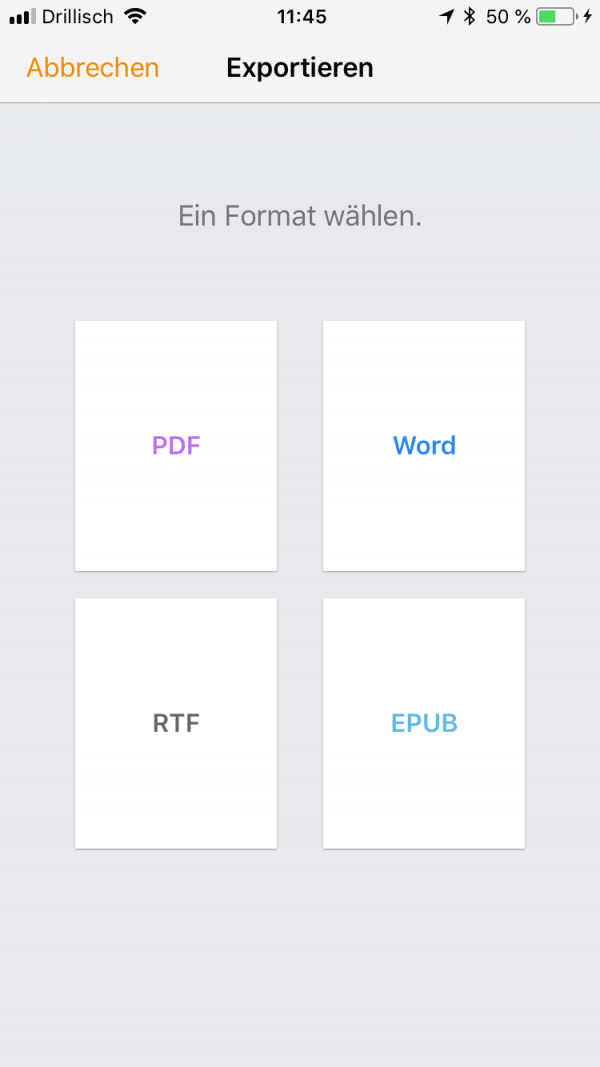 Alternatively, if the app allows it, you can also export the document manually to iCloud: To do this, tap on the three dots in the top right corner of the document view and then on " Export ". You can then manually save the document anywhere in iCloud as a PDF, Word, RTF or EPUB file.
 7th step:
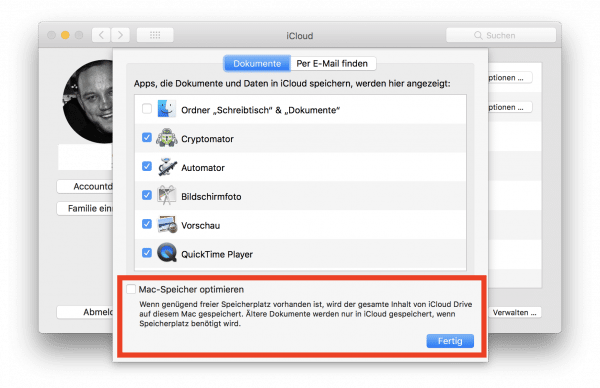 Also, make sure your Mac is set so that iCloud Drive doesn't automatically “optimize” storage. To do this, open System Preferences > iCloud > iCloud Drive (Options) and uncheck " Optimize Mac Storage ". This ensures that new iCloud documents are automatically downloaded to the Mac as soon as it is on the Internet. The different document versions are automatically included in the next Time Machine backup of the Mac.
 Back up individual data sets with Mobimover Free
Unfortunately, this backup procedure is not necessarily optimal: it is effective, but unfortunately also quite cumbersome to implement. In addition, it is only suitable for data that will be saved as documents. You can use a third-party tool to back up data on a larger scale and in a more targeted manner. One of them is the free version of EaseUS MobiMover: With this tool you can easily save a complete backup of your iPhone on your PC or Mac:
1st step:
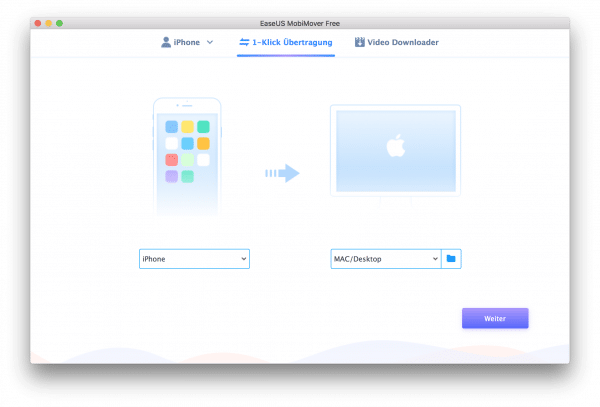 Install MobiMover and connect the iPhone (or iPad) to your PC or Mac and unlock it. Then start MobiMover. The program recognizes the iPhone and suggests a backup on the computer. Choose a destination folder and click “ Next ”.
 2nd step:
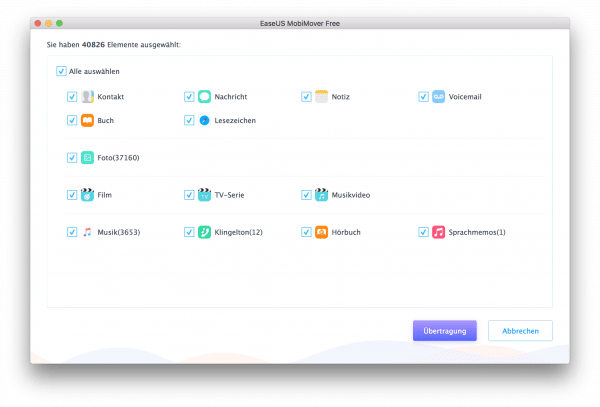 MobiMover now takes a while to browse the iPhone. The program then suggests all the data records to be backed up. Uncheck data records that you do not want to save and then click on " Transfer ".
 3rd step:
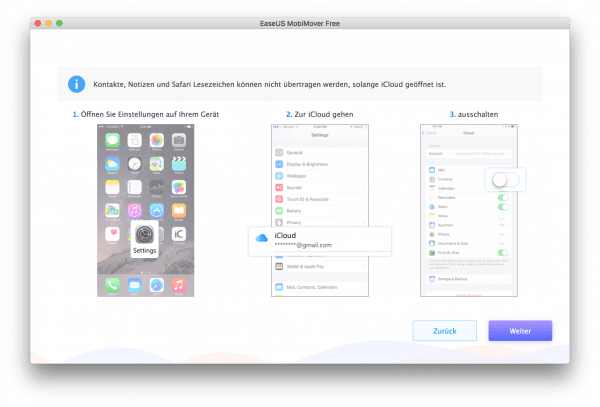 MobiMover can only transfer contacts, notes and bookmarks if they are not synchronized via iCloud. The program will give you instructions on how to disable the feature. However, we recommend that you do not transfer these three data sets and stick with iCloud. So just click on “ Next ”.
 4th step:
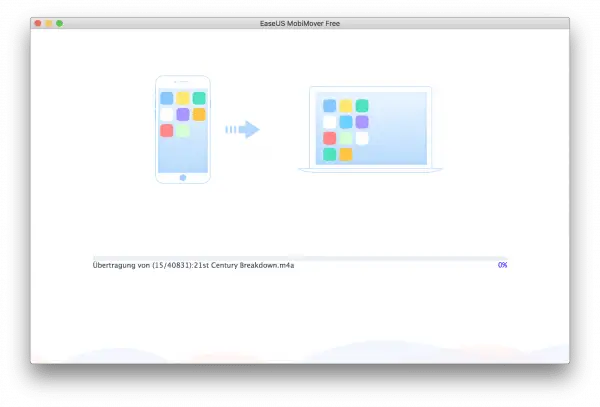 MobiMover will now pull all the records you want from the iPhone to your PC or Mac. This can take a long time, especially if you want to back up photos and videos, as well as music. Unfortunately, the Lightning port isn't particularly fast.
 5th step:
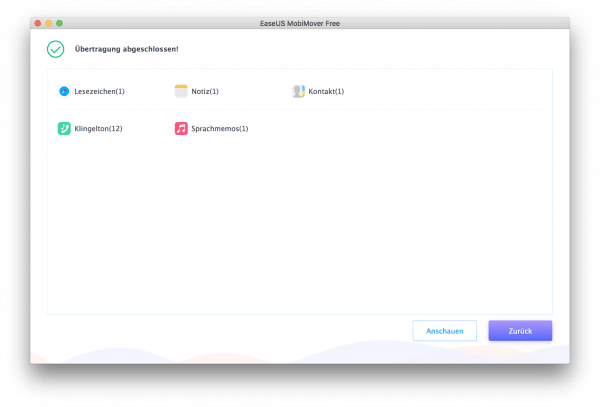 After the transfer is complete, MobiMover reports success: You can now view the backup on your computer. Unfortunately, MobiMover does not back up all files, but only the " core data " of the iOS system, ie the basic content and not individual apps and their content. The iCloud is still the method of choice for securing them.
 Conclusion: The iPhone is well secured with iCloud
All in all, “ordinary users” should have the best option at hand to back up iPhone data with the iCloud backup and data storage in the iCloud. Unfortunately, the iCloud space of five gigabytes provided by Apple is very sparse. For one euro a month, the storage space can be upgraded to 50 gigabytes. This means there is enough space for all documents and data. Media such as music and pictures should be kept in sync via iCloud or iTunes anyway. If the worst comes to the worst, you can also back them up with the MobiMover tool..