Apple is known for the simplicity of its software and hardware. However, Apple often uses its own proprietary solutions for this reason, even though the industry standard certainly offers alternatives. The Lightning connector on iPhones and iPads is Apple's own solution, but software restrictions are far more annoying and don't have to be. This is also the case with Wi-Fi Direct: This is a technology that allows devices to find each other independently, authenticate and then transfer data. Android devices mostly support this standard. For example, a printer can be controlled via NFC and WLAN without having to pull a cable. At Apple things are more complicated: The manufacturer uses the same technology,but puts its own software framework over it, the so-called Multipeer Connectivity Framework - and that only works with Apple devices.
Use a direct Wi-Fi connection between two iPhones
However, if only Apple devices are involved, the connection works wonderfully. The best example of this is the AirDrop function: Devices that are close together can be found via Bluetooth. The user can then transfer data such as photos or videos:
1st step:
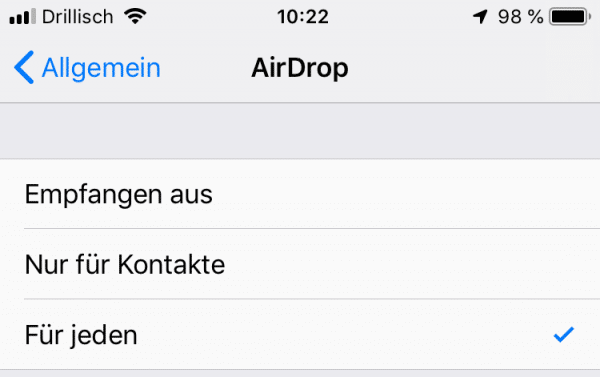 Open the settings on both iOS devices and select " General "> " AirDrop ". Check the box next to " For everyone ". You can record data with any iOS device without the other user having to be in the contact list. Bluetooth is activated automatically.
 2nd step:
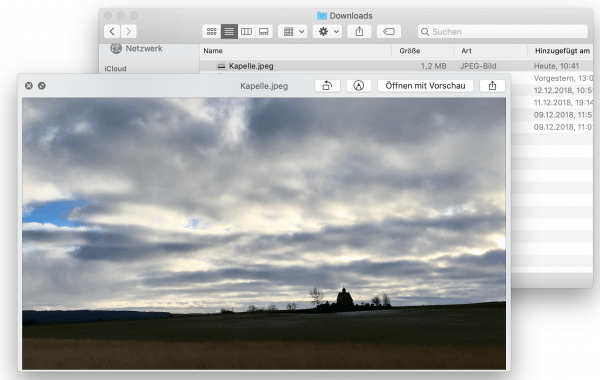
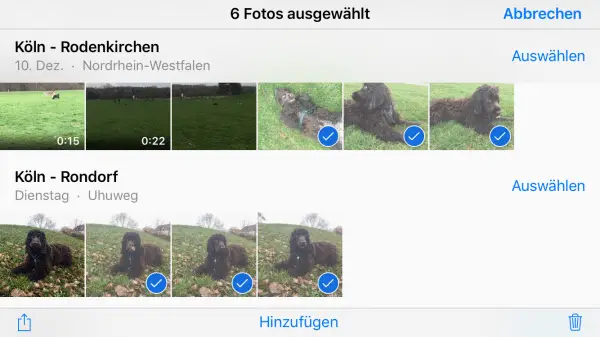 Now open the app on the "sender device" that contains the files that you want to transfer. We are using the “Photos” app in this example. Tap “Select” and mark the photos and videos that you want to transfer.
 3rd step:
 Then tap on the "Share" button at the bottom left: The iPhone will now show you your selection of photos again. Tap on “ Next ”.
 4th step:
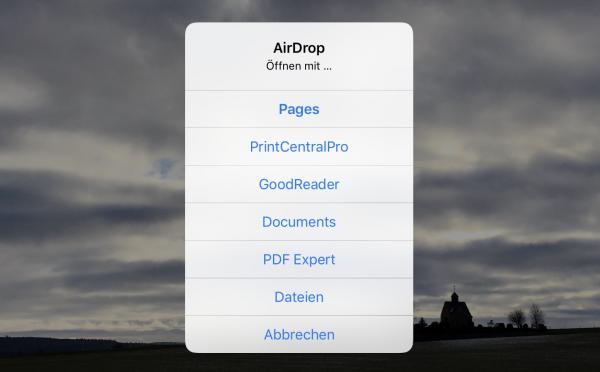
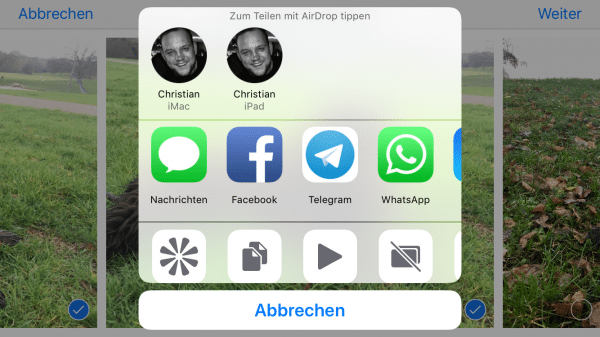 Now the actual sharing dialog appears. The possible target devices are already displayed here: In the example, two devices from the author, the iMac and the iPad. In your case, the other user's device appears here. Select one of the devices .
 5th step:
 The data is automatically accepted on the receiving device and, in the case of photos, saved directly in the Photos app. In this way, for example, you can quickly transfer pictures between iPhone and iPad or iPhone and Mac without a photo stream and iCloud photos (both of which require an internet connection). This also works if, for example, you do not have an Internet connection on the train abroad. Since the Internet is not used for the function, no data volume is used.
 Use a direct Wi-Fi connection between macOS and iOS
The procedure with a Mac is largely identical: If you want to send files from a Mac to another Mac or iPhone, the receive function (see step 1 above) must be active on the iPhone. For this purpose, the Mac has the entry "AirDrop" in the Finder.
1st step:
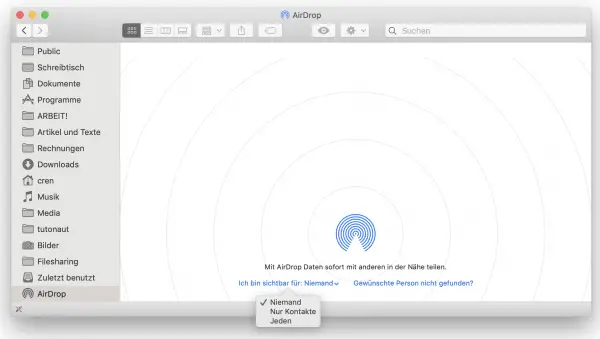
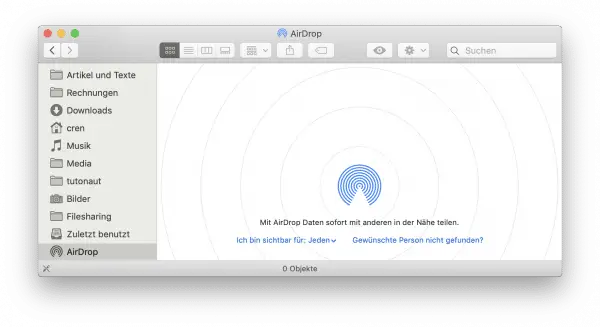 Open a Finder window and look for “ AirDrop ” in the sidebar on the left . Activate Bluetooth if necessary .
 2nd step:
 Then select “ I am visible to: Everyone ”. As a result, the Mac should already appear in the share dialog on other Macs and iPhones / iPads.
 3rd step:
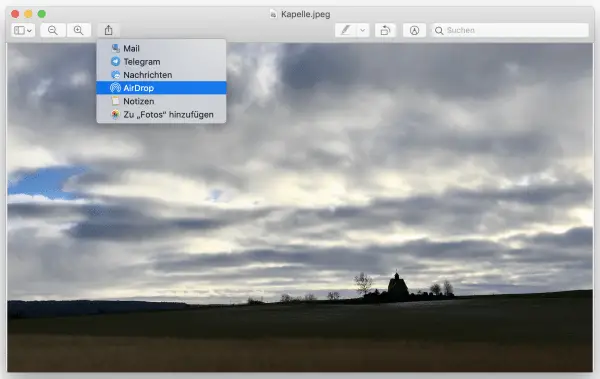 Now select one or more files in the Finder window. Then click the Share button . Most standard Mac apps such as Photos also have a share dialog. In the example we use “Preview”.
 4th step:
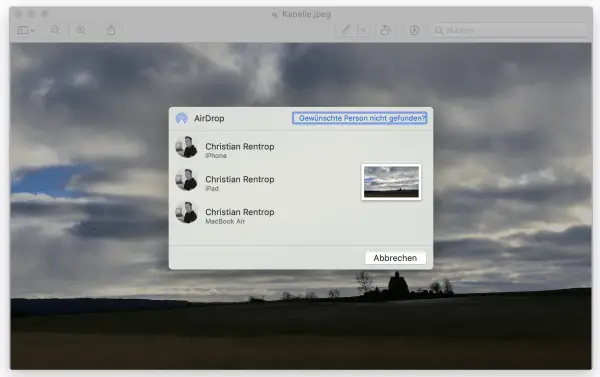 You will now see a list of all devices authorized for reception, i.e. devices in the vicinity that have activated AirDrop. Click on the appropriate device .
 5th step:
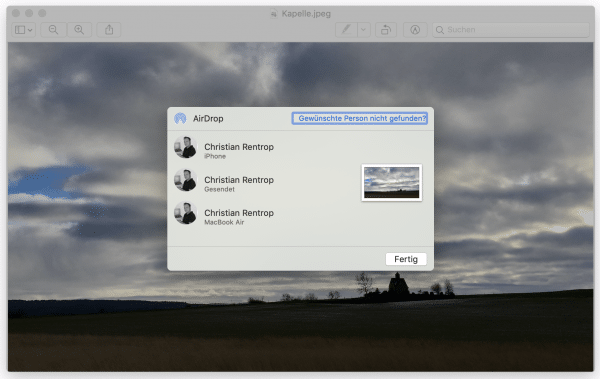 The file or files will now be transferred. The dialog then shows " sent ".
 6th step:
 On the target Mac, files transferred via AirDrop end up in the download folder . They are automatically saved in the appropriate app on target iPhones and iPads .
 7th step:
 Depending on the file type, the target iOS may ask which app to use.
 Turn off AirDrop on iPhone and Mac
Of course, the direct Wi-Fi connection between Macs and iOS devices carries a certain risk: In the past, AirDrop asked whether it was allowed to receive data, but now the files are simply saved. This led to the phenomenon of cyber flashing: in metropolitan areas, some people use the function to send other people naked photos without being asked. Therefore it makes sense to switch off AirDrop when it is not needed:
Mac:
 To deactivate AirDrop on the Mac, you have to open a Finder window and click on " AirDrop " in the sidebar on the left . Then select “ I can be seen by: Nobody ”.
 iPhone / iPad:
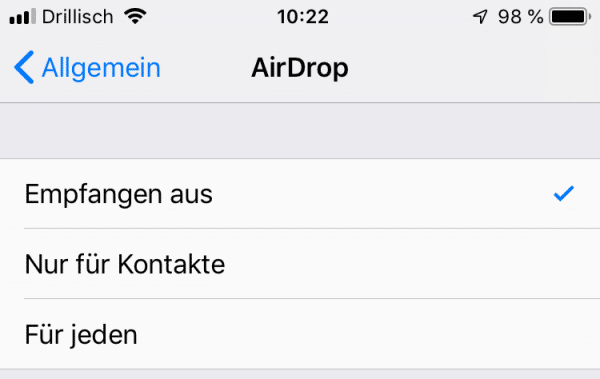 On the iPhone and iPad you have to open the settings and under " General "> " AirDrop " check the option " Receive from ".
 Switch off bluetooth:
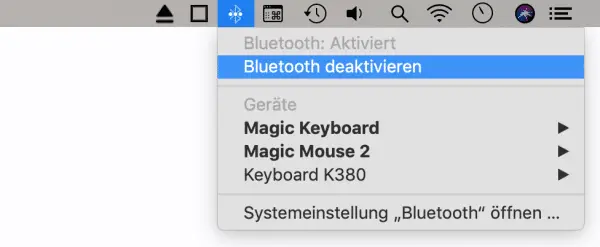 Both under macOS and under iOS, you can also put AirDrop to a halt by simply switching off Bluetooth . However, in many cases this does not make sense because, for example, the mouse and keyboard on the Mac or the car radio or Bluetooth accessories on the iPhone must remain connected.
 Use Wi-Fi Direct with iPhone and iPad
In addition to the AirDrop function, however, there are definitely options for connecting an iPhone to an end device via a direct Wi-Fi connection. Wi-Fi Direct devices always have a built-in hotspot, which means that an iPhone can establish a connection with a corresponding device via app or directly via WLAN..
1st step:
 Start the WLAN function on the device you want to connect to . This can be a digital camera or a printer or some other device. The example is a Fujifilm digital camera with WLAN functionality.
 2nd step:
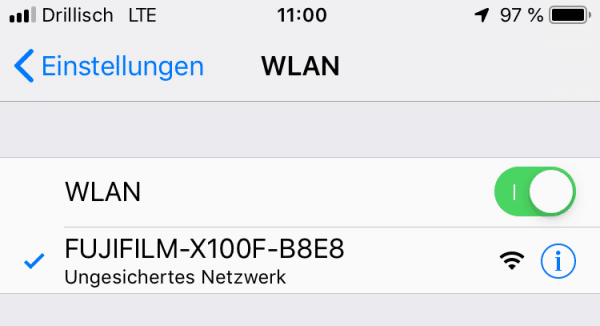 Then connect the iPhone to the device's hotspot . To do this, you have to disconnect the current WiFi connection : As long as you are connected to the end device, you therefore have no internet, as iOS prioritizes WiFi connections.
 3rd step:
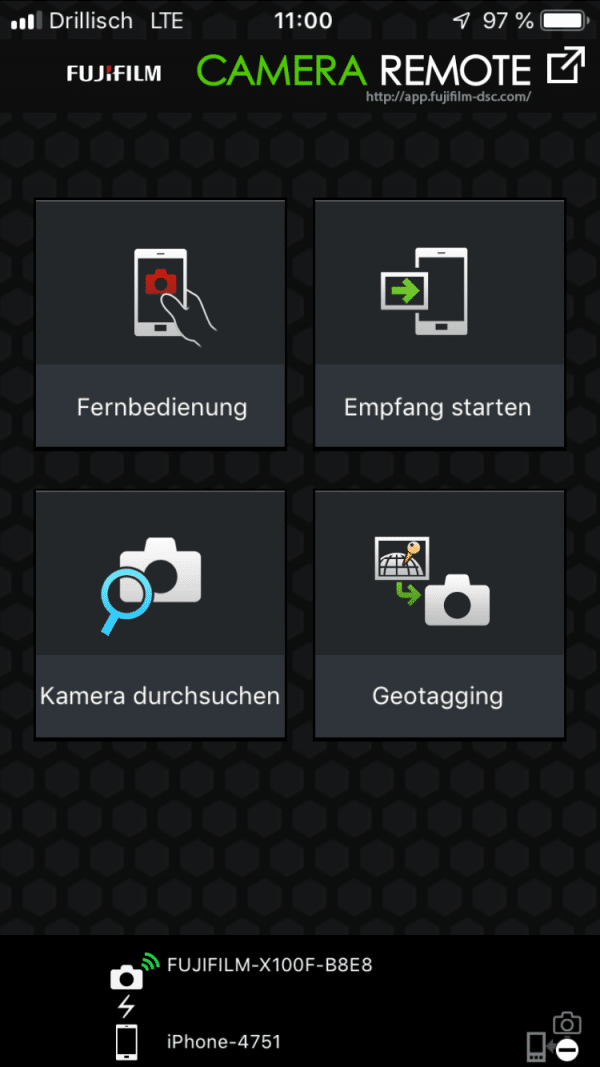 Now start the app that the manufacturer provides for iOS and start transferring data. You can then close the app, switch off WiFi on the device and reconnect to the regular WiFi with the iPhone.