With the "Live Photos" function you can not only capture the current moment as an image, but also the 1.5 seconds before and after the shutter release. This will give you a short video. How to activate the function on the iPhone, what you can do with the moving pictures and how to convert Live Photos back into an image, read in our tips + tricks.
How to enable Live Photos
Live Photos are enabled by default on newer iPhones. If this is not the case for you, read the following instructions to activate the function:
1st step:
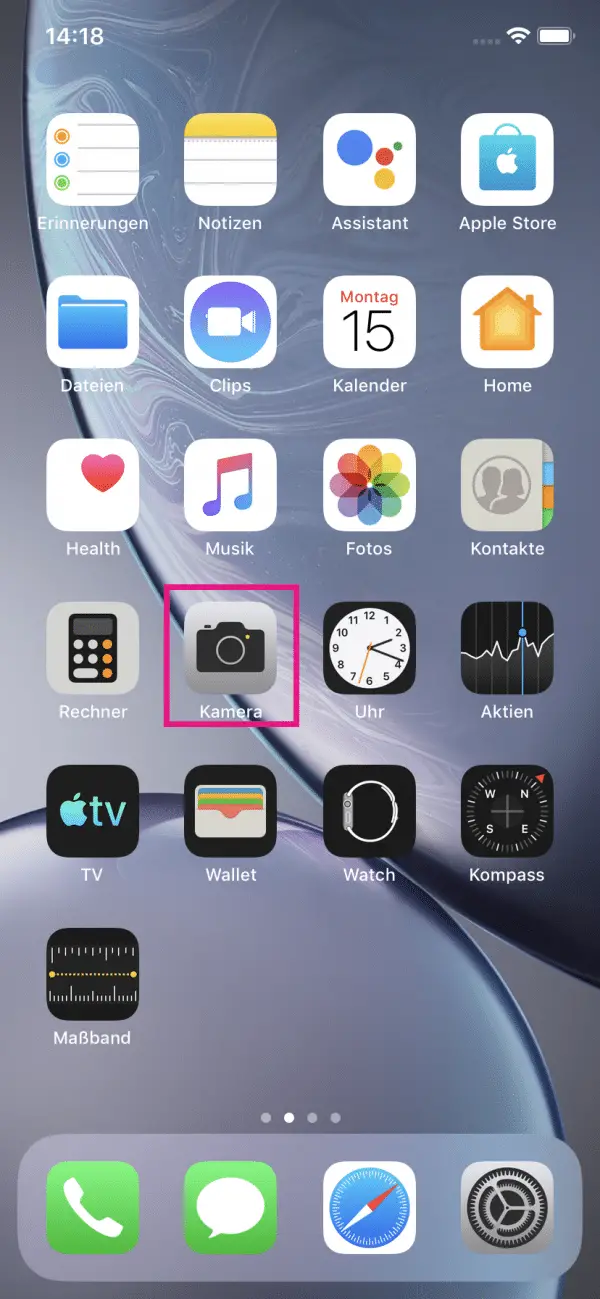 Open the camera app.
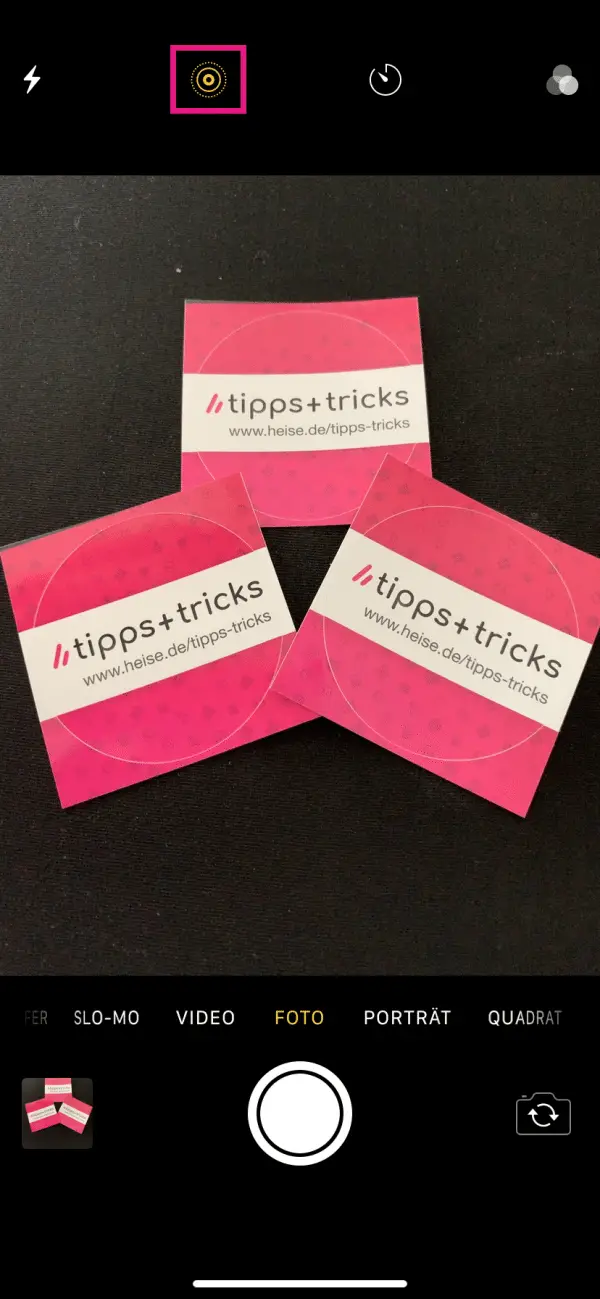
2nd step:
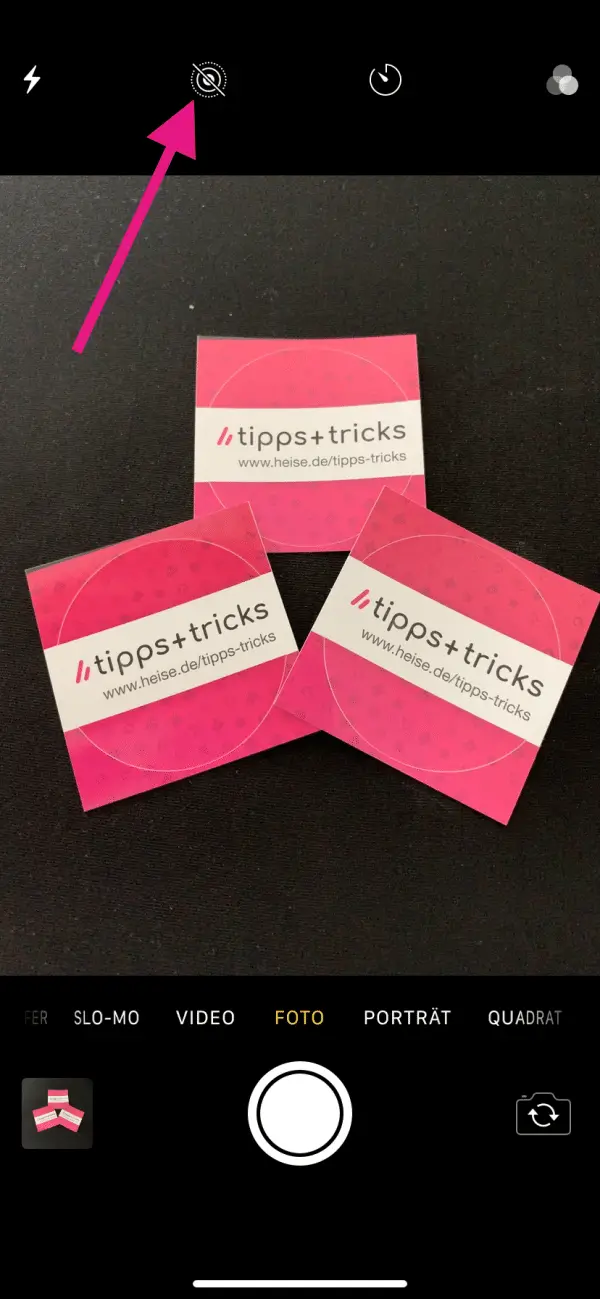 Make sure the camera mode is set to Photo . To activate Live Photos, tap on the circle symbol in the bar at the top . When activated, the icon turns yellow .
3rd step:
 Now tap the shutter button as usual and take a photo. A Live Photo is created automatically.
How to Play Live Photos
Like all other images, Live Photos can be found in the Photos app . To do this, simply navigate to the photo you just took. To play the Live Photo now, simply press and hold the image. A small video sequence is now played back, which contains the 1.5 seconds before and after the actual recording.
How to change the key photo
The key photo is the photo that is displayed by default. It shows the moment you pressed the shutter button. You can also set any other image from the short video as the new key photo. This is especially useful if you haven't caught the optimal moment for your picture..
1st step:
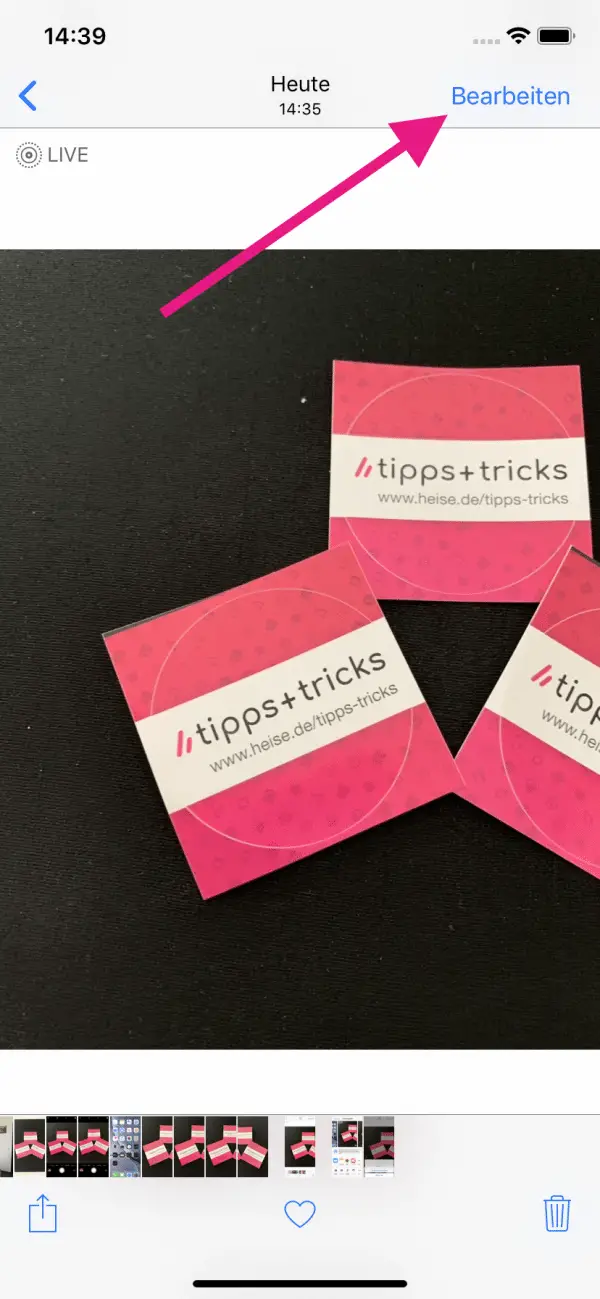 Open the Live Photo and tap " Edit " in the upper right corner .
2nd step:
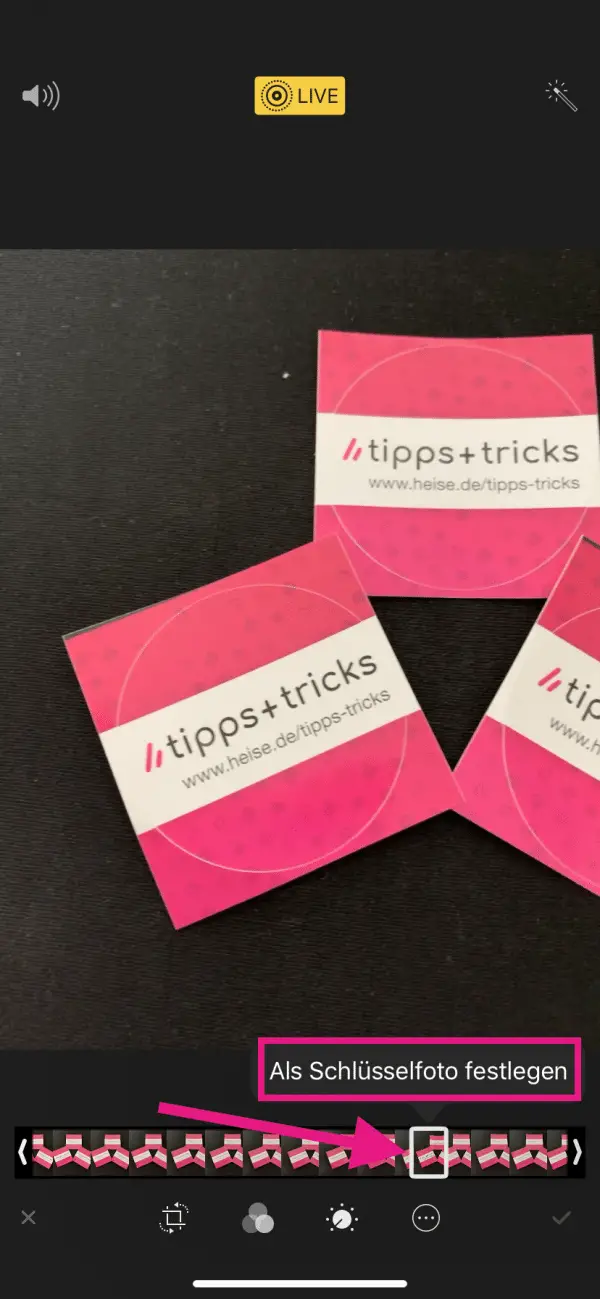 Move the slider to an image you like. Then tap on " Set as key photo ".
3rd step:
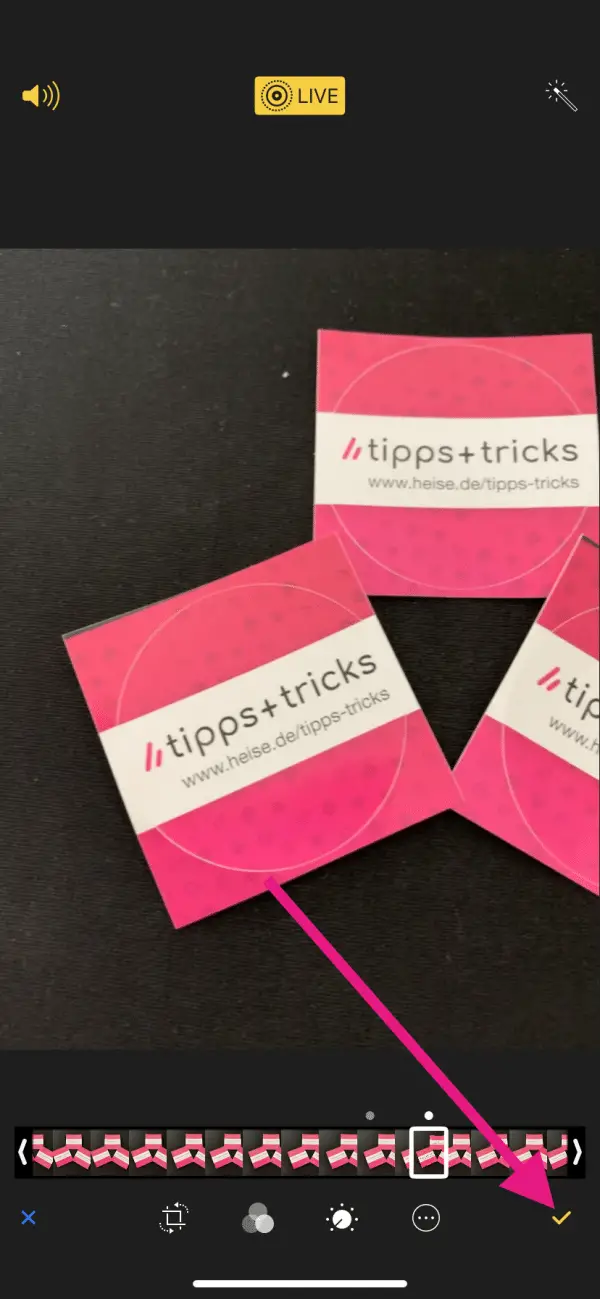 Confirm your selection with the yellow tick at the bottom right.
4th step:
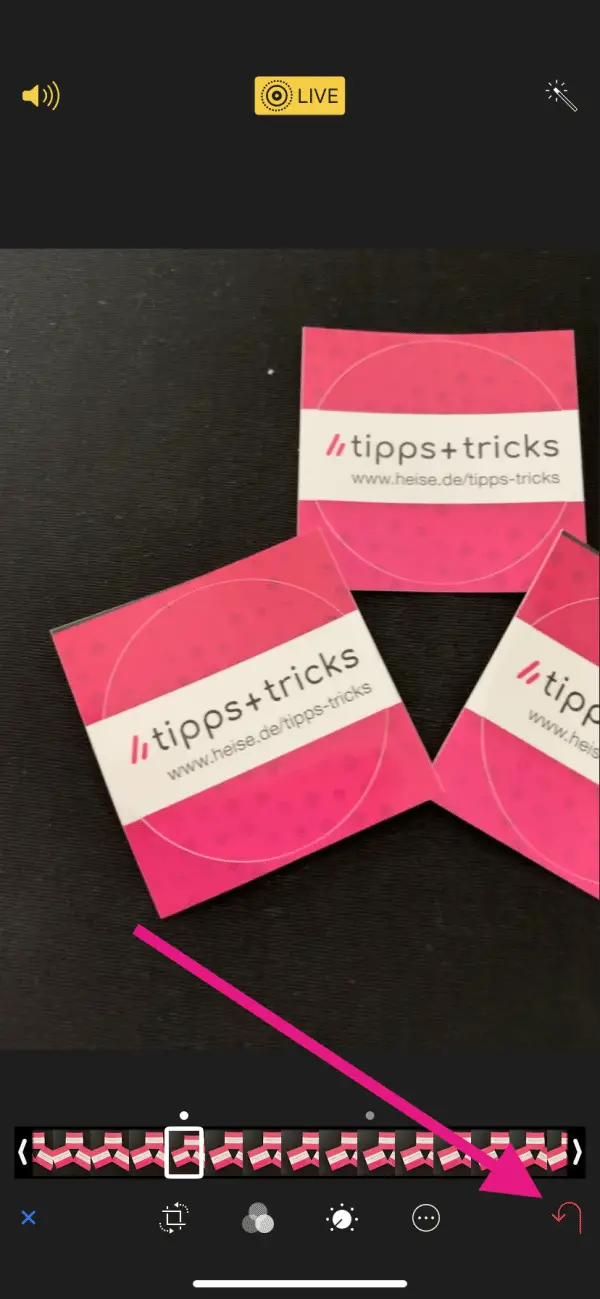 If you want to undo the process , open the Live Photo again via " Edit ". There is a red arrow at the bottom right . Tap on this and confirm the dialog to return to the initial key photo.
Convert iPhone Live Photos to still images
The feature introduced by Apple gives the pictures more life, but the pictures also consume more storage space. To save storage space, you can convert Live Photos into normal, non-moving images afterwards:
1st step:
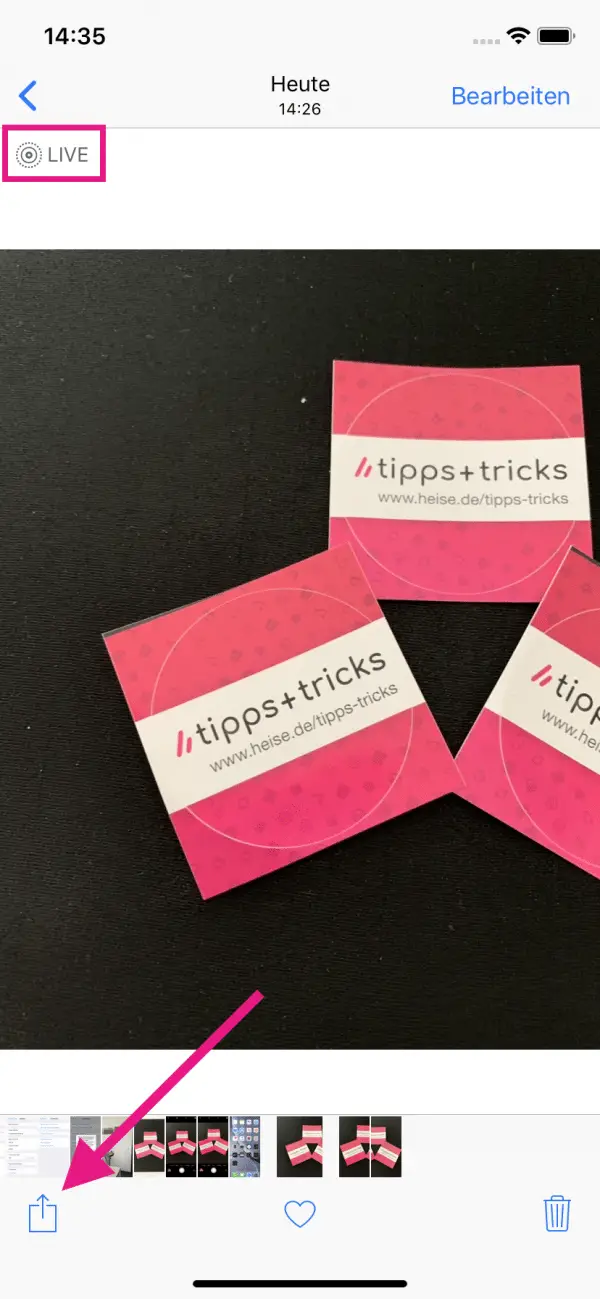 Open the Photos app and navigate to a Live Photo. You can tell whether an image is a Live Photo by the text " Live " in the top left . At the bottom, tap the " Share " icon.
2nd step:
 Now select " Duplicate " in the lower bar .
3rd step:
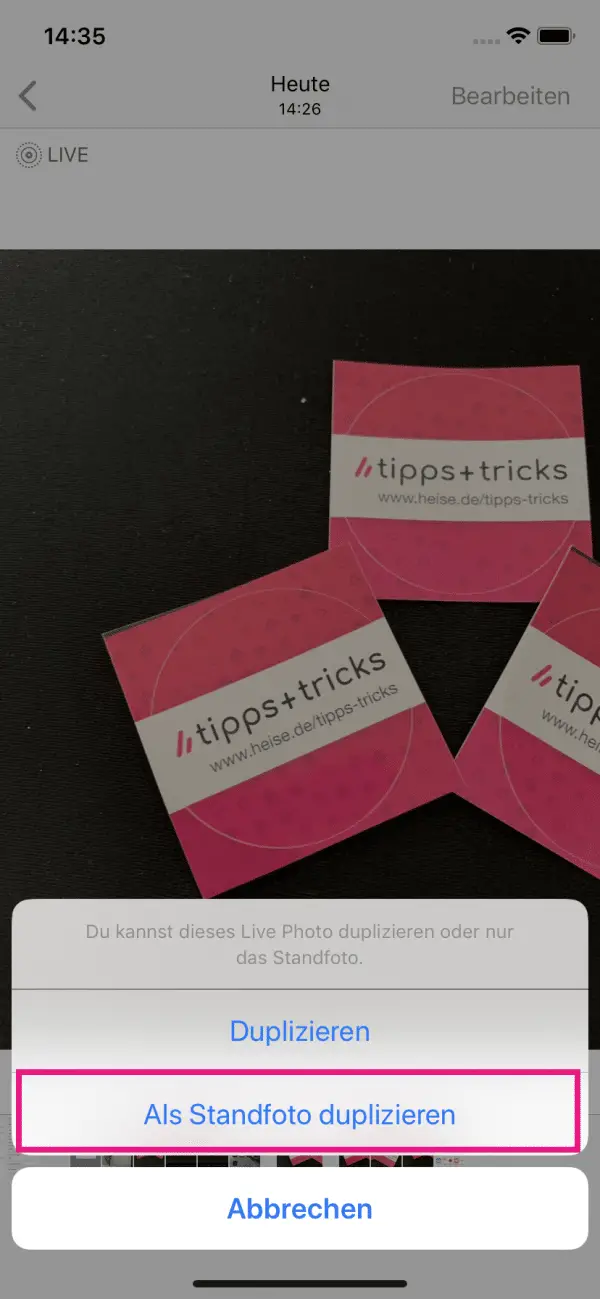 Now you can tap on " Duplicate as Still Photo ". This will reduce the size of the photo and allow you to delete the old Live Photo.
Send Live Photos via AirDrop
If you send the Live Photo to others as an image, it will not appear as a Live Photo on the other device. AirDrop offers a remedy here. To learn how to enable AirDrop, check out our article: Transfer Photos from iPhone to iPhone. If you share the Live Photo with other devices, it will also be sent as a moving image:
1st step:
 Open the Live Photo in the Photos app. Now tap on the share icon at the bottom left.
2nd step:
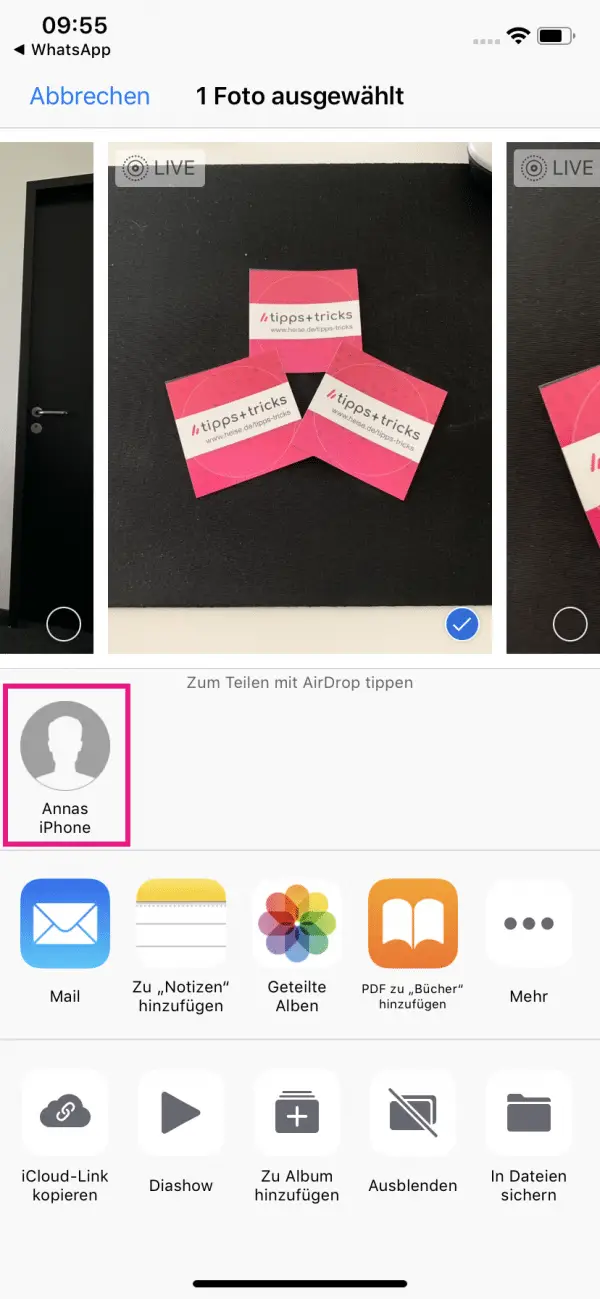 Select the recipient by clicking on the device name of the other iPhone .
3rd step:
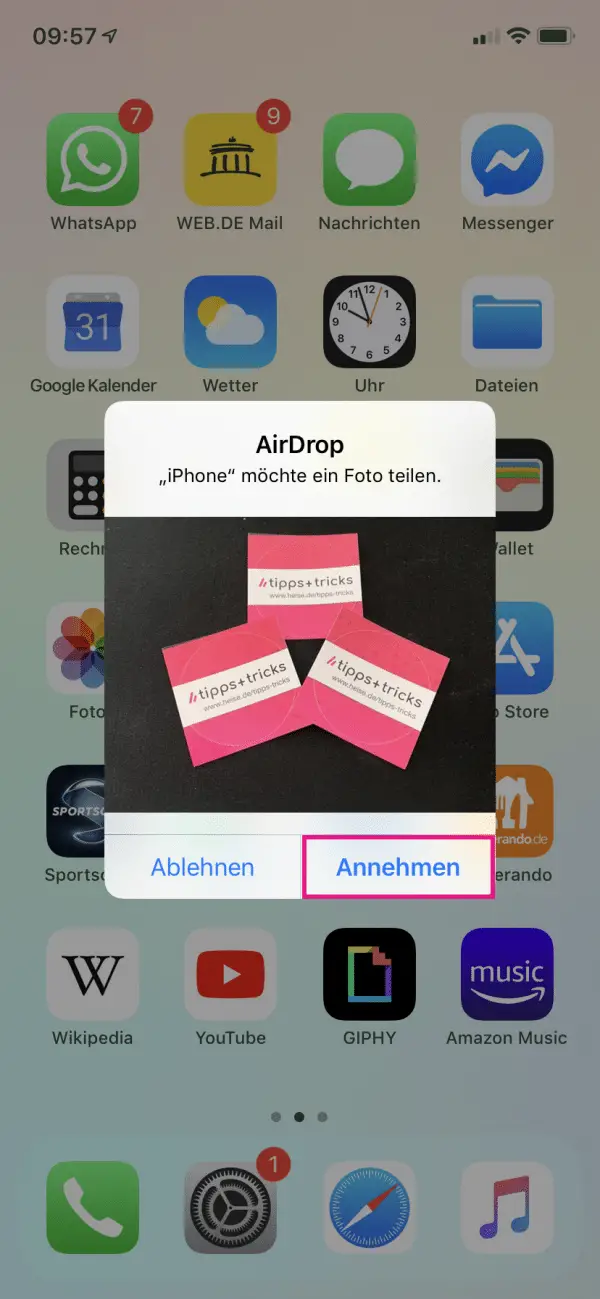 The iPhone receiving the picture must now tap on " Accept ". You have successfully shared the Live Photo with another iOS device.
Export Live Photo as Video
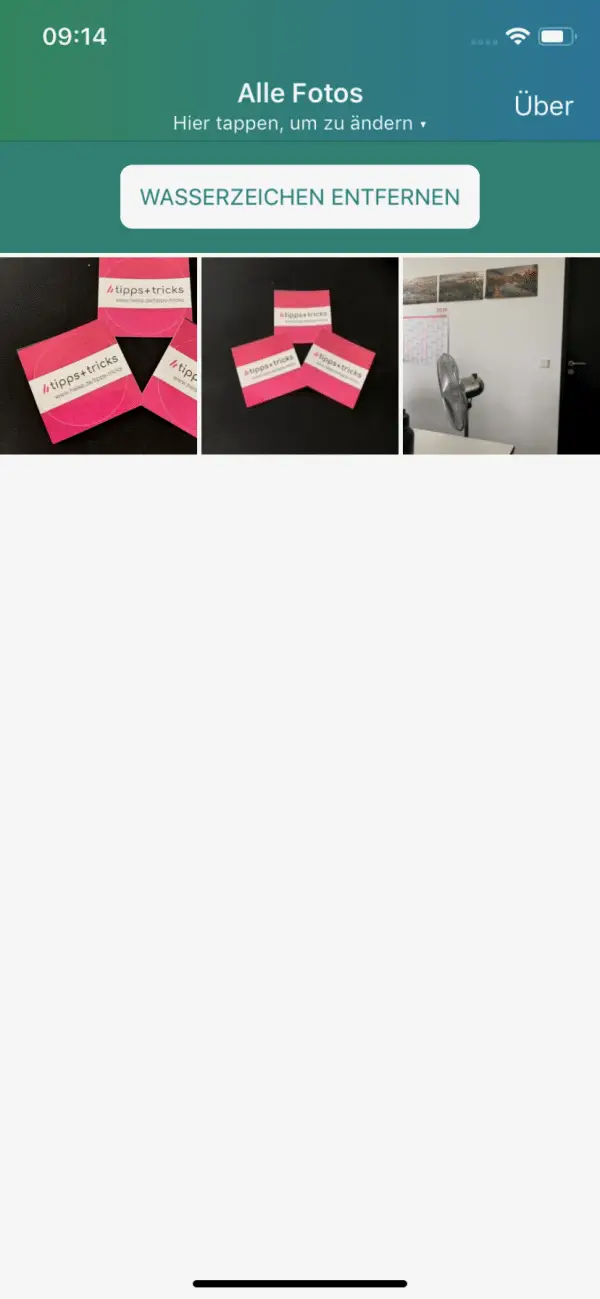
There are various apps that make it possible to convert a live photo into a video and then save or send it. We chose Lively :
1st step:
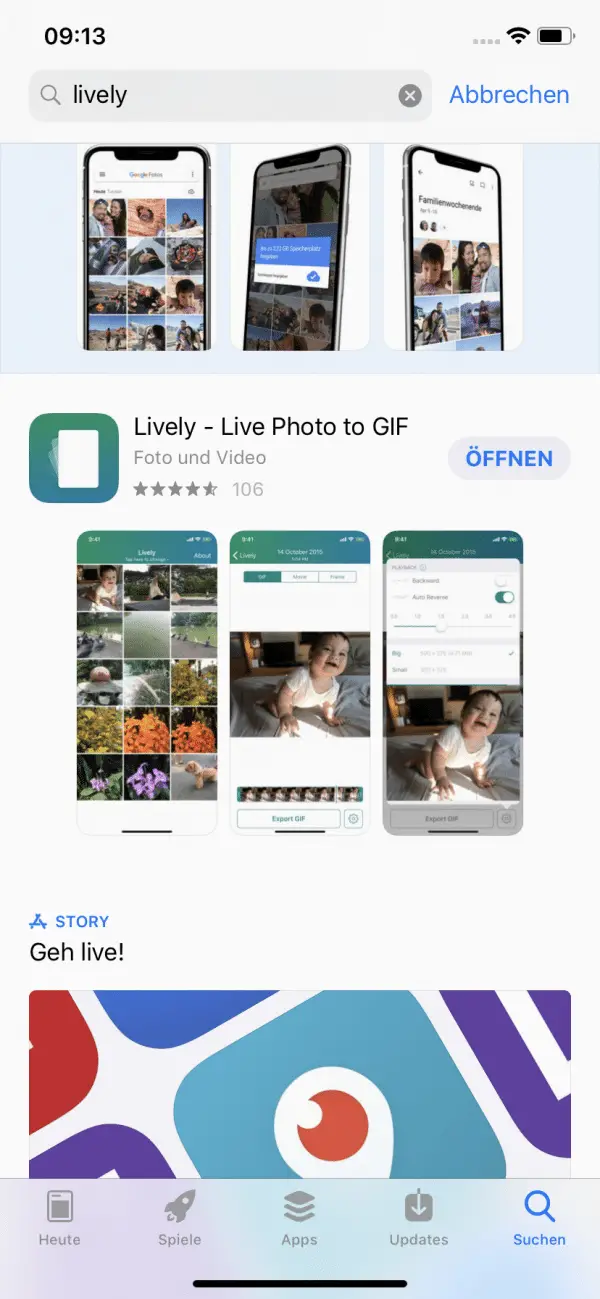 Open the App Store and download the “ Lively ” app for free.
 2nd step:
 Start the app and confirm the required permissions. Now select a Live Photo of your choice.
3rd step:
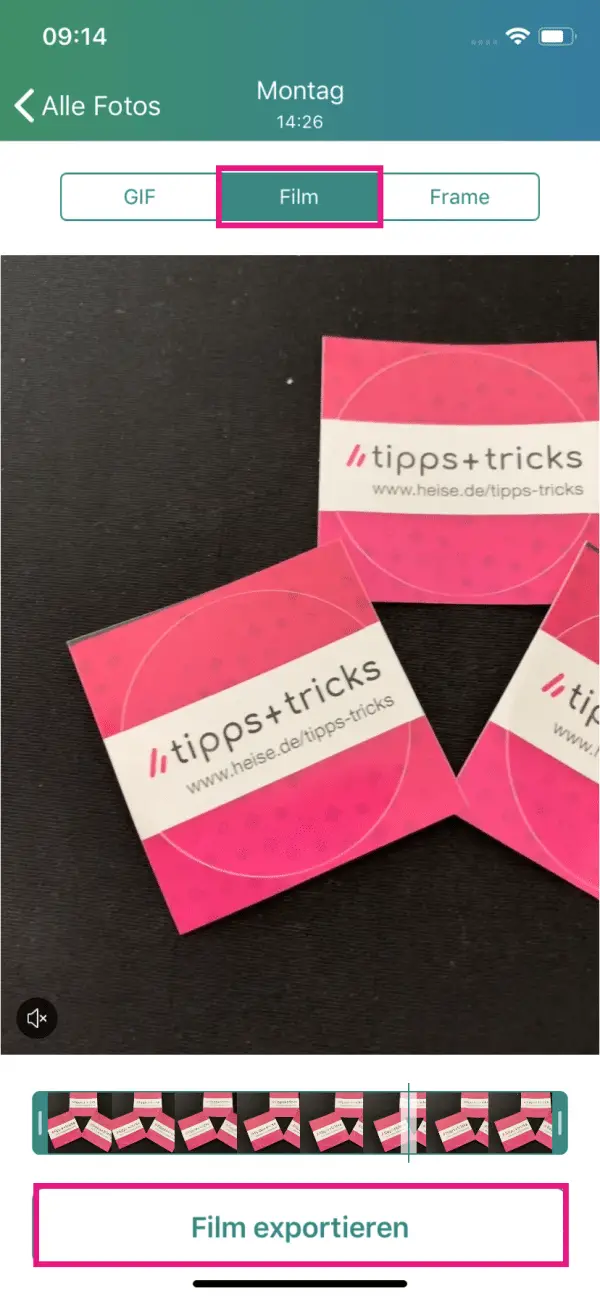 At the top, tap " Movie " to convert the Live Photo to video. Alternatively, you can also choose GIF, but here a watermark is integrated on the GIF. This can only be avoided with a payment option. However, there is no watermark on the video. Then select " Export Movie ".
4th step:
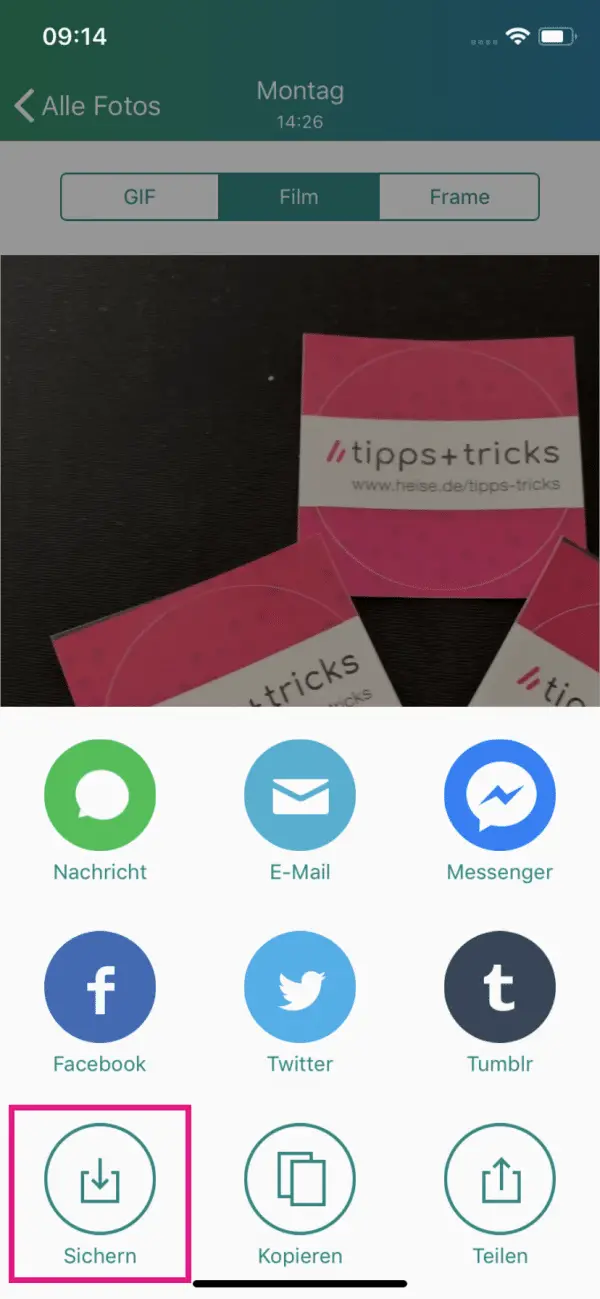 Tap one of the options. We choose " Save ". This will allow you to save the video in the Photos app.
Send Live Photo as GIF via WhatsApp
If you want to quickly share a Live Photo with your friends, WhatsApp offers the function of converting the Live Photo directly into a GIF. You can read how this works in the following:
1st step:
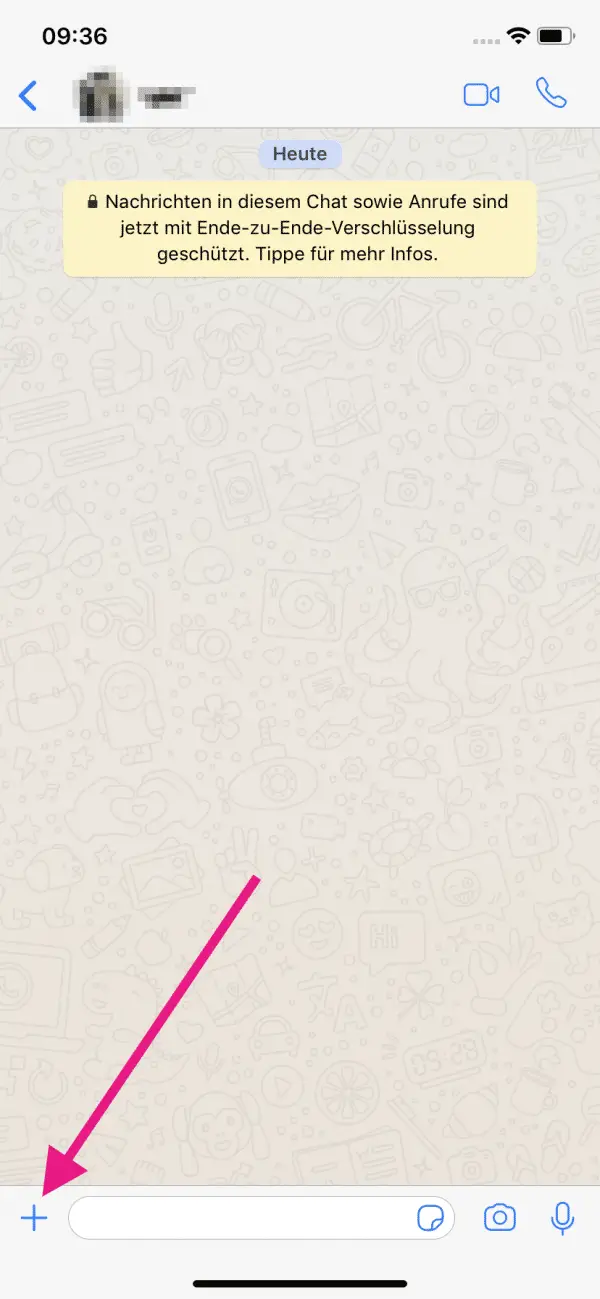 Open WhatsApp and tap the plus sign .
2nd step:
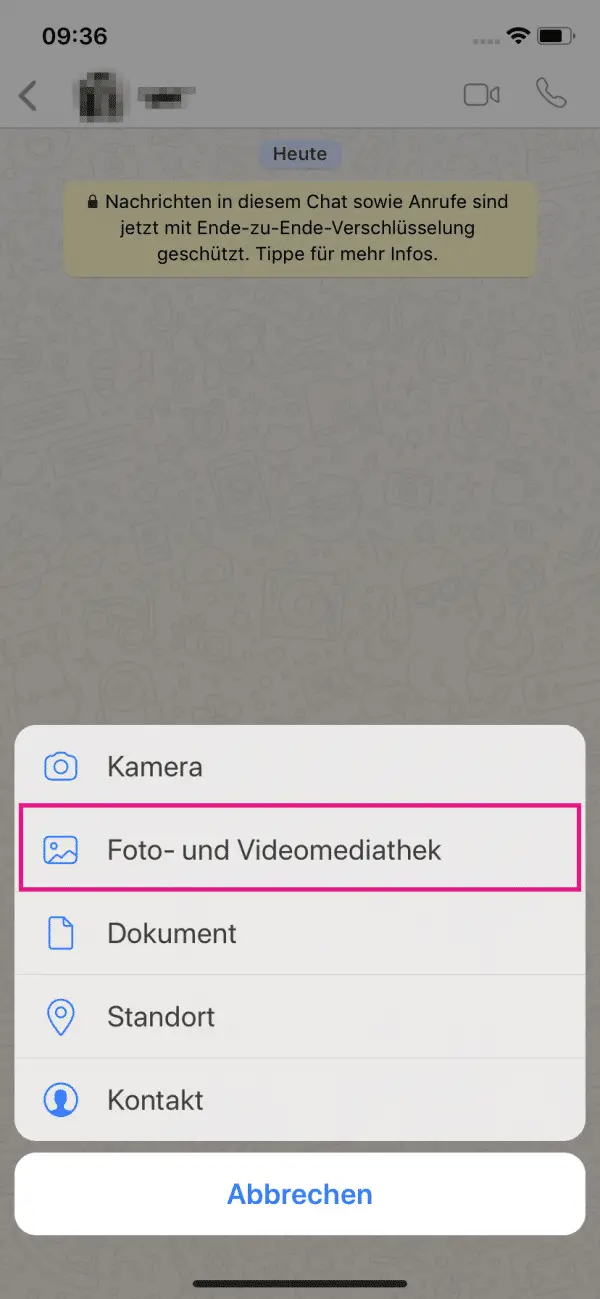 Select the Photo & Video Library option .
3rd step:
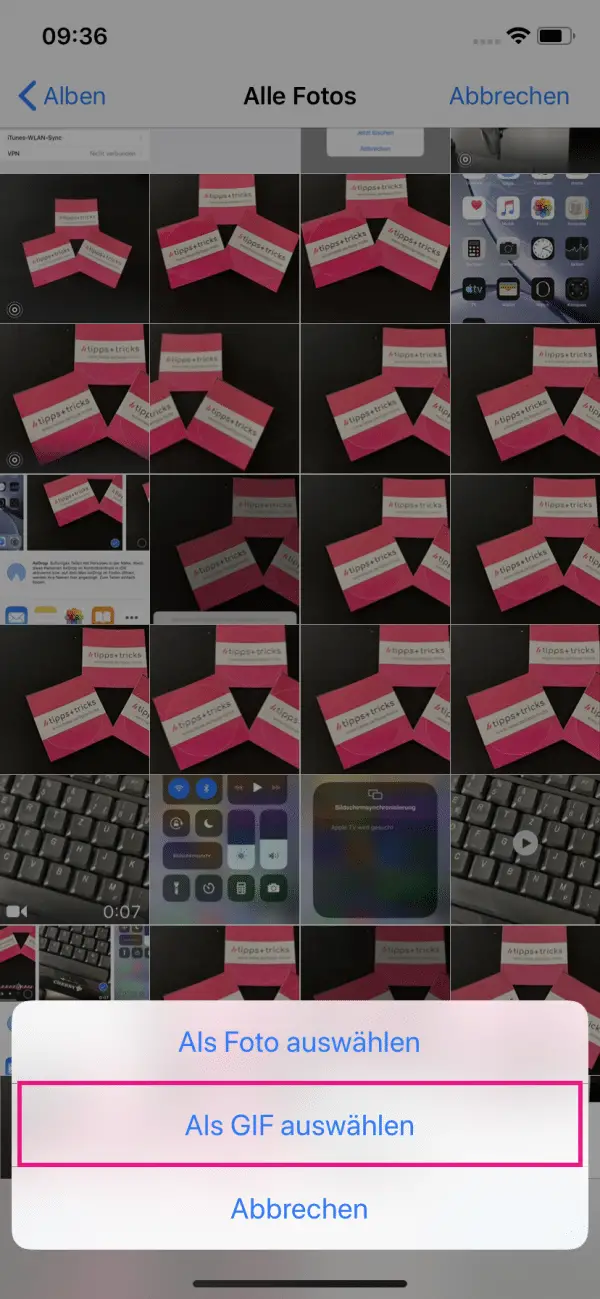 Now press and hold the Live Photo that you want to send. A menu then opens. Here tap on " Select as GIF ".
4th step:
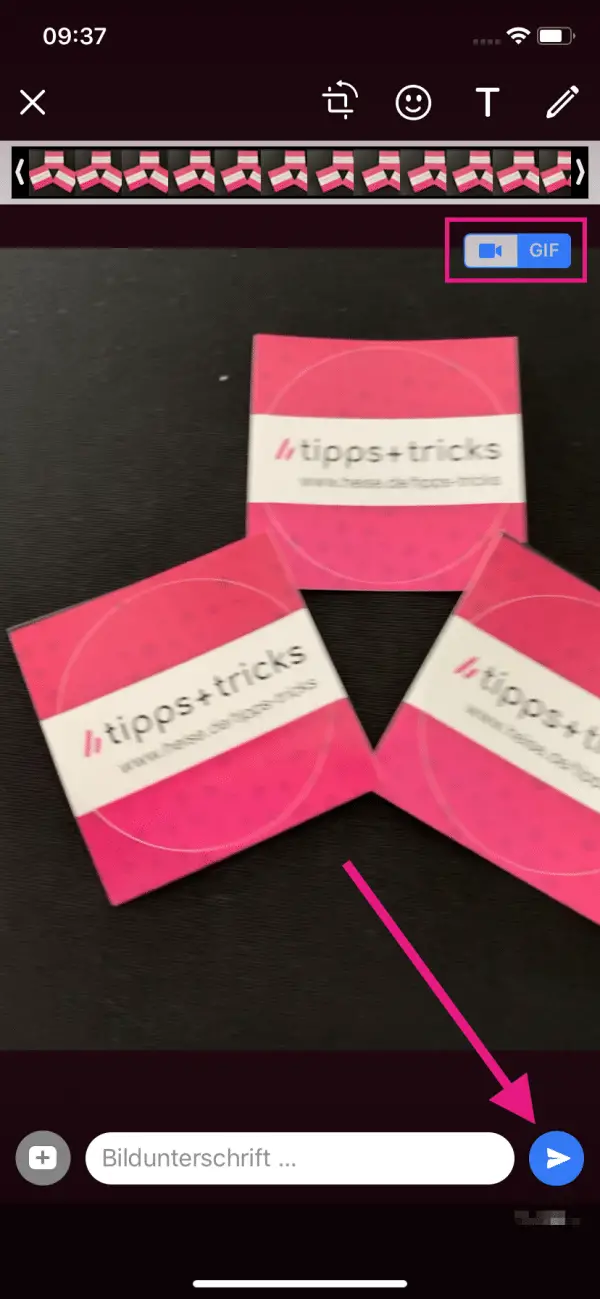 You can set in the top right whether you want to send the Live Photo as a video or GIF . To do this, simply tap on the corresponding symbol. You can also change or adapt the video sequence. Then tap the arrow in the lower right corner to send.