In Windows 10, you have the option of creating or joining a home network. You can then share folders, files, and even printers with others. A private network is particularly useful if you have several PCs at home.
How to set up a private network in Windows 10
Unfortunately, the feature for home networks has been removed with Windows 10 version 1803 . So you can neither create home networks nor join existing ones. However, you can set up and manage private networks with the help of workgroups. You must make the settings described below on each computer that you want to add to your private network. Follow our step-by-step instructions or take a look at the quick start guide .
1st step:
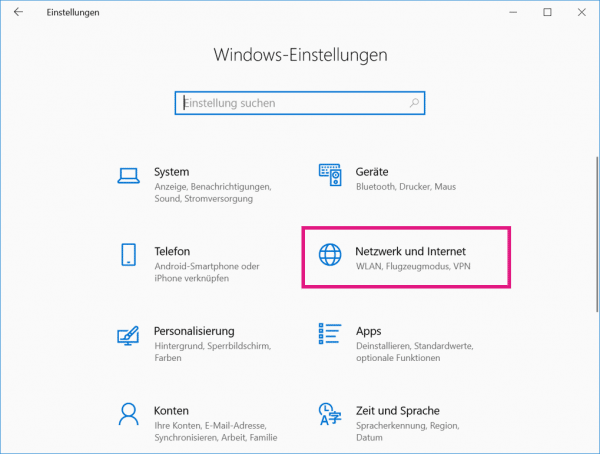 Open the Windows settings using the key combination [Windows] + [I] . Now click on " Network and Internet " in the new window .
 2nd step:
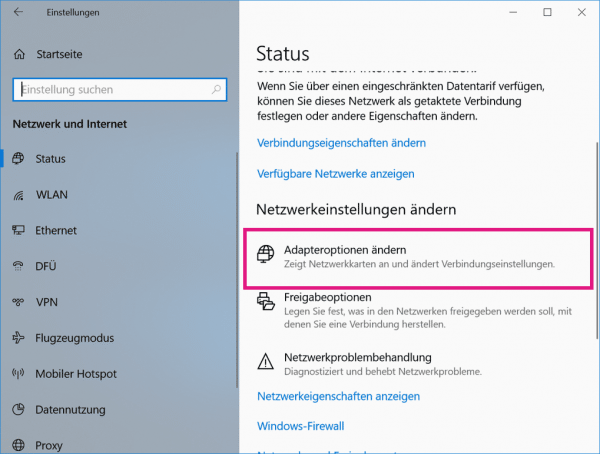 There scroll down to the heading " Change network settings " and then click on " Change adapter options ".
 3rd step:
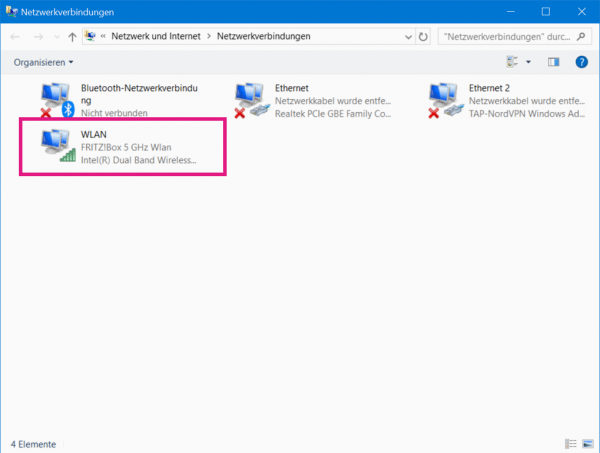 In the " Network Connections " window, double-click your current network connection. Usually this is the one with no red cross next to it.
 4th step:
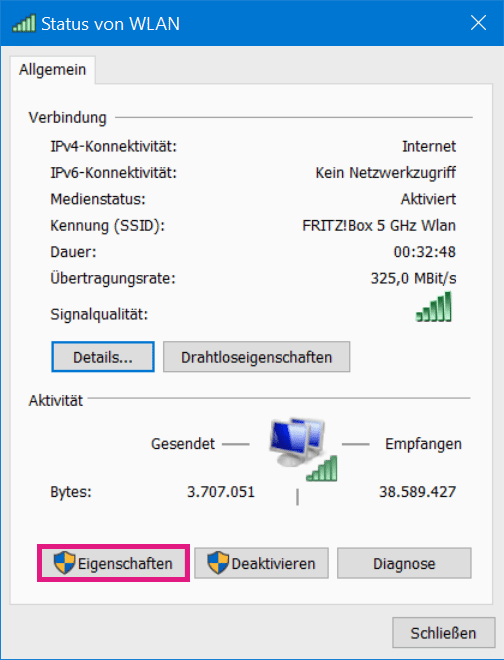 In the window that opens, click the " Properties " button . You may have to enter the administrator password.
 5th step:
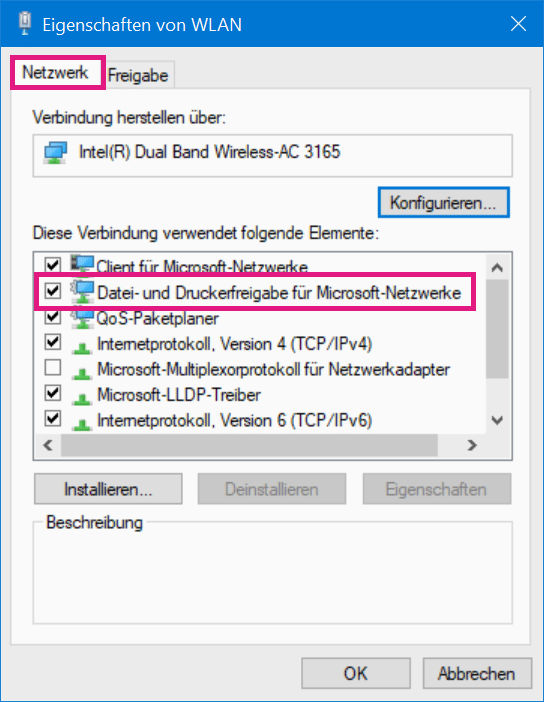 In the " Network " tab, look under " This connection uses the following elements: ". Check the option " File and printer sharing for Microsoft networks " there. Then click OK .
 6th step:
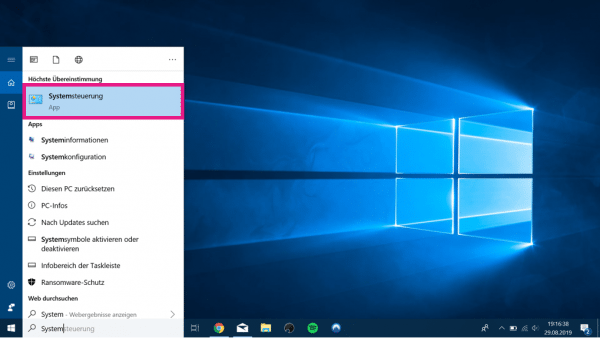 Now enter " Control Panel " in the Windows search bar and click on the result of the same name.
 7th step:
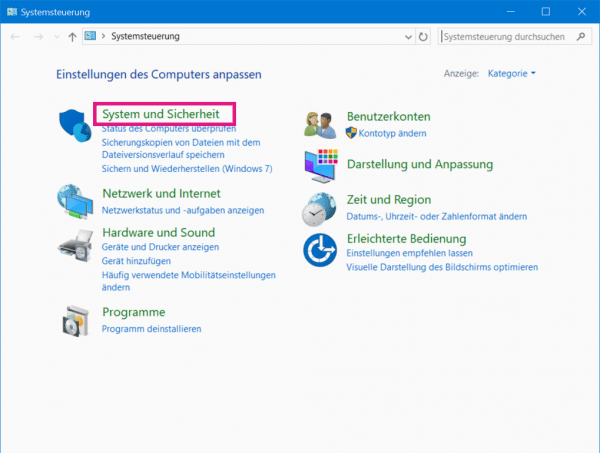 In the " Control Panel " window, click on the " System and Security " entry .
 8th step:
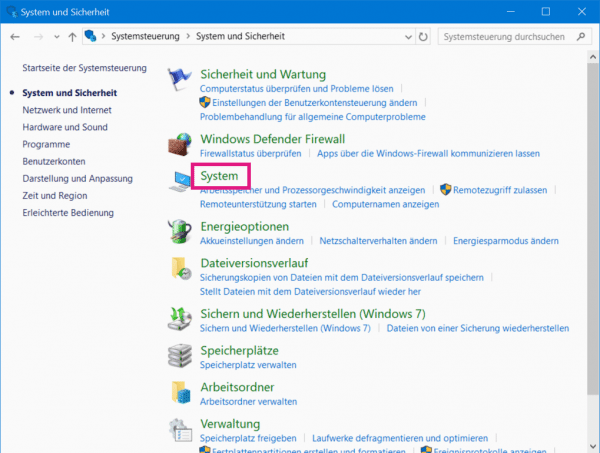 Then click on " System ".
 9th step:
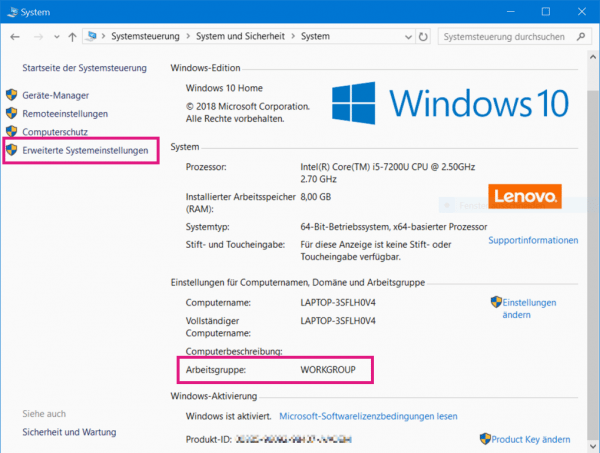 Under the category " Settings for computer name, domain and workgroup " you will find the item " Workgroup ". Next to it is the name of your workgroup, which is WORKGROUP by default. You need to make sure that all of the computers that you want to have on your network have the same workgroup name. If you would like to change the name , click on " Advanced system settings " on the left .
 10th step:
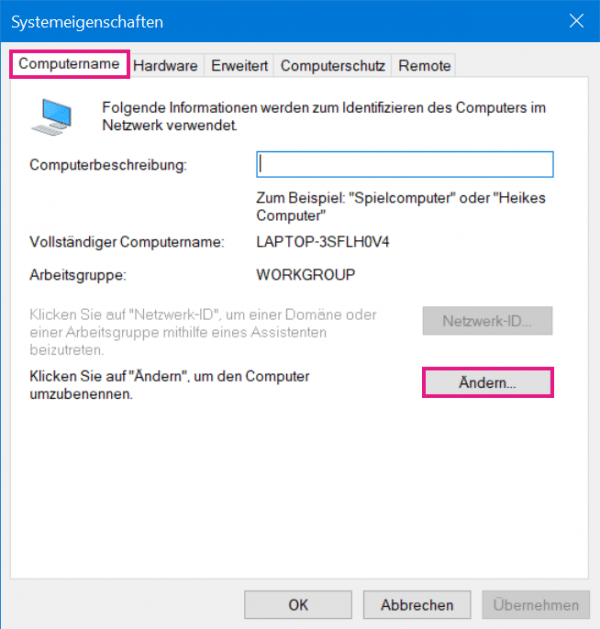 In the " Computer Name " tab, click on the " Change ... " button .
 11th step:
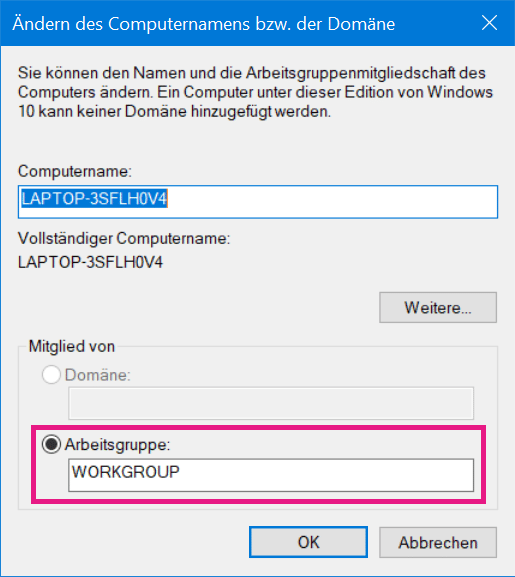 Now select the option " Workgroup " under " Member of " and enter a desired name for your workgroup. Then click on the " OK " button .
 Step 12:
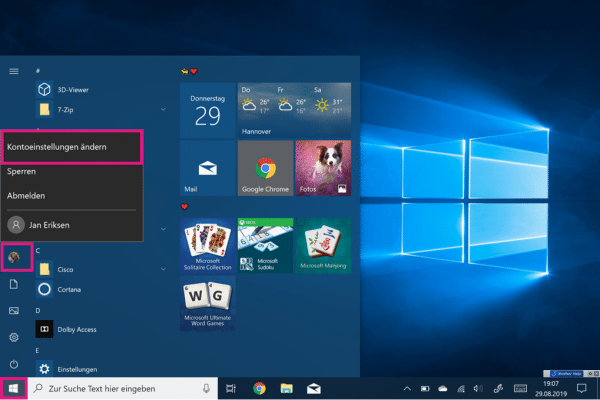 Now click on the Windows start symbol at the bottom left and then on your profile picture . Then select the " Change Account Settings " option .
 13th step:
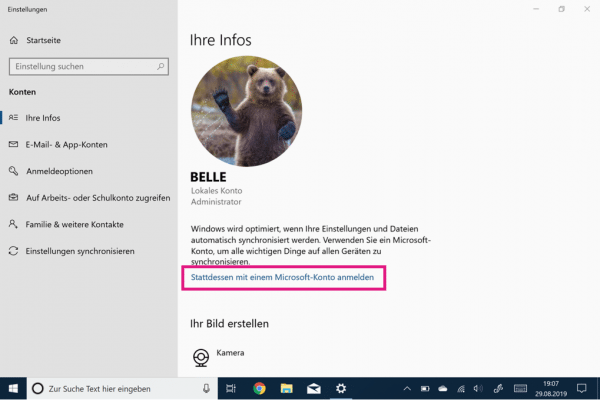 In the account settings you now have to make sure that you are logged in with your Microsoft account on every PC with which you want to use your network. If you don't have an existing account, create one here: https://account.microsoft.com/account . If you're not already signed in to your PC with your Microsoft account, click “ Sign in with a Microsoft account instead, ” then enter your account information.
 14th step:
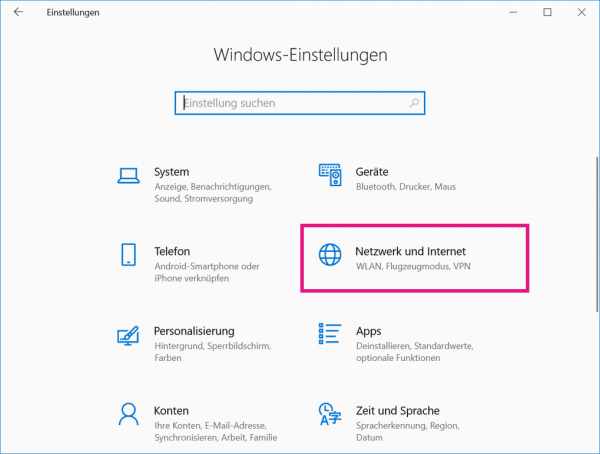 Now it's almost there! Open the Windows settings again using the key combination [Windows] + [I] and click on " Network and Internet ".
 15th step:
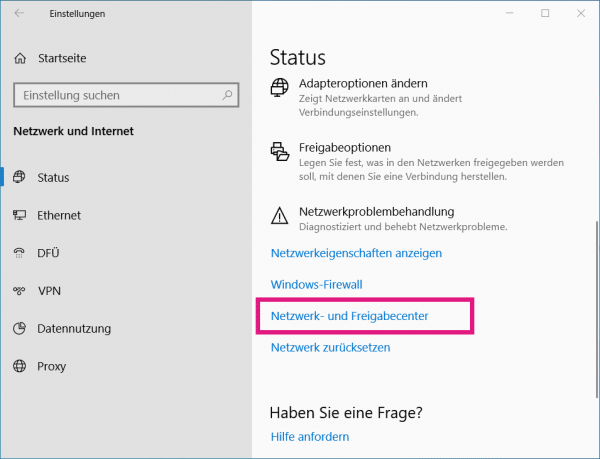 Scroll down and click on " Network and Sharing Center ".
 16th step:
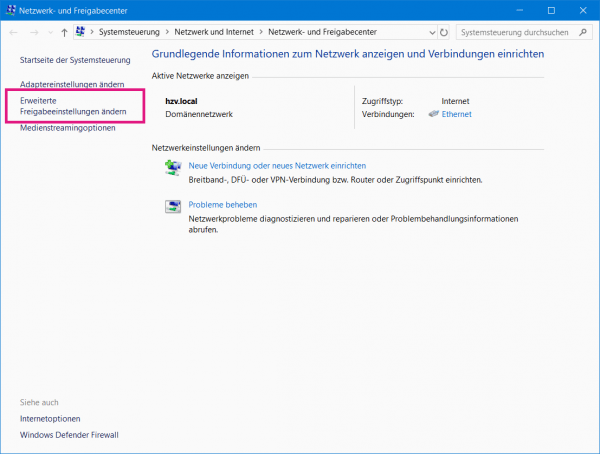 Now go to the setting " Change advanced sharing settings" on the left .
 17th step:
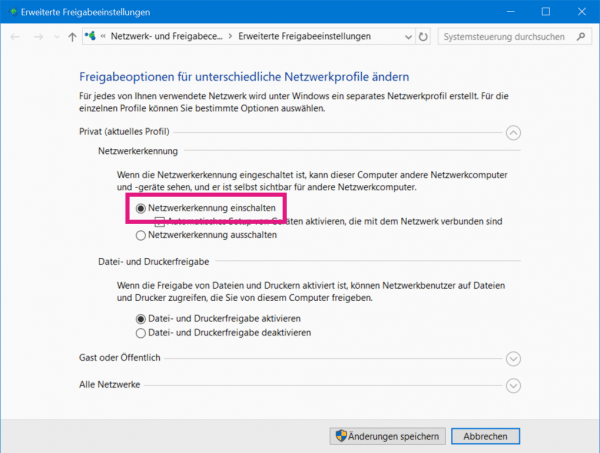 Under the heading " Network Discovery " select the option " Enable Network Discovery ". Then click on the " Save changes " button .
 18th step:
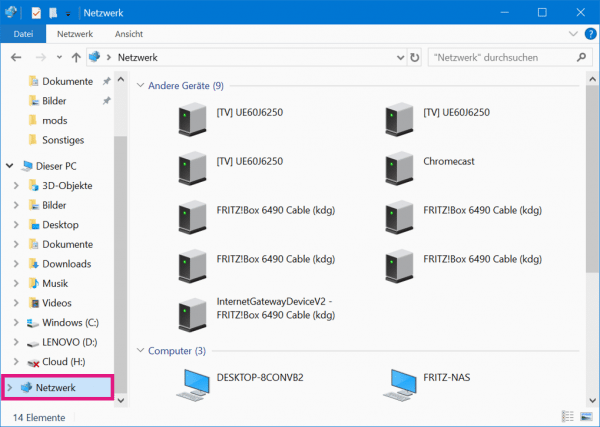 If you have now carried out all the steps on all PCs that you want to add to your network, they should now be able to see each other in your network and exchange data. Also make sure that the PCs are connected to the same network. In addition to the standard 2.4 GHz WLAN, some routers also offer 5.0 GHz. The computers on your network must all be connected to either 2.4 or 5.0. If all conditions are met, open Windows Explorer . Now select the " Network " folder on the left. You should then see all of the devices connected to your network. Do a double click on a desired computer, you can see its files.
 Quick guide: Setting up a private network in Windows 10
- Simultaneously press the [Windows] + [I] keys to open the Windows settings and click on " Network and Internet ".
- Now go to " Change adapter options ". Then double-click on your network connection , usually the one with no red cross next to it.
- Now click on " Properties " and then check the box for " File and printer sharing for Microsoft networks ". Then click OK .
- After you have done that, enter " Control Panel " in the Windows search bar and click on the corresponding search result.
- There you go to " System and Security " and then to " System ".
- Here you can now see the item " Workgroup " and its name behind it. All computers on your network must have the same workgroup name . To change the name, click on " Advanced system settings " in the upper left corner .
- In the " Computer Name " tab click on " Change ... ". Then select the option “ Workgroup ” under “ Member of ” and then enter a name of your choice. Then click OK .
- Now go to the Windows start symbol and then to your profile picture on the left. Then select " Change Account Settings ".
- Now make sure that you are signed in with your Microsoft account on all the PCs that you want to use your network with . If you don't have a Microsoft account, create one here: https://account.microsoft.com/account . If you're not signed in to your Microsoft account on your PC, click " Sign in with a Microsoft account instead " and sign in.
- Now open the Windows settings again with [Windows] + [I] and click on " Network and Internet ".
- Now go to " Network and Sharing Center " and then select " Change advanced sharing settings " on the left .
- Now select the option " Enable network discovery " and then click on " Save changes ".
- You have now successfully set up your private network, provided that you have carried out all of the steps mentioned on all PCs for your network. Also check that all computers have the same network connection . Then you can open Windows Explorer and open the " Network " folder on the left . There you will now see all devices in your network.