In this tipps + tricks article, we will show you how you can protect important Excel documents from unauthorized access - simply with the help of a password. You can choose whether you want to protect the entire file, just a single worksheet or your workbook with a password.
Password protection for Excel workbooks
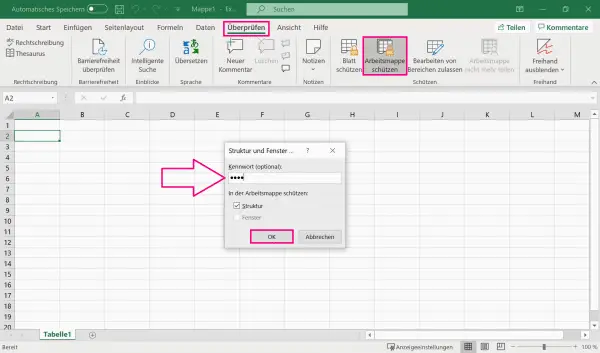
Protect your workbooks with a password so that no other user can see hidden sheets, add, move, delete, rename worksheets or change the structure of the workbook.
To do this, open your workbook in Excel and then go to the " Review " tab . Click there on " Protect workbook ". Then enter a password and click OK . To confirm, repeat entering the password and then click " OK " again..
In another article we will show you how you can remove the password in Excel.
Protect a single worksheet with a password
You can also protect your data in an Excel file at the worksheet level. This gives you control over how others can work on your worksheet and ensures that important data is not changed. Follow our step-by-step instructions or take a look at the quick start guide ..
Note: With this variant, no recovery is possible without a password , as Microsoft cannot retrieve the password.
1st step:
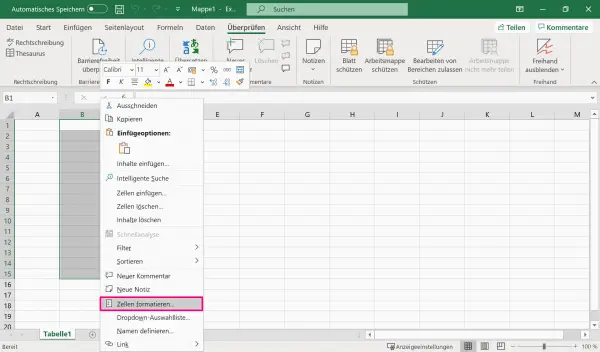 Open Excel and select the worksheet in your portfolio that you want to protect. Select all cells that continue to be processed by other persons may be . Make a right-click anywhere on the worksheet, and then go to " Format Cells ." Tip: You can select cells that are not consecutive by holding down the [Ctrl] key.
 2nd step:
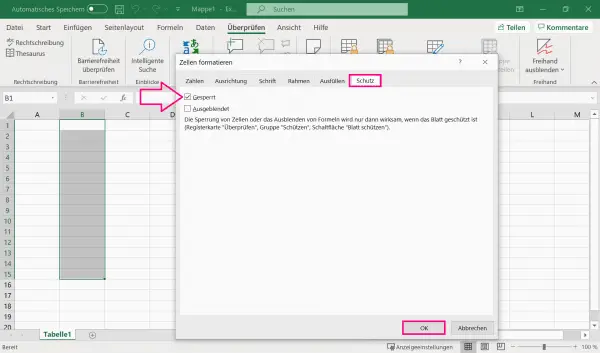 In the newly opened dialog box, switch to the " Protection " tab and remove the checkmark for " Locked ". Finally, click OK .
 3rd step:
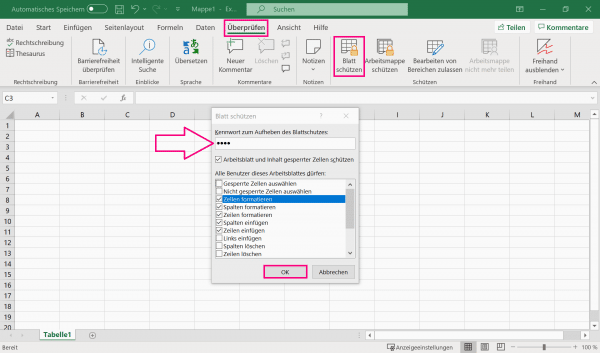 Go to the " Check " tab in the top menu bar and then to " Protect sheet ". A new dialog window then opens in which you can select from a list which authorizations the users of the worksheet should have. In addition, you can optionally enter a password in the free line " Password to remove sheet protection " in order to be able to remove the protection if necessary. Click OK , re-enter the password, and then click OK again .
 We explain here how you can remove the password in Excel.
Brief instructions: Protect individual worksheets with a password
- Select the cells in a worksheet in Excel that other users can continue to edit . Right- click the worksheet, then click Format Cells .
- Go to the " Protection " tab in the new window and remove the check mark in front of " Blocked ". Click " OK " to confirm .
- Now switch to the upper tab " Check " and click on " Protect sheet ". Select the permissions for the users from the list that appears and optionally enter a password for " Password to remove sheet protection ". Click once on " OK ", repeat the password entry and go finally back to " OK ".