The Telnet Client is a developer and administrator tool that you can use to manage and test network connectivity. However, the use of the client is deactivated by default in Windows 10. But that's not a problem, because activating Telnet is a snap.
What is telnet
Telnet is an Internet protocol that allows you to connect to another computer on your local network or on the Internet. In the era of mainframes, Telnet enabled researchers and professors to log into a university mainframe from any terminal in the building. This remote login saved them several hours of travel.
While Telnet pales in comparison to modern network technology, it was revolutionary in 1969 and paved the way for the World Wide Web in 1989. Over time, the insecure Telnet evolved into the newer SSH network protocol, which modern network administrators use to remotely manage Linux and Unix computers. SSH offers strong authentication and secures encrypted data communication between computers over an insecure network..
In contrast to Firefox or Google Chrome user interfaces, Telnet interfaces cannot be displayed. Telnet is all about typing on a keyboard. It does not contain any of the graphic elements that we expect from websites today. Telnet commands can be pretty cryptic, with example commands like z and prompt% fg. It is worth noting, however, that Telnet still works as it did decades ago, and Telnet clients are available for almost every platform.
How to enable Telnet in Windows 10
Follow our step-by-step instructions or take a look at the brief instructions ..
1st step:
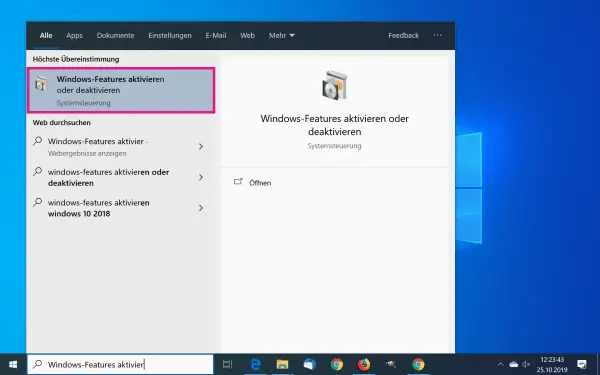 Enter " Activate or deactivate Windows features " in the Windows search bar and click on the entry of the same name.
 2nd step:
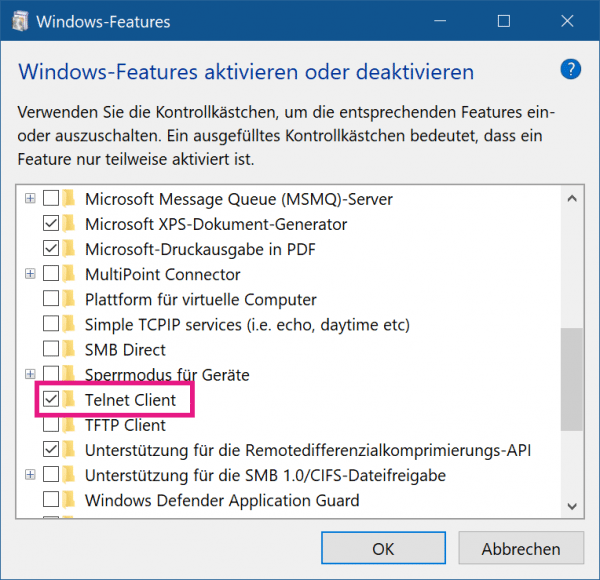 Now look for " Telnet Client " in the list and place a check mark in front of it. Then click OK . Telnet will then be installed.
 3rd step:
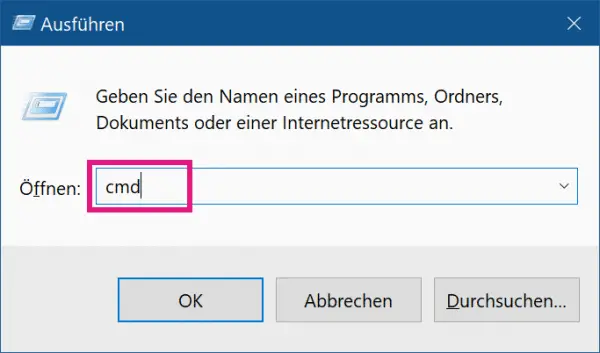 After installing the client, press the [Windows] + [R] keys simultaneously to open the Run window. Enter " cmd " there and press [Enter] .
 4th step:
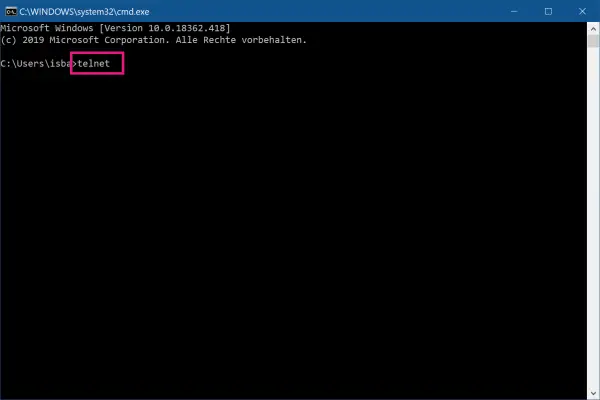 To start the Telnet client now, enter the command " telnet " and press [Enter] .
 5th step:
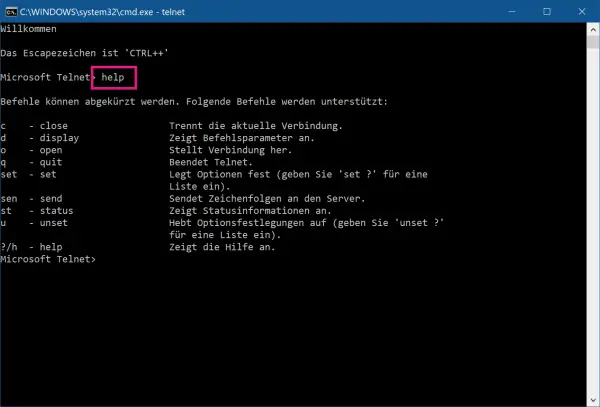 Now enter " help " to see a list of the possible commands.
 quick start Guide
- Type " turn Windows features on or off " in the Windows search bar and click the result of the same name.
- Now put a checkmark next to " Telnet Client " and click on " OK ". Telnet will now be installed.
- Then use the key combination [Windows] + [R], enter " cmd " in the new window and press [Enter] .
- To start the client now, enter " telnet " and press [Enter] . With " help " you will see a list of the possible commands for Telnet.