The standard desktop environment GNOME, which has been supplied since Ubuntu 17.10, does not have any on-board means for changing the appearance. In contrast to competing desktop environments, additional programs must be installed for this. In these tips + tricks we show you which programs you need as a user and how other themes are installed.
Install GNOME optimizations for using themes
In order to be able to adapt the surface of the GNOME desktop, you need the so-called "GNOME tweaks" or "GNOME optimizations". There are two ways to install this on your Ubuntu computer: via the graphical user interface and Ubuntu software or via the terminal .
Install GNOME optimizations through Ubuntu software
1st step:
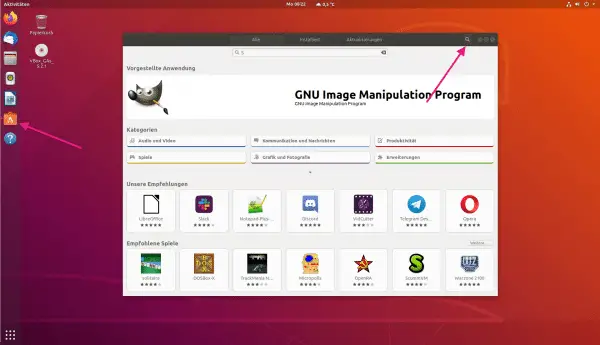 Click in the panel on the left on " Ubuntu Software " and in the window that opens on the magnifying glass symbol to go to the search.
 2nd step:
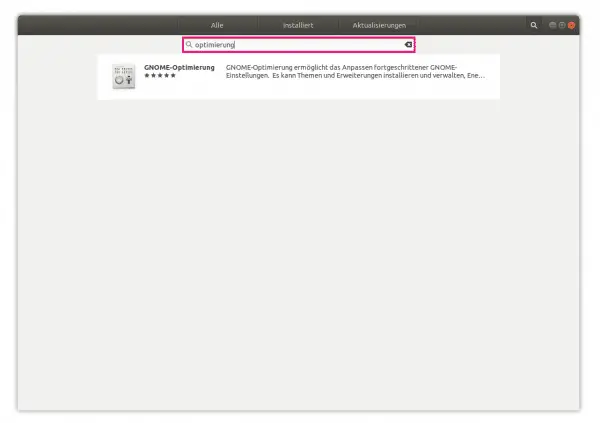 Search for " Optimization " and select the " GNOME Optimization " entry .
 3rd step:
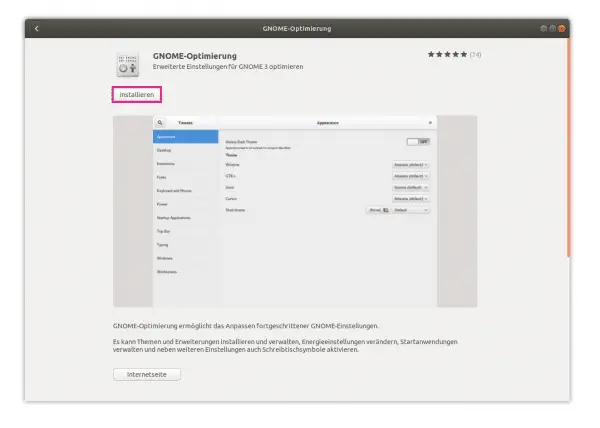 Click on " Install " and enter your user password when prompted. The optimizations will now be installed on your Ubuntu system.
Install GNOME optimizations via the terminal
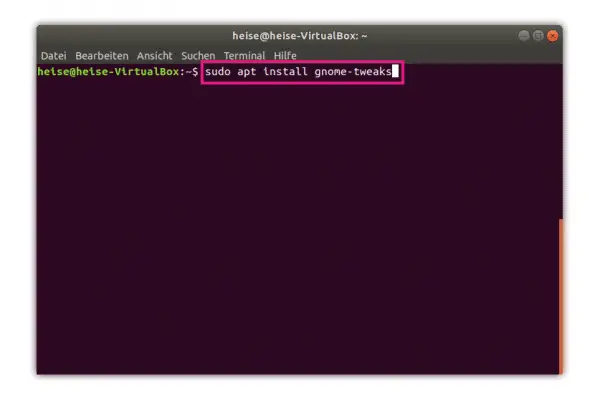
The second way via the terminal works entirely without a GUI and is often preferred by many users. To do this, simply open a terminal as usual using the search function or the key combination [Alt] + [Ctrl] + [T] . Then enter the following command: Then type in your password and click on [Enter] . The GNOME tweaks will be installed and added to Ubuntu.
sudo apt install gnome-tweaks
Use GNOME optimizations
In our step-by-step guide and the quick start guide , we explain how you can use the GNOME optimizations to adapt and change themes. We'll also go into how you can install a missing package to fix a bug..
1st step:
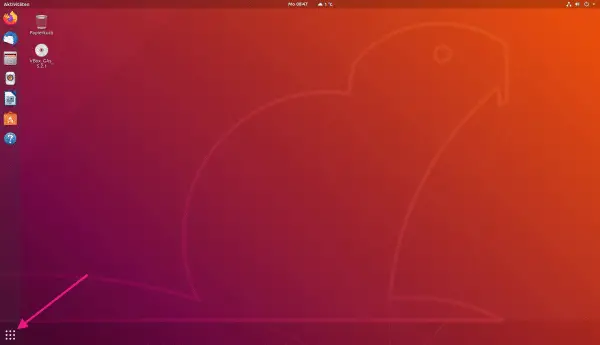 First navigate to the applications , which you can either access by clicking the button at the bottom left or using the [Super] button . This is usually the [Win] key on your keyboard.
 2nd step:
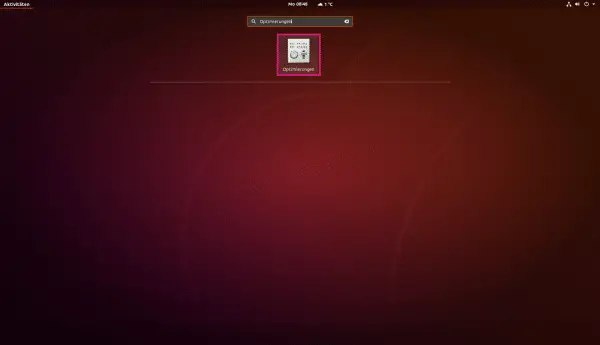 Enter " optimizations " in the search and click on the result.
 3rd step:
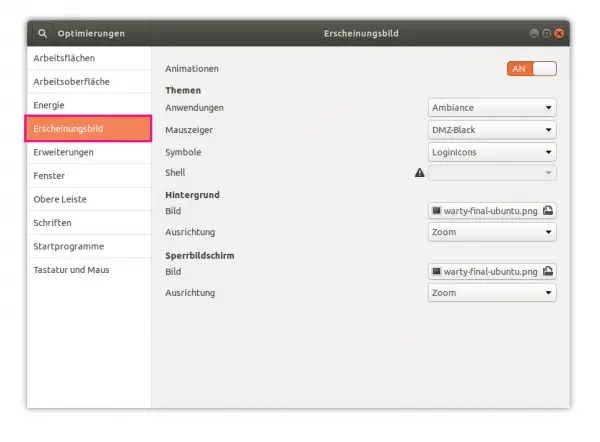 In the menu on the left select " Appearance ". Here under " Themes " you have the option of changing the appearance of your desktop as a user. To do this, simply open the selection menus next to Applications, Mouse Pointers, Icons or Shell and select a topic that you like. You may see a triangle next to the Shell option. This means that the extension is not activated here. The next step is to learn how to fix this problem.
 4th step:
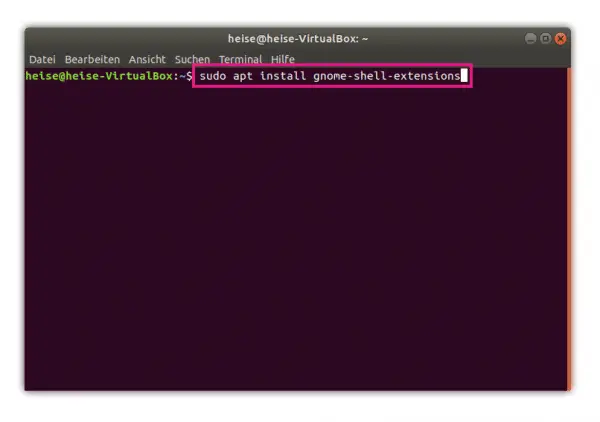 Open a terminal again via [Alt] + [Ctrl] + [T] and enter the command " sudo apt install gnome-shell-extensions ". Then enter your user password and press [Enter] . So that the shell extensions are now also displayed in the GNOME optimizations, log out and log in again or perform a restart.
 5th step:
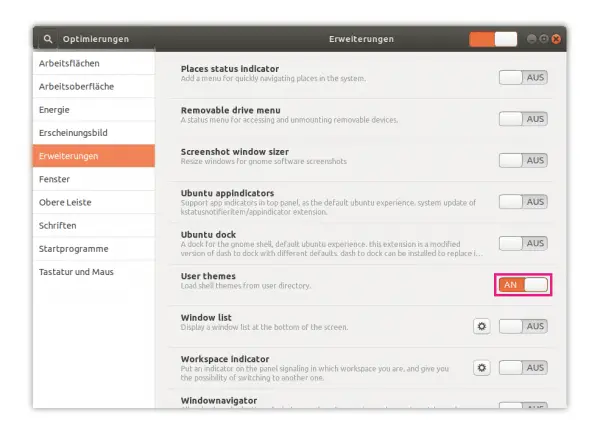 Now open the optimizations again and click on " Extensions ". Here you look for the entry " User themes " and activate it by setting the switch to " ON ". To finally activate the function, call up the optimizations again. The triangle should now be gone and the shell theme can now also be adjusted.
 Install additional GNOME themes
A popular resource for GNOME themes is gnome-look.org . Go to the page, choose a theme and install it. You can find out exactly how this works in the following step-by-step instructions or take a look at the brief instructions .
1st step:
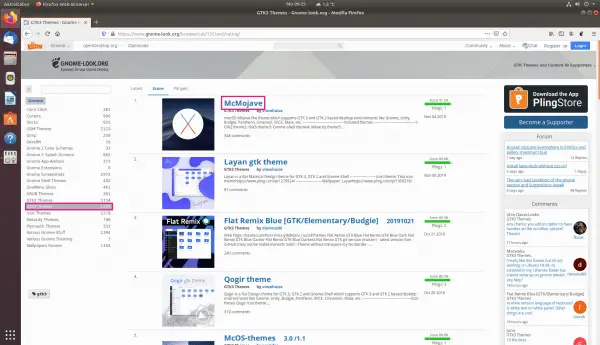
Go to the website mentioned and navigate the menu to find the customization you want to make. We select " GTK3 Themes" and sort them according to popularity using " Score ". After that, click on the theme that you want to install. We choose " McMojave " to simulate our desktop like that of macOS Mojave..
2nd step:
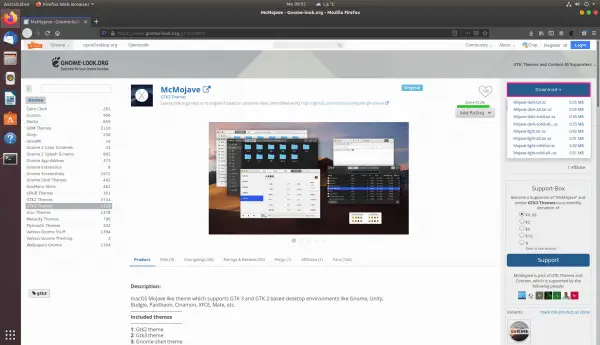
The next step in the installation is to download the theme. Click on " Download " and select one of the possible variants. The files are available for download as a tar archive, a so-called tarball. In the Linux world this is basically nothing more than a zip archive under Windows. The tarball will now be downloaded and saved in ~ / Downloads by default .
Step 3:
Open a terminal again and enter the following commands: Use this to navigate to the Downloads folder. ⟶ Extracts the compressed tarball. Of course, replace "Mojave-dark" with the theme you downloaded. ⟶ Creates a hidden " themes " folder in the root directory so that the theme can also be found by the GNOME optimizations. ⟶ Moves the theme to the " .themes " folder . Now just open the GNOME optimizations and select the new theme. The target folder for downloaded icons is " ~ / .icons ", which you can also recreate in the same way.
cd ~\Downloads ⟶
tar xvf Mojave-dark.tar.xz
mkdir -p ~/.themes
mv Mojave-dark ~/.themes
Quick Start Guide: Using GNOME Optimizations
- Navigate to the applications.
- Find " tweaks " and open the application.
- Select " Appearance " in the menu on the left and change the theme below " Themes ".
- If you also want to activate the shell extensions, then open a terminal again via [Alt] + [Ctrl] + [T] and enter the command "
sudo apt install gnome-shell-extensions ". - Log out and back in or restart .
- Open " Optimizations "> " Extensions "> " User themes " and set the switch to " ON ". Restart the " Optimizations " so that you can now also adjust the shell theme .
Quick Start Guide: Install Additional GNOME Themes
- Call gnome-look.org and select on the left side for. B. Select " GTK3 Themes " or any other category that you want to customize.
- When you've found a theme, click " Download ".
- The tar archive will be downloaded and saved in " ~ / Downloads " by default .
- Open a terminal and enter the following commands in sequence: , .
cd ~\Downloads, tar xvf THEME-NAME.tar.xz mkdir -p ~/.themes, mv THEME-NAME ~/.themes - The target folder for downloaded icons is " ~ / .icons ", which you can also recreate in the same way.