"I have a Google Slides presentation to do, how do I record a high quality Google Slides presentation? How do I make an audio recording in Google Slides? "
Google Slides is online collaboration software that has been designed for personal but also professional use, it allows you to create and edit a presentation with other people in real time. However, it should be noted that Google Slides is quite different from Microsoft PowerPoint, which offers a built-in recorder. So if you have to work on a Google Slides presentation, then you will need a specialized recorder to produce a video with or without Google Slides sound..
In order to better help you in recording a Google Slides presentation, we would like to introduce 2 recording tools that you may find useful. The first solution shown here is to record a Google Slides presentation with an easy-to-use screen recorder. The second solution is to use a Chrome extension to record Google Slides with audio. Now let's see how these tools can help you in recording a presentation.
Read also:
- 2 Ways to Add Narration to a PowerPoint Presentation [Update]
- How to turn PowerPoint presentation into video with sound and animation
1. How to add audio recording to Google Slides presentation with Screen Recorder
When we talk about high-quality recording of a Google Slides presentation, we think of the need to use a professional recording tool. FonePaw Screen Recorder is just the tool we would like to recommend to you here. With its help, you will be able to record a high-quality Google Slides presentation with microphone sound and / or webcam audio-video. So here is a list of those best features..
Free TrialFree Trial
Various recording modes for Google Slides
Use whatever mode you want to record a Google Slides presentation: “Video Recorder”, “Audio Recorder”, “Webcam Recorder”, etc.
Selecting the recording area
Record in full screen, a specific window, or a custom area of your Google Slides presentation..
Adjusting video quality and frame rate
Configure the video quality of your Google Slides presentation, from lowest to without quality loss, while adjusting the frame rate: 20 fps, 24 fps, 25 fps, 30 fps, 60 fps.
Various video formats available for Google Slides
Record and save your Google Slides presentation video as popular video format like MOV, MP4, M4V, GIF, etc. No need to search for a video converter tool to convert it to another format.
Supports a real-time edit panel
Edit your Google Slides presentation live: add annotations, draw shapes of all kinds and colors, etc. You will find many features in the edit panel.
Setting up a recording schedule
Easily schedule a recording with FonePaw Screen Recorder. Simply set up a start time and a stop time to record your presentation with peace of mind.
Compatibility included with Mac and Windows
The program is fully compatible with desktop computers and laptops running Windows 10/8/7 and macOS 10.9 to 10.15.
Step 1: Install and start FonePaw Screen Recorder
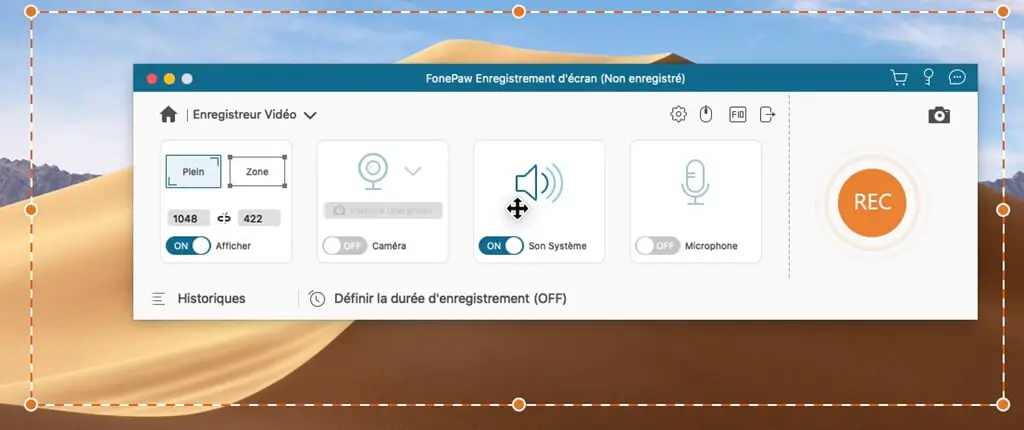
Download and install FonePaw Screen Recorder on your Windows or macOS computer. Start the software and you will see the interface shown in the image below. To start, click on "Video Recorder".
Free TrialFree Trial

Step 2: Select the recording area and configure the audio settings
As we already mentioned above, you can record any area you want, whether it is the entire screen or a specific area. To improve the recording of the Google Slides presentation, we recommend that you select a specific area by clicking the “Area” button. Since you'll also likely need narration in your Google Slides audio presentation, note that you have the option to turn the microphone on. If you need to record your Google Slides presentation with the webcam, then you can also enable the webcam in the settings.
Tip: To reduce the size of the video recording, we recommend that you use the following settings for the area to be recorded: 720p, 1280 × 720.

Step 3: Choose output settings and video quality
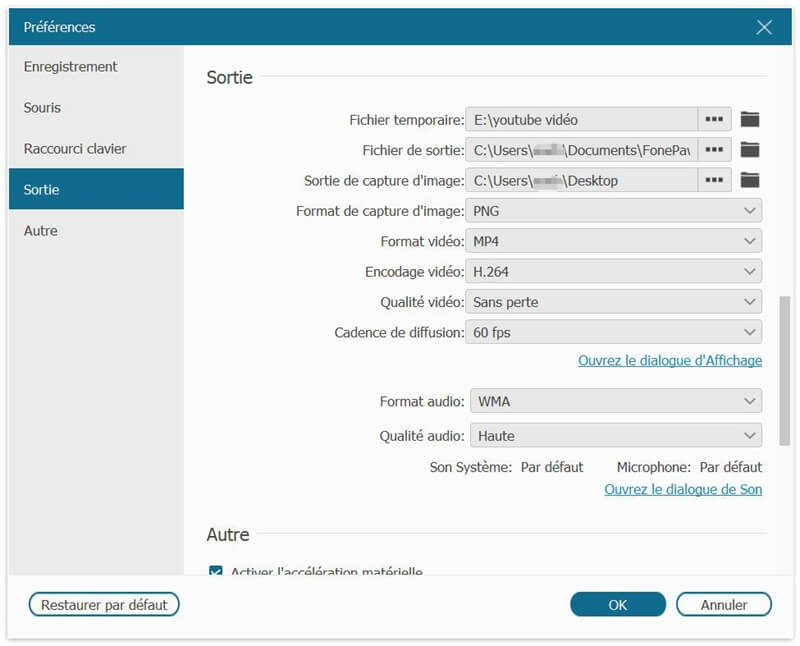
Click on the cog icon to enter "Preferences". Go to the "Output" section, to be able to choose the output format and location. There are various video formats available: on Mac, there are: MOV, MP4, M4V and GIF; on Windows there are: MOV, MP4, M4V, GIF, etc. Here you will also be able to adjust the video quality as well as the frame rate.
Tip: Here we recommend you to choose MP4 format with high image quality and frame rate of 30, it will allow you to get very good quality video but small in size.

Step 4: Record presentations from Google Slides just in one click
Once you are ready for the presentation, start the slides in the presentation view options (by clicking the arrow next to “Present”). At the same time, click the “REC” button to start recording. You will be able to speak throughout your Google Slides presentation. You also have the option of making on-screen edits while recording.
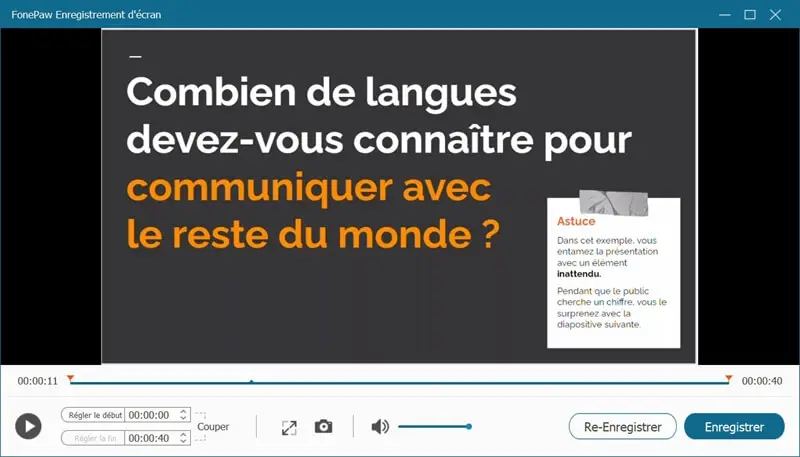
When you are finished, click on the red square button to stop recording. You can view the video capture to see if you have benefited from it. Finally, don't forget to click on the “Save” button to save your video presentation in the chosen local folder.

Advantages :
- Stable recording of PowerPoint presentation, with audio and webcam.
- There is a countdown timer so you can prepare well before recording begins.
- Save video presentation as various file formats: MOV, MP4, M4V, GIF, WMV, etc.
- HD streaming and recording with 1: 1 output quality.
- Support for keyboard shortcuts for recording a presentation.
- Direct and easy sharing available to different social media platforms, like Facebook, Twitter and YouTube.
- No advertisements and watermarks present in the video recording.
Disadvantages:
- Slicing features not available in the trial version.
- Only 3 minutes of recording are available in the trial version.
2. How to record Google Slides with Screencastify by saving it as MP4 format
Alternatively, we recommend that you use Screencastify , a Google Chrome extension that allows you to make audio-video recording of Google Slides. It will also allow you to sync and store your videos on Google Drive. If you are looking for a way to quickly and easily produce videos, then Screencastify is a great choice.
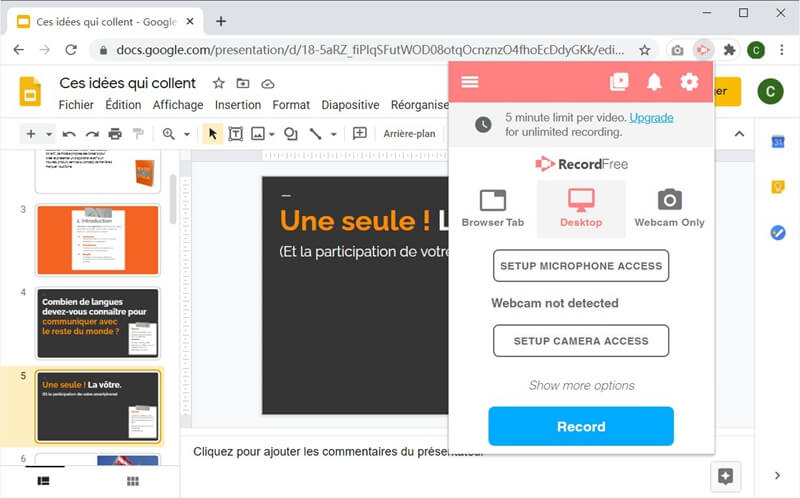
Step 1: Go to the official Screencastify website, then click “Add to Chrome”. Then allow the extension to install on your Chrome browser. Once it's ready, click on the Screencastify icon in the toolbar.
Step 2: Open Google Slides in your browser. Select the "Desktop" option to record the entire screen to capture the browser tab or just select the Google Slides window.
Step 3: Activate the “Microphone” and allow Screencastify to access your microphone and camera.
Step 4: Once you are ready, click on the “Record” button to start recording your presentation. During this recording, you can use the stylus to draw whatever you want.

Step 5: Click the square button to complete the recording. You can save the video recording to Google Drive and share it with others, post it to YouTube, or even upload it as an MP4 file.
Advantages :
- No need to install any other software, this service is free.
- Quick recording of the screen or the webcam thanks to the keyboard shortcut keys.
- Countdown available and adjustable (3, 5 or 10 seconds).
- Fully compatible with Windows PCs, MacBook and ChromeBook with Chrome installed on them.
Disadvantages:
- Save only in MP4 format and without sound.
- Presence of limits in the trial version: 10 minutes of video recording, 3 days of editing functions with only 50 actions per month.
- Presence of watermarks in captured videos.
That was all the details you need to know on how to record a Google Slides presentation with audio. To improve the quality of your videos, we strongly recommend that you test these tools to see which one is right for you. We hope this guide will help you produce an exceptional presentation. Enjoy recording your Google Slides presentation!