Abstract :
This article will walk you through the practical solutions to initialize hard drive without data loss. With FonePaw Data Recovery, you can even initialize hard drive without data loss. Don't hesitate to try it!
Is your newly purchased new hard drive not working when you just installed it? Don't worry, all you need to do is initialize the hard drive on your computer. However, if you receive an error message stating that your disk is uninitialized and unknown when you have used it and important data is stored on it, then you are facing disk corruption or several errors. system..
There are solutions that may help you when you are unable to access a disk on your computer and encounter the error message "You must initialize a disk before Logical Disk Manager can access it" .
Read also:
Solution 1. Initialize hard drive directly
In general, when starting to use a brand new hard drive, it is necessary to initialize it. In this case, you can initialize a hard drive as many times as you want since your new drive does not contain any data yet. So you can directly initialize the hard drive with disk management. Follow the steps below:
Step 1: Open the search bar and type in the term “Disk Management” . Right-click on it and select the “Run as administrator” option..
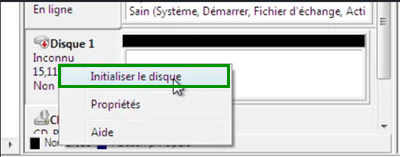
Step 2: Once you are in the Disk Management window, right-click on the hard drive to initialize.
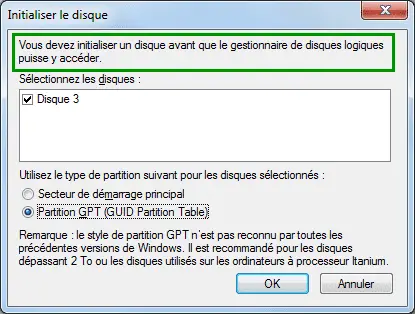
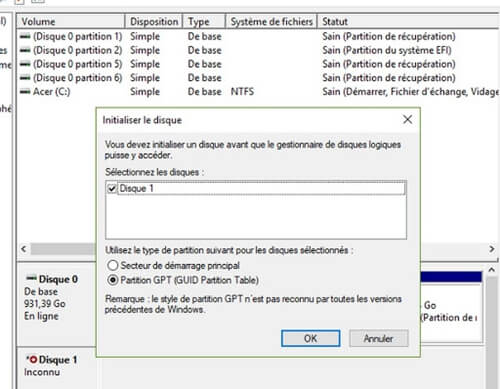
Step 3: Make sure you have selected the correct drive and then click on the “OK” button..
Step 4: Right-click on unallocated space on the drive, then select the “New Simple Volume…” option .
Step 5: Then click “Next”, configure the volume size and file system you want to use. Continue by clicking "Next".
Step 6. Type “PowerShell” in the taskbar and select the “Run as administrator” option or select the “Windows PowerShell (admin)” menu. Then type one of these disk commands in Command Prompt to initialize the hard disk in different styles:
-
Initialize a hard drive using the defaults : PS C:> Initialize -Disk - Number 1. This command initializes your computer's first disk (disk number 1), using the defaults, which will initialize the disk using a score in the GPT style.
-
Initialize a disk using the MBR partition style : PS C:> Initialize -Disk - Number 1 - Partition Style MBR. This command will initialize the disk using an MBR style partition.
Solution 2. Recover files from an initialized disk
If you need to initialize a hard drive that contains a lot of data then you will need to do it much more carefully as initialization will erase all data on your drive. Since you cannot access your hard drive through Windows File Explorer, you will need to use third-party software to recover files from an initialized drive. Here we recommend you the powerful program - FonePaw Data Recovery (opens new window) as an example to initialize hard drive without data loss.
Step 1: Download and install FonePaw Data Recovery on your computer.
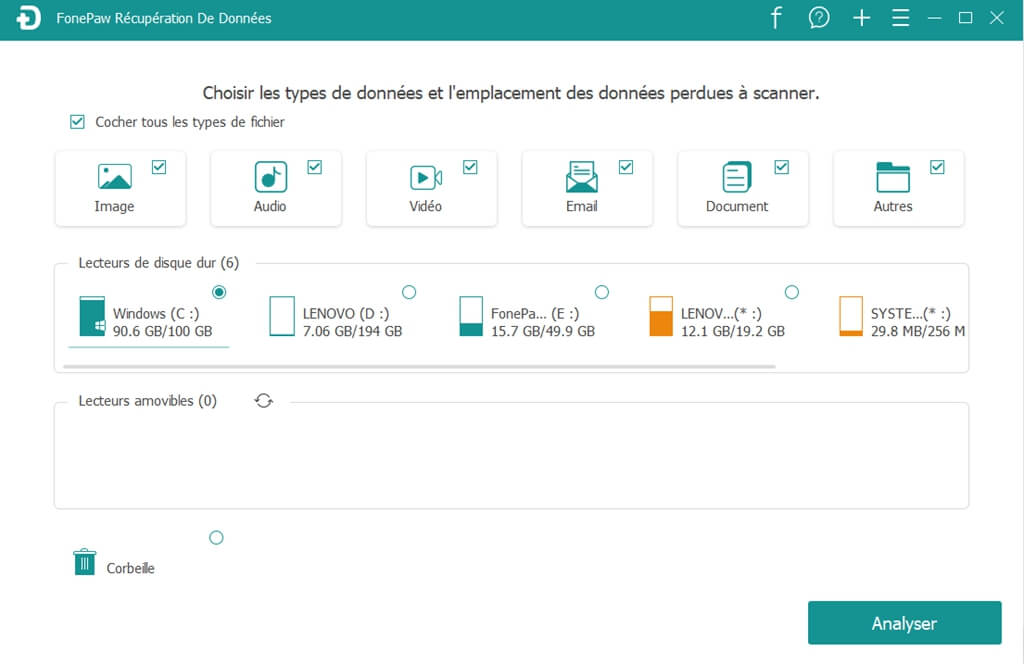
Step 2: Launch the program and choose the types of files to recover from the initialized drive. Then click on the "Analyze" button .
Step 3: Find the files you need in the search results. If you cannot find the files you want, then please run “Quick Scan” mode .
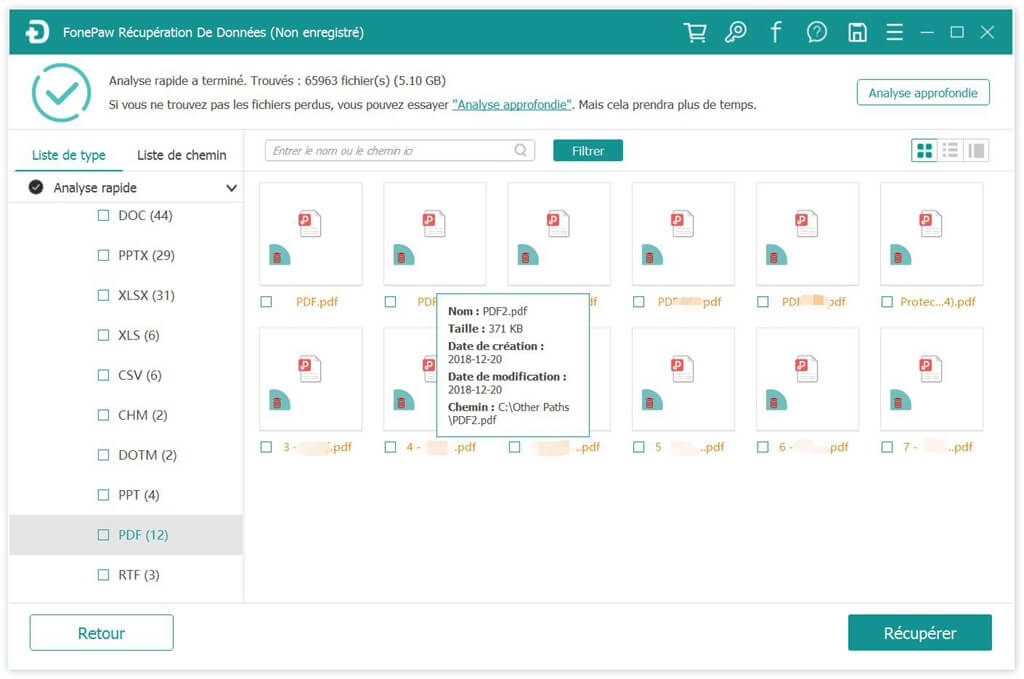
Step 4: Select the files to restore and click “Recover” button .
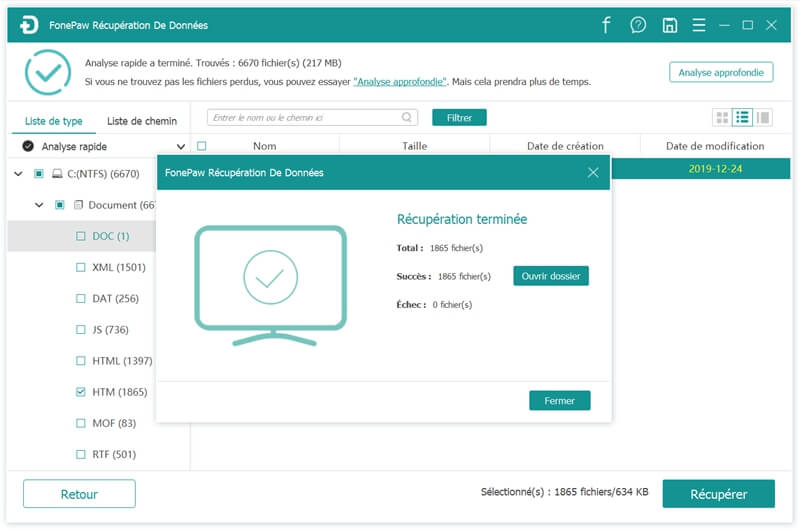
Save your files to a hard drive other than the one on your computer. You can then format the initialized hard drive.
Solution 3. Reconnect the hard drive
Windows might not be able to access the external hard drive due to a connection problem. To check the hard drive connection, you can try the following steps.
-
To get started, you will need to safely disconnect your drive. Then you will need to reconnect it to the computer.
-
If it still doesn't work, then you can always try another USB port or another computer.
Solution 4. Update the hard drive driver
The problem could also appear when the driver for your disk expires. So you will need to update this driver. To do this, please follow the instructions below.
- To start, press the "Start" + "R" keys simultaneously to open the "Run" window.
- Then type "devmgmt.msc" and press the "Enter" key.
- In the new window, go to the “USB Bus Controllers” section and find your external hard drive.
- Right-click on it and select the “Update Driver” option.
- Click the "Automatically check for updated driver" option displayed in the new window.
- When the search and update is complete, please restart your computer.
Solution 5. Uninstall and reinstall the hard drive
If updating the driver for your external hard drive doesn't change much, then you can always try uninstalling the drive from your computer and then reinstalling it. This will allow Windows to automatically detect and resolve device problems.
- To get started, please apply steps 1 to 3 of the previous solution.
- Then, right-click on the name of your disk and select the “Uninstall device” option .
- After uninstalling, click on the "Action" menu > "Check for hardware changes" .
- Now please check if the problem is still present.
Solution 6. Reinstall all USB bus controllers
If reinstalling the driver couldn't help, then you can always try reinstalling all USB controllers.
- Please follow the steps in Solution 4 to find and expand the “USB Bus Controllers” list .
- Then, uninstall all the controllers one by one.
- Finally, restart your computer and let the USB controllers automatically detect and reinstall all peripherals.
Solution 7. Change registry values
Also note that the "UpperFilters" and "LowerFilters" registry values can also prevent Windows from accessing your external hard drive. You can always try to examine and delete them to resolve this issue.
- To get started, search for "regedit" from the "Start" menu.
- Select the "Registry Editor" application and run it as administrator.
- Then please go to "HKEY_LOCAL_MACHINE> SYSTEM"> "CurrentControlSet"> "Control"> "Class"> "{36FC9E60-C465-11CF-8056-444553540000}".
- In the right panel, locate and delete the "UpperFilters" and "LowerFilters" registry values.
- Finally, restart your computer.
Hard drive initialization faqs
1. What is hard drive initialization?
In general terms, to initialize a hard drive is to activate it. This refers to the process of building and rebuilding the MBR. MBR stands for the term Master Book Record. It is the very first disk sector that identifies how and where the operating system is located. It can thus be loaded on the main storage of your computer or on a random access memory.
To put it simply, initialization only affects data keeping track of the location of your files on a drive.
2. Can initializing a hard drive erase its data?
As the initialization process only deletes the data recording the location where your files are stored on the drive, no current item on your hard drive will be deleted . But does that mean that you can initialize a hard drive without losing data? Unfortunately, the answer is no. Initialization will activate a disk but render it useless. It also means that if you want to read or write data to a disk, you will need to create partitions on it and format those partitions once the disk is initialized.
Even if initializing a disk only affects the primary sector without erasing data from it, formatting will perform a deletion. To initialize hard drive without data loss, you will need to recover all your files right after initialization and just before formatting, you can use FonePaw Data Recovery tool (opens new window) to help you.
3. Should I choose MBR or GPT?
When you initialize a disk, you notice that there are two partition styles: MBR (Master Boot Record) and GPT (GUID Partition Table).
Windows users using partition styles in order to understand how to access data on a disk.
GPT is made for conventional drives and SSD drives. It is also compatible with removable disks, such as memory cards.
But today, Windows automatically uses the correct type of disk. So you don't need to worry about anything.