Hello everybody ! I had a problem recently while trying to install the macOS Catalina 10.15 update after 10.14.2, my hard drive ended up completely cleaning up. There is absolutely nothing on my desk, documents, emails, files, etc. and the files I used most often just disappeared. The apps are still there, but that's really it. I took a look in the Recycle Bin, but no luck, it's empty. It's really annoying. Is there a way to restore all the lost files?
Before updating your computer to macOS Catalina 10.15, it is imperative that you back up your data using Time Machine. Time Machine will make sure that you don't lose any data while updating macOS on your MacBook, iMac, or Mac mini..
If you ever lost your data after the macOS 10.15 update, don't worry too much. This article talks about 3 effective methods that will allow you to get your data back. Read on to learn more.
# Recover deleted files on macOS Catalina 10.15
# 1. Check other files
Apple developers indicated in the macOS 10.15 release notes that Macintosh HD contains files at the root of the volume. It is thus understandable that the files / folders stored at the root level of the volume will be moved to the directory: "/ Library / SystemMigration / History / Migration-UUID / QuarantineRoot /" of your Mac, just after the macOS Catalina update. Go to that folder to see if you can find the transferred items there..
# 2. Use Time Machine
If just before doing the Catalina update you made a backup of your Mac through Time Machine, then please follow the steps below to restore your Mac from that backup.
Step 1: Make sure the drive containing the Time Machine backup is plugged into your Mac..
Step 2: Restart your Mac, then press and hold "Command" + "R" keys simultaneously. Release them once you see the Apple logo appear on the screen. Now enter the Recovery Mode of your Mac.
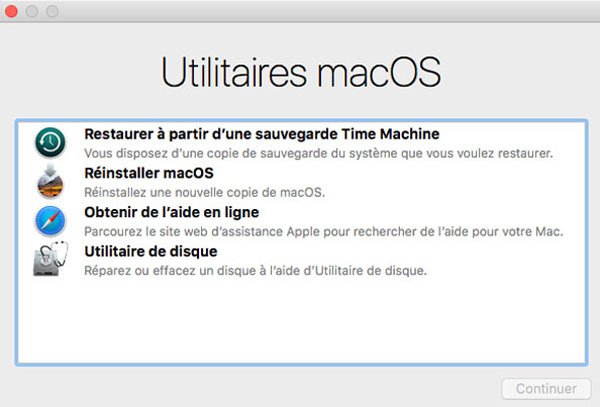
Step 3: In the "macOS Utilities" window, select the "Restore from Time Machine backup" option and then click the "Continue" button.
Step 4: Select the disk containing the Time Machine backup (the restore source), then click "Continue".
Step 5: Select the last backup that was made, then click “Continue”.
Step 6: After that, select the destination disk (Macintosh HD - the startup disk) and then click on “Restore” button.
Step 7: Once the restore process is complete, restart your Mac.
You can finally find all your files back to their original location on your Mac.
# 3. Use data recovery software for macOS Catalina
If you weren't able to back up your Mac before the macOS Catalina update, don't worry. You should start by immediately stopping using your Mac, you will be able to work on it again after recovering your deleted files.
FonePaw Data Recovery (opens new window) is the best data recovery software for macOS 10.15 Catalina. It can help you recover files that disappeared right after macOS Catalina update, recover data lost after reverting to the system version before macOS Catalina on your Mac, recover data from macOS startup disk Catalina. And even if your Mac fails to boot properly right after the Catalina update, then FonePaw Data Recovery can help you sort it out.
Here are the steps to recover deleted files from your Mac right after macOS Catalina update:
Step 1: To avoid overwriting lost data from your Mac, it is better to download FonePaw Data Recovery to external hard drive rather than bootable drive.
Step 2: Double-click the installation file of FonePaw Data Recovery and then double-click the software icon to be able to open it.
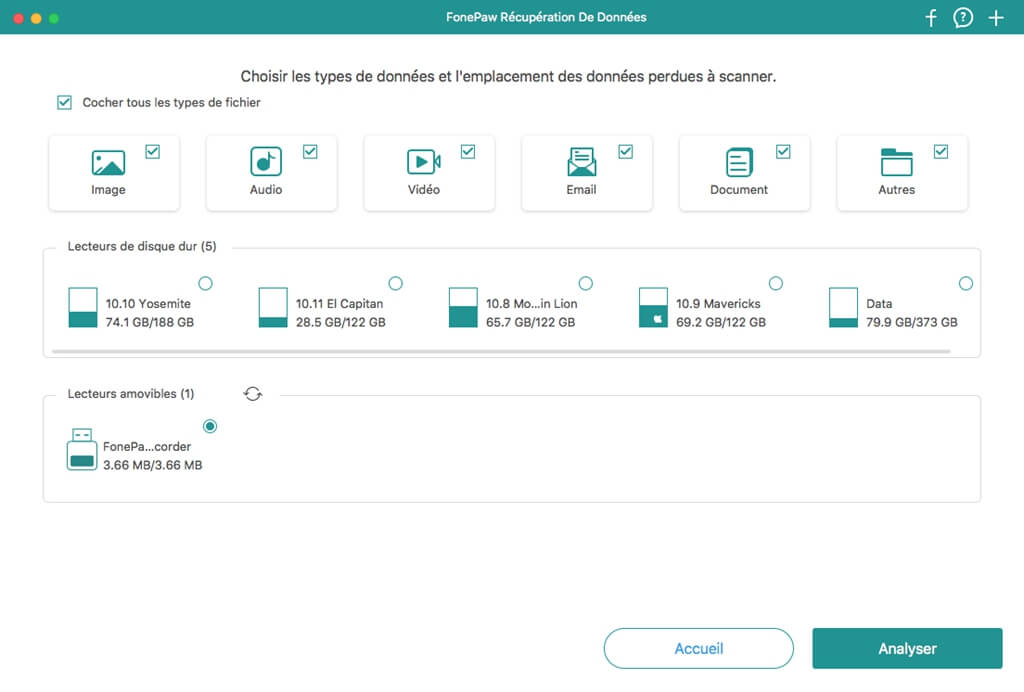
Step 3: After launching FonePaw Data Recovery, select the disk drive where your lost data was located (the “Macintosh HD” startup disk). Then click on the "Analyze" button.
Step 4: When the scan is finished, you will be able to preview the list of recoverable files.
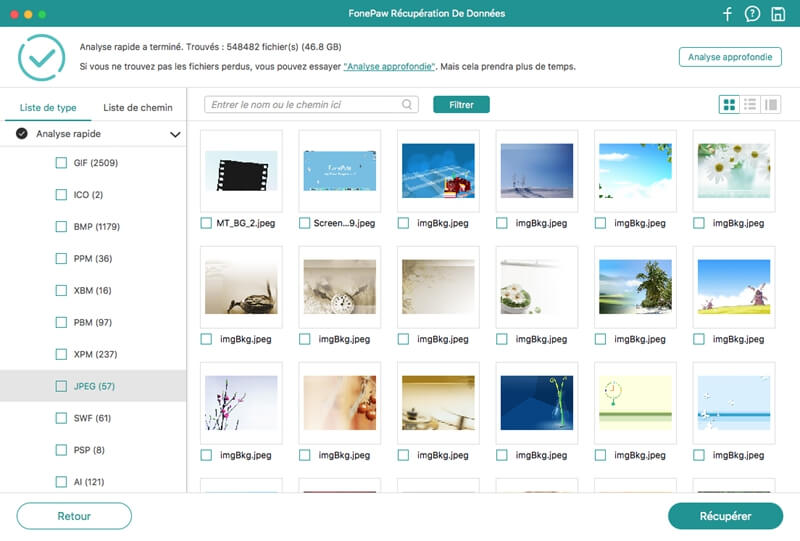
Step 5: Select the data you want to restore and then click on the “Recover” button. You can then choose a new location to save them.
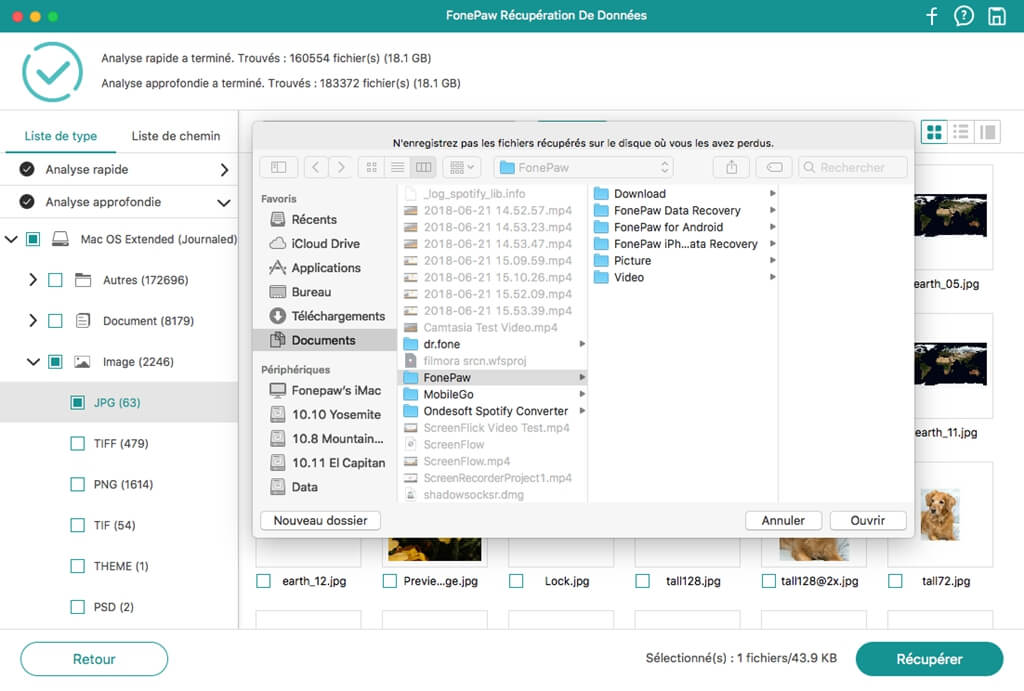
Step 6: Click on the "Browse" button to choose a new drive - preferably an external drive - to save your data. Then click “Save” to save the recoverable files.
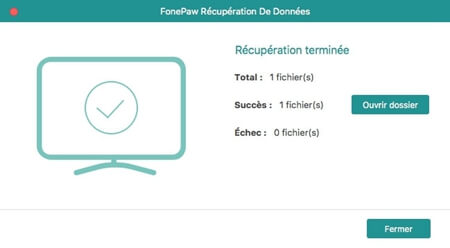
Step 7: Please wait until the recovery process is complete. Head to the new location containing your restored files to find them.
Note: The trial version of FonePaw Data Recovery allows you to use the scan and preview functions of the program for free. You will need to purchase a license to be able to use the file recovery feature as well as all other locked features including Disk Manager.
And There you go ! You have finally been able to recover the files that disappeared right after installing the macOS Catalina 10.15 update. You can transfer these files to your Mac. However, it is important not to forget to make backups of your data using Time Machine.
If you value your important data very much, then it is necessary that you make at least three copies. A copy on the current Mac. And two more copies located on media storage devices (such as HDD hard drives or SSD drives). You can also choose to make a copy online - to a cloud storage service - to prevent any risk of data loss during a natural disaster.