As a great player, you might sometimes feel like recording your best games to share your wins or tips with newbies. If you like having fun on a Windows computer then there are two awesome methods that will let you capture footage from Minecraft, LoL, Dota, World of Warcraft, Overwatch, Grand Theft Auto V, Call of Duty, Gears of War on Windows 10..
Also Read: [2020] League of Legends Registration: 4 Ways to Register LoL Game (opens new window)
# How to capture video game footage on Windows 10 with Game Bar
The Windows Game Bar (opens new window) is an integrated tool especially for recording video games. This feature also supports Xbox games and can record video footage of your game or take screenshots of crucial moments in your game.
# 1. Launch the Game bar
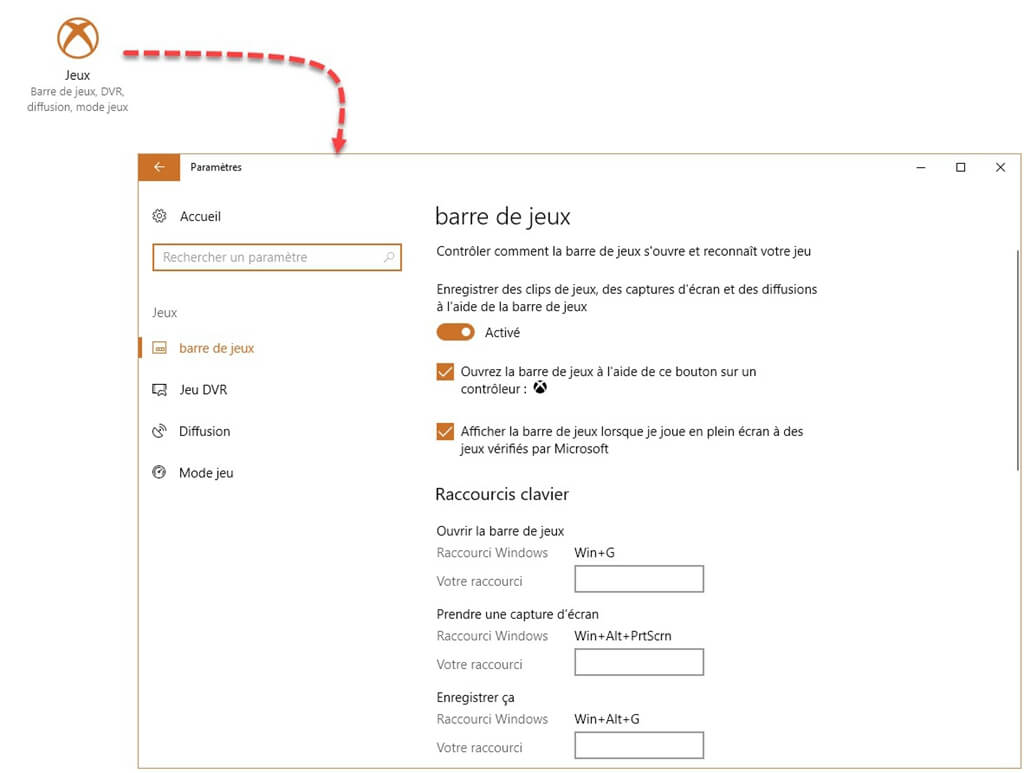
Simultaneously press the "Start" + "G" keys to launch the Game Bar on your computer. If Windows thinks that you are not currently playing a video game, you might find yourself in front of the window below. Click “Yes” to open the Game Bar.
Tip: If you don't see the pop-up window, it may be because you are playing in full screen. Please minimize the game window..
# 2. Record a video game on Windows 10
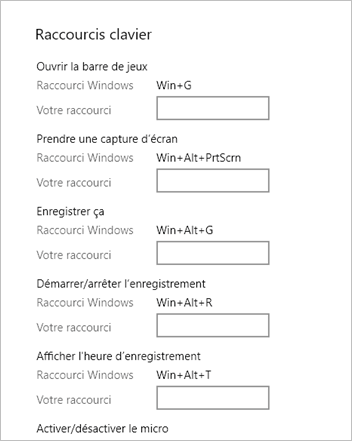
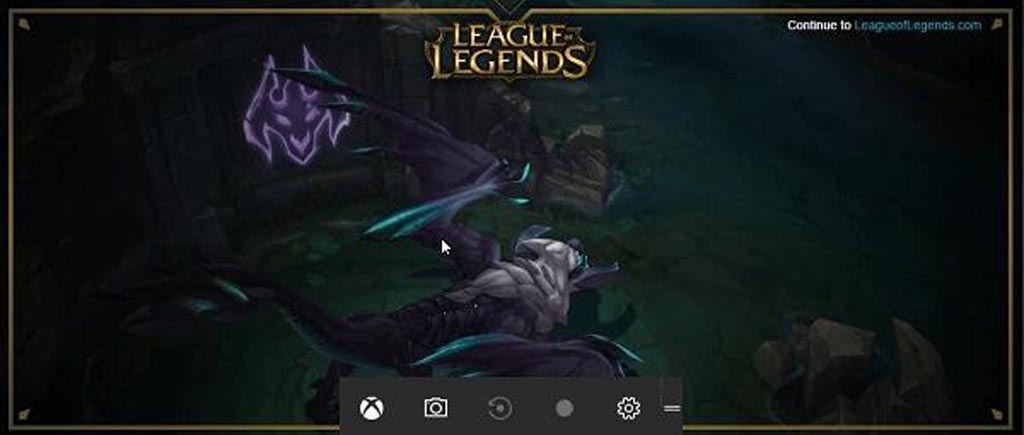
Click the "Record" button to begin capturing your video game portion. You can also use the keyboard shortcut "Start" + "Alt" + "R" to start recording. When you are finished, press "Start" + "G" keys to display the option bar, then click the red "Stop" button.
Tip: If you need to take photo captures while in the game, just click on the camera icon..
# 3. Adjust the Settings as per your needs
Click the "Settings" button, you can choose to add system audio sound and microphone sound at the same time when capturing video of your game part, you can also enable background recording , configure keyboard shortcuts, activate countdowns, etc.
# 4. Locate and share your play footage
After you have finished capturing your game video with the Windows 10 Game Bar function, you can go to your user account, then to the “Video”> “Capture” folder. There you will find the recording in MP4 format. You can then share the video of your game on YouTube, Instagram, Facebook and many other social networks.
# What to do when Windows 10 video game recorder does not work
Using Windows' built-in game recording tool is really handy, but this solution might not be right for you. If you are unable to record video games using Game Bar, please ensure the following:
-
Use Windows 10. Computers running Windows 7/8 / XP / Vista do not have the game recording function by default.
-
Check if the Game bar has not been deactivated. Go to "Settings"> "Game DVR" and verify that the video recording options as well as screenshot using game DVR are enabled.
-
Check if the disc is pulled out. If this is the case, then your computer does not have the necessary hardware for recording games.
# How to capture video game footage on Windows 10 with a Screen Recorder
If your computer is running on Windows 7/8 / XP / Vista or if the game recorder just does not work on your Windows 10, then you can always use third-party software as an alternative to the Game Bar. FonePaw Screen Recorder (opens new window) is a much more powerful tool than Game Bar. Some users have experienced quality issues while using Game Bar, due to its high resource requirements, while using FonePaw Screen Recorder it is just the opposite. This program worked perfectly even on different computer models. Moreover, apart from recording games, this program is also capable of taking screenshots and allows you to add personalized annotations to them.
# Download a Screen Recorder on your Windows
Click the button below to download FonePaw Screen Recorder to your computer. After installation, launch the program and select "Video Recorder" mode.
# Record a video game on Windows
Click on the save button. Before that, you can choose and select the area of the screen you want to record, you can also select the entire screen. You also have the option of including your game sound and that of your microphone in the video recording. For that, you just need to adjust the sound of the system and the sound of the microphone. After completing all your settings, click the "REC" button to start recording video.

# Modify a capture of video game sequences
While capturing video, you can use the various tools on the toolbar to edit the video, for example: add rectangles, arrows or even highlight certain areas. You can also take screenshots while recording video. When you are done with this video, simply click on the rectangle button, located at the top left of the bar, to stop recording.

# Preview and rename the video
The video will display in the program interface. You can launch the video to preview it and then save it to any folder you want. If you wish, you can also change the name of the file, by clicking on the pen icon at the top left of the window. To make more modification, we suggest you use the FonePaw Video Converter program (opens new window) to enhance your video.
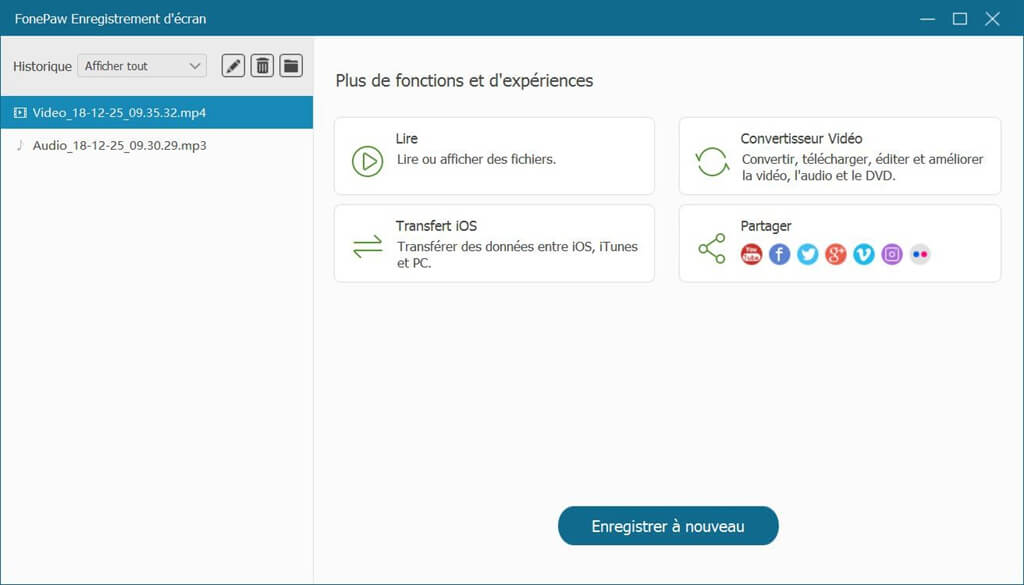
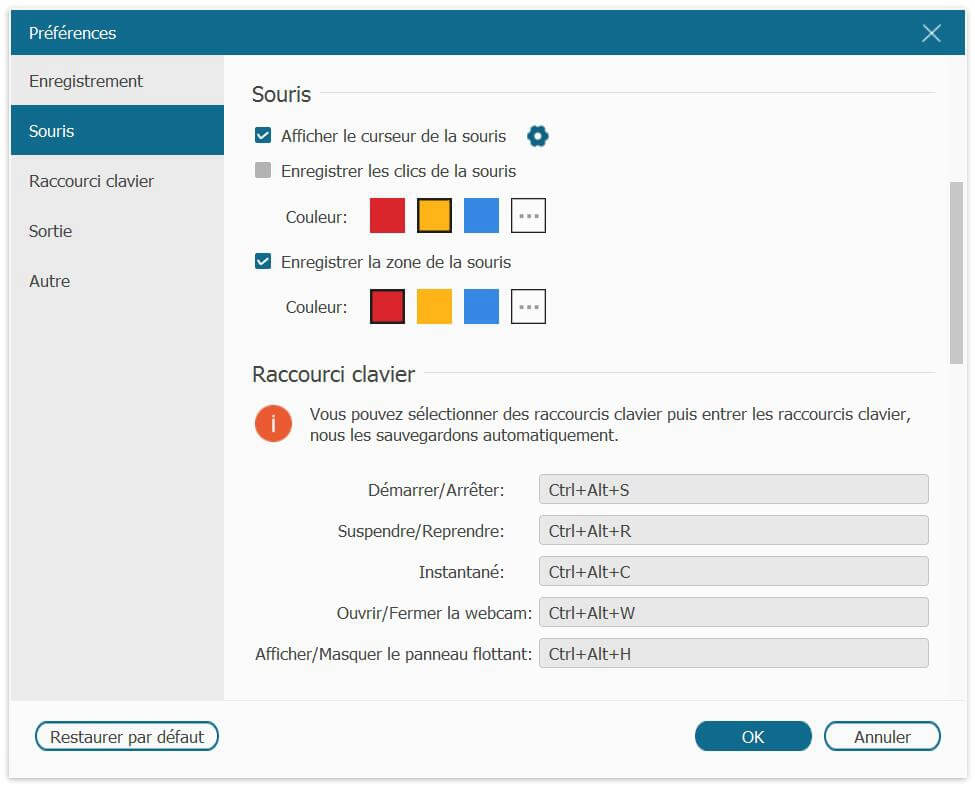
Tip: Go to “Preferences” to adjust Screen Recorder settings to better suit your needs. You can, for example, customize the shortcuts to pause or stop recording, adjust the audio or video quality, choose whether or not to display the mouse cursor, the options bar, etc.
With these two methods, you will be able to make recordings of your video game games more easily and share them more quickly with your friends.