Do you regularly post images on the web? Do you have your own website or blog? It is certain that looking for a lighter image format and of good quality will be able to optimize the loading of your pages. So how do you do it? It's simple. Use the WebP image format..
But what is the WebP format? WebP is an image format developed by Google and based on technology acquired with the purchase of On2 Technologies.
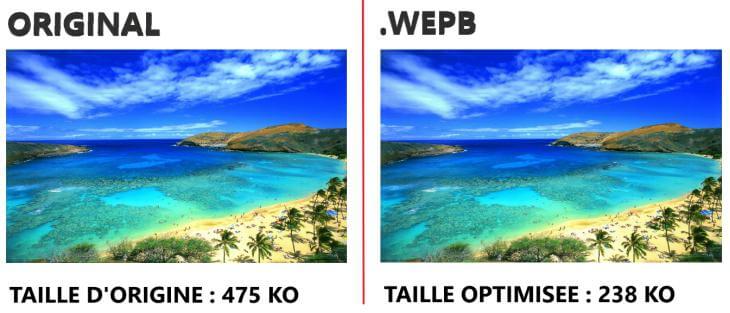
The WebP format employs both lossy and lossless compression. What does that mean ? In other words, you get much lighter photos still keeping the same image quality and sharpness. See the result for yourself..
Download and install Image Resizer! And follow the instructions in this article to find out how it works!
Free Trial Free Trial
Step 1: Start the software and choose photos
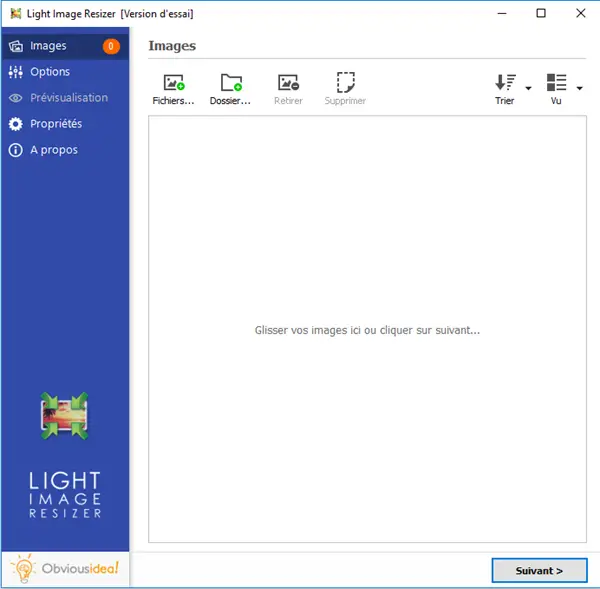
Start the Image Resizer program, by clicking on the shortcut icon representing it on your PC desktop.
Once the software is open, a window like this will appear on the screen. Please click on "Files" or "Folders", and select the photos you want to convert to WebP..
Step 2: Configure settings to convert photos to WebP
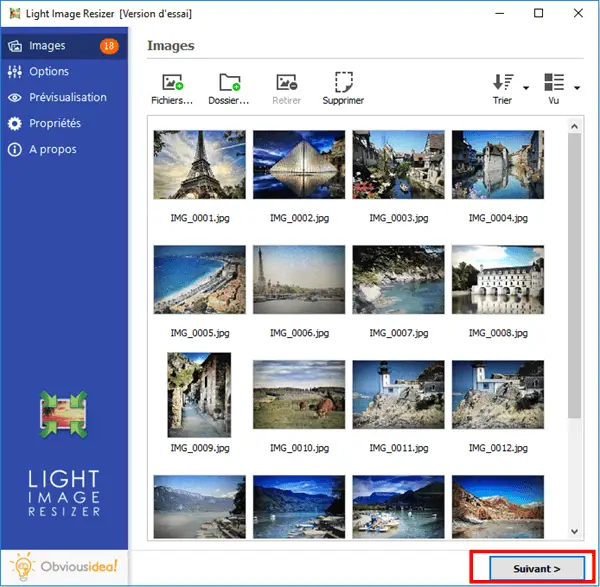
After selecting the desired photos, continue by clicking on the "Next" button.
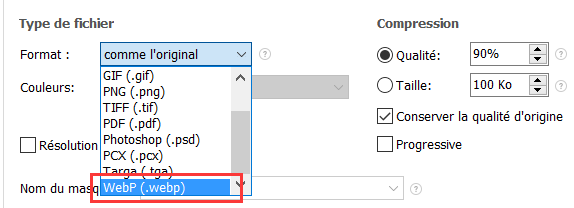
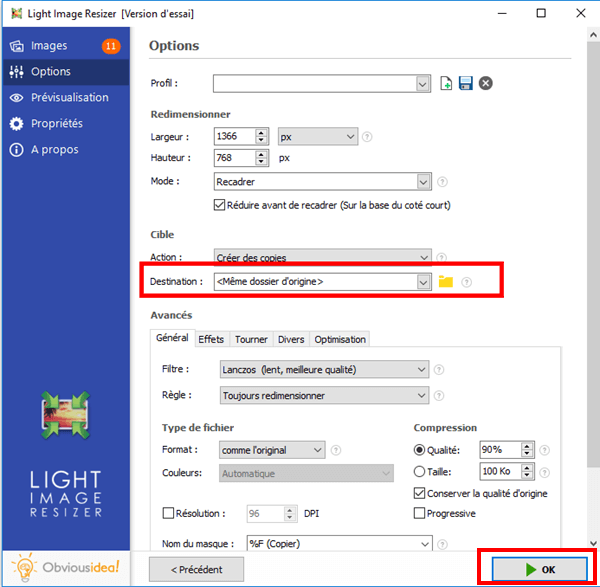
An options window will appear on the screen, go to “Advanced” → “File type” → “Format” → “WebP (.webp)”.
Step 3: Choose output location and convert photos to WebP
After the conversion, the photos will be sent to the folder where the original photos are located. If you wish, you can change the default output location by clicking on the folder icon in the “Destination” part and selecting the desired location.
Continue by clicking "OK" to start the conversion process.
Note: The duration of the process may vary depending on the number of photos you have selected for conversion to WebP. It can range from a few seconds to a few minutes. But you don't have to worry about the time used, because it's usually very fast! A loading bar will appear on the screen to inform you of the remaining time.

A window will appear to inform you that the conversion of your photos to WebP is successful. For more information on the changes made, you can click on the "Details" badge located on the lower right corner of the window.
Note: By clicking on "Close", you will not only close the window informing you that the task has been completed, but you will also close the software. If you wish to continue performing other operations, please click on the arrow next to the “Close” badge, and select the action that best suits you. You can continue to make other changes from the software, open the folder where the transformed files were sent, etc.
Free Trial Free Trial
Its good ! It's over ! Here you are with good quality and light photos that are ready to be uploaded on the net! You will see that with the same network connection speed, your photos will load more alive than before.
Did this article help you? If so, that's really great. Do not hesitate to share this article with your loved ones. And if you'd like to leave us a comment, feel free to express yourself in the free space below.