Abstract :
Don't miss FonePaw Screen Recorder, a professional program that shows you how to convert PPT to video with sound. Read on and get the solutions of the different versions of PPT..
A PPT file is not always the best format to display your presentation. Here's why it's best to convert PowerPoint to video when presenting it to your audience:
- Your audience might not have Microsoft PowerPoint to open your PPT file, but almost anyone can easily play a video on a phone or computer.
- If you can't personally present your slideshow, then it's best to turn your PowerPoint presentation into a video with your narration. This way, the audience will be able to watch the presentation as if you were presenting it in front of them.
- You can convert PPT to YouTube video or put it in website or blog after PPT file has been turned into video.
If you decide to convert PowerPoint to video on Windows / Mac, don't miss this step-by-step guide! You can convert PPT to video on all versions of Microsoft PowerPoint, including:
- Versions for Windows: PowerPoint on Office 365, PowerPoint 2019/2016/2013/2010/2007/2003;
- Versions for Mac: PowerPoint on Office 365 for Mac, PowerPoint 2019/2016/2010 for Mac.
Convert PowerPoint to video with sound (Office 365, 2019, 2016 and 2013)
Here is how you can convert PPT to video with sound on Office 365, PowerPoint 2019, and PowerPoint 2016.
Step 1: Open the PPT file you want to convert to video..
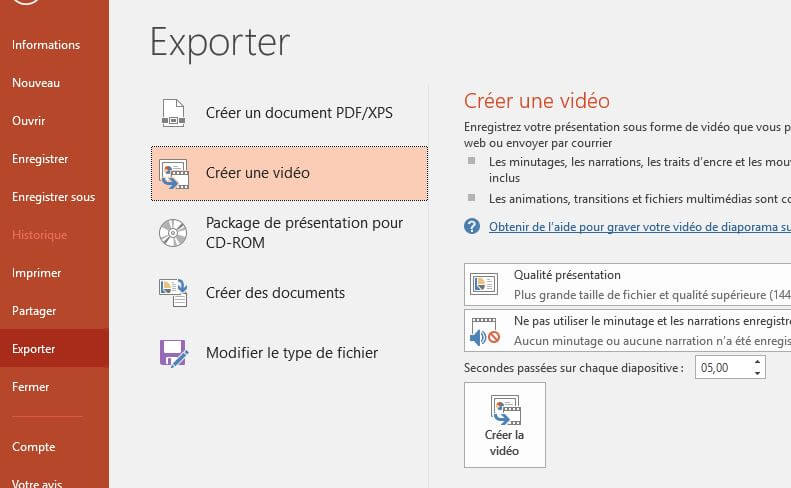
Step 2: Click “File” → “Export” → “Create Video” and PowerPoint will create a video from your presentation. (You can also do this in “Recording” → “Export to Video” .)
Step 3: Select the video quality from one of the 4 options offered: Ultra HD (4K), Full HD (1080p), HD (720p), Standard (480p) . Your PowerPoint can be turned into video files in MP4 or WMV format.
Step 4: Choose whether or not to include narrations and timings in your PPT video. If you want to include audio in the video of your PPT file, then you will need to record your narration first..
Step 5: Configure the display time of each slide in the video.
Step 6: Click “Create Video” then save the video to the folder you want. The process of creating a PowerPoint video can take hours depending on the size of your slideshows. Wait for the video creation to finish.
Remark :
-
When you convert PowerPoint to video on Mac, the embedded media files cannot be played. If you want to include the media files embedded in PowerPoint video then you can use FonePaw Screen Recorder to record video of your PowerPoint presentation with all media embedded.
-
On PowerPoint 2013, only 1080p, 720p and 480p formats are available. In addition, the ultra HD (4K) option is only available on Windows 10.
What can be converted to video on PowerPoint?
On Office 365, PowerPoint 2019/2016, almost everything like narrations, transitions, animations, pointer movements, timings, inserted videos, etc. in a PPT file can be converted to video, except media files inserted by previous versions of PowerPoint, QuickTime video, Macros as well as OLE / ActiveX controls.
What quality should you choose to record PowerPoint video?
It depends on the devices that will be used to play the PowerPoint video. Ultra HD (4K), the highest quality, is suitable for creating PowerPoint videos that will be viewed on a large monitor. For a standard computer monitor, the 1080p video quality is perfect. Most websites and video platforms support 720p HD videos. So if you want to upload your PowerPoint video to YouTube, Facebook, etc., choose 720p HD quality. 480p videos are great for smartphones.
Save PowerPoint File to Video (2010)
The steps to record PPT to video on PowerPoint 2010 are similar to previous versions of PowerPoint. Here are the detailed steps:
Step 1: Open the PPT file you want to convert to video.
Step 2: Click “File” → “Save & Send” → “Create Video” .
Step 3: Click on “Computer and HD Screens” and select the quality of the PowerPoint video. You can choose between three options: Computer and HD screens, Internet and DVD, portable devices, which correspond to 1080p, 720p and 480p qualities respectively.
Step 4: To get PowerPoint video with narrations, select “Use recorded timings and narrations” option .
Step 5: Configure the display time of each slide in the video.
Step 6: Click “Create Video” and save the video. It will take longer to create the video if your presentation contains a lot of media, animation, and narration.
Remark :
-
PowerPoint 2010 for Mac does not allow you to convert PPT to videos. You can use FonePaw Screen Recorder to record PowerPoint 2010 to video with your narrations, animations, timings and mouse cursor actions on Mac.
-
Presentations created with PowerPoint 2010 can only be saved in MP4 format .
Turn PowerPoint into video with sound (2009, 2003)
If you are using an older version of PowerPoint such as PowerPoint 2009 or 2003 then unfortunately there is no option for you to convert PowerPoint file to video. If you are using PowerPoint 2009 or 2003, you will need to use a PowerPoint presentation to video converter or screen recorder to record video of your PowerPoint presentation with sound, animation, and other media.
More professional alternative to convert PowerPoint to video
Although PowerPoint 2010/2013/2016/2019 allows us to save your PowerPoint presentation as video, there are some issues that may prevent us from converting PowerPoint to video. When these problems arise, you can use another much easier method - record video of your PPT presentation.
FonePaw Screen Recorder (opens new window) can let you convert PowerPoint to video on PC and Mac. Here are some features of the software:
- Capable of recording not only video of the slides, but your narration if you want to create PowerPoint video with sound.
- Has a drawing panel that allows you to draw circles, write words, and paint colors on the slides as you narrate.
- Recording videos embedded in your PPT with sound.
- Option to activate the webcam if you want to film yourself while explaining your PowerPoint.
- You can also activate the mouse cursor to highlight mouse movements in your recording.
- Much shorter duration of a video recording .
- Ability to preset video recording duration if you record an autoplay PowerPoint presentation.
Step 1: Install and launch FonePaw Screen Recorder on your computer.
Step 2: Choose “Video Recorder” mode . Then open the presentation you want to save.

Step 3: Click “Mode” → “Exclude Window (s) and Save” , which will allow you to save PowerPoint window only without including other applications on your computer screen. Adjust the recording area (the rectangle formed by the dotted blue lines) according to the size of your presentation.
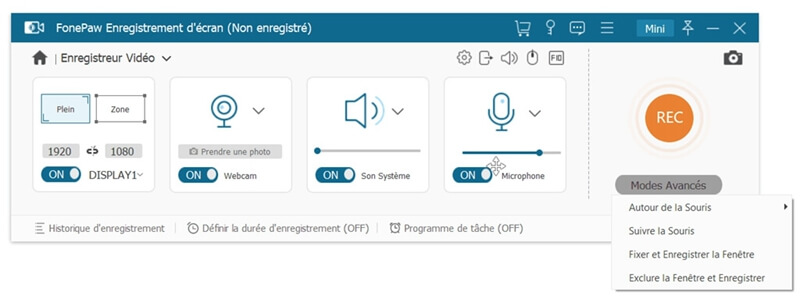
Step 4: Turn on system sounds if you want to record audio of your PowerPoint presentation and turn on microphone if you want to record your narration during the presentation. Also activate the webcam if you want to include your face in the video.
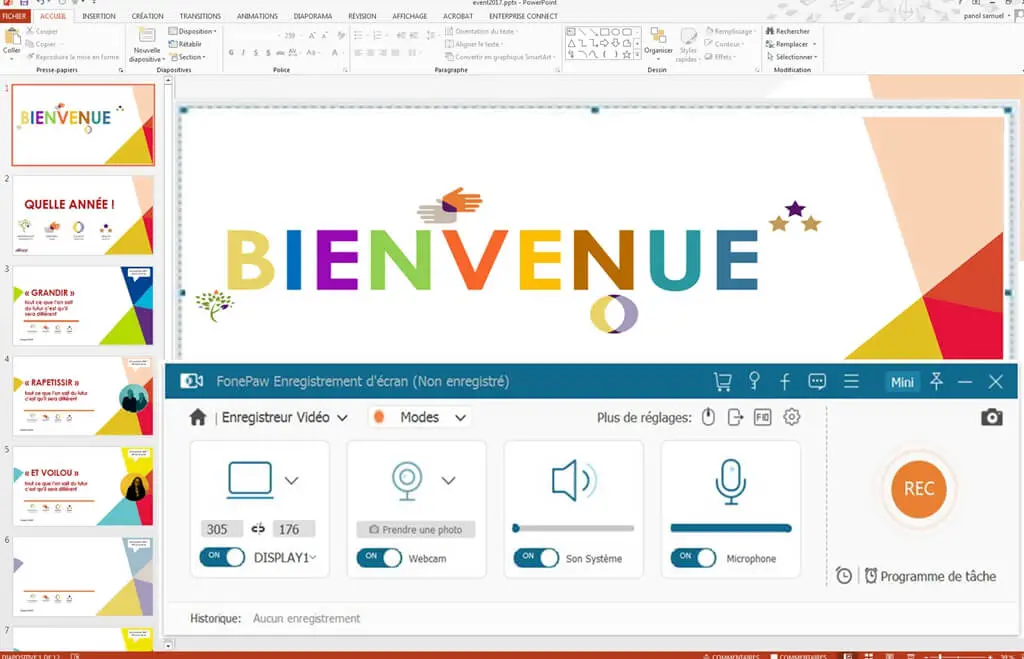
Step 5: When you are ready, click on the "REC" button to start recording your presentation. You can use the annotation tools to highlight parts of your PowerPoint presentation.
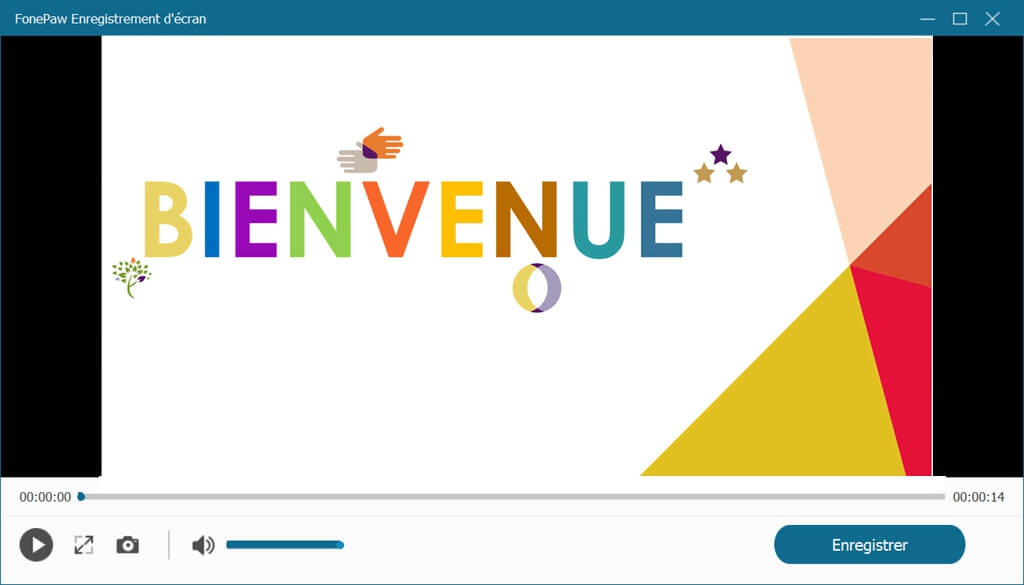
Step 6: After the presentation is finished, click the “REC” button again to stop recording. Then you can preview the PowerPoint video and finally click “Save” .
Advice :
-
With FonePaw Screen Recorder, you can save your PowerPoint file to video in MP4, MOV, TS, FVI, AVI, WMV format . Go to the output settings to select the video format and quality before starting your recording.
-
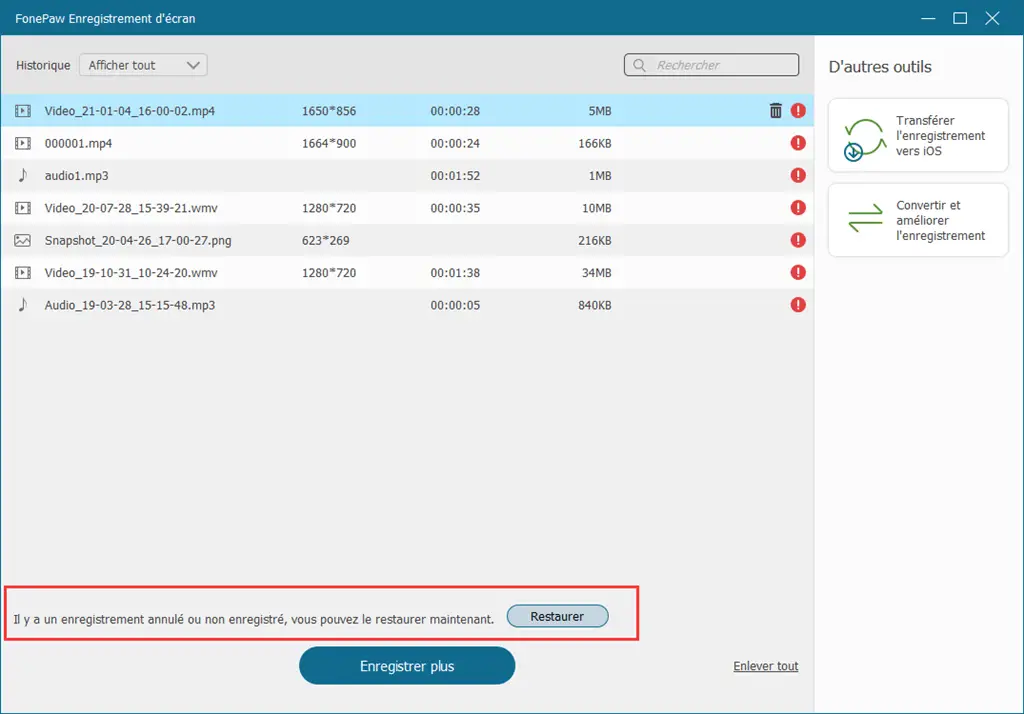
The canceled or unrecorded file can be restored when the program accidentally quits during recording. All you have to do is access "Record History" at the bottom left of the software home interface. In the pop-up window, you will see the button at the bottom of the "Restore" window . Press this button and then you can recover the unsaved video.
Here are the solutions to record PPT video for different PowerPoint versions. Besides using PowerPoint's built-in recording function, you can try FonePaw Screen Recorder (opens new window) , a more professional software to record video in various formats, such as MP4, MOV, TS, FVI, AVI and WMV in high quality. Try the free trial below!