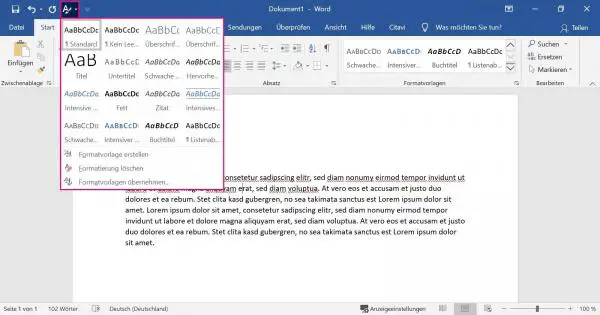
Style templates in Word are a helpful means of quickly applying uniform formatting to your document. In addition to the templates that are already available, you can also create your own formatting, for example to design your headings differently. In the following sections you will learn how you can use the format templates in Word and also format them yourself .
Use styles
The templates already integrated in Word can be found in the " Start " tab on the left. To use them in your document, select the text to be formatted and then select the appropriate style:
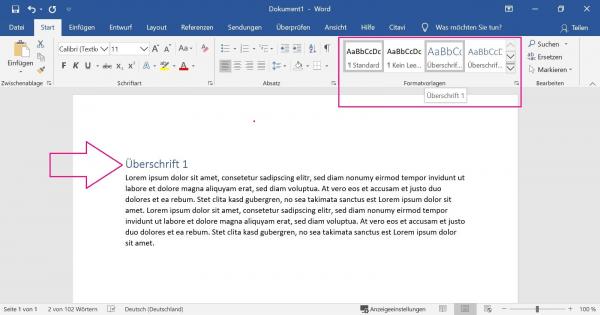
Depending on which format template you specify, elements such as headings are also displayed accordingly in your Word table of contents. An example: The heading that you have declared as " Heading 2 " is displayed in your table of contents as a sub-chapter of " Heading 1 ". Here we will show you how to create an automatic table of contents in Word..
Change existing styles
If you want to change the templates built into Word, you have two options: If your document already has formatting, you can change it directly in the document . In this way, the one-time change is applied to all elements with the same formatting. If you have not yet written any text, the other option is to make the change manually . You can find out which steps are necessary for the individual options in the following sections:
Change formatting directly in the document
You can adapt all text parts of the same format template in just two steps:
1st step:
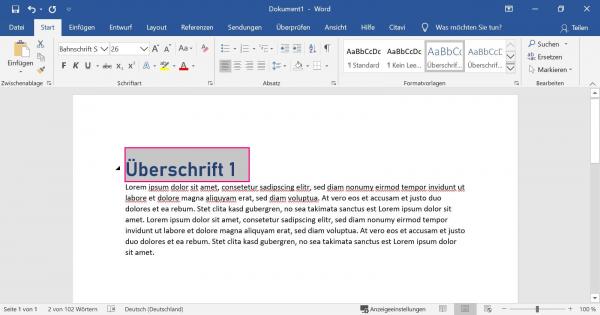 Mark you first remove the part of your text where you want to change the style and format to Him as you wish. For example with a different font size or type .
 2nd step:
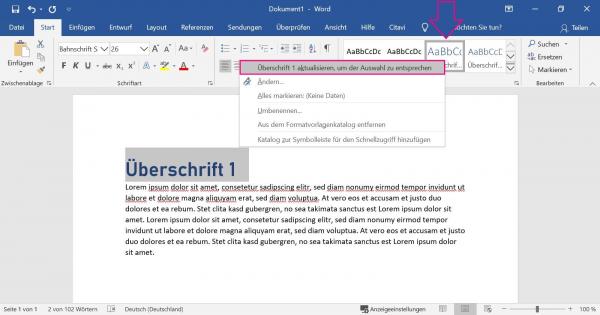 Then click in the upper menu bar in the area of the templates with the right mouse button on the appropriate template and select "Update (name of template) to match the selection ". The corresponding format template will then be adapted with your formatting changes.
 Changes in the template catalog
Word saves the styles in what is known as the style catalog . There you can also adapt existing templates according to your wishes:
1st step:
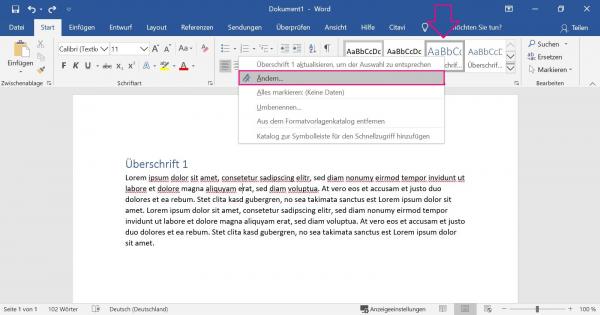 Make a right click on a any Word style , and then go to " Change ... "
 2nd step:
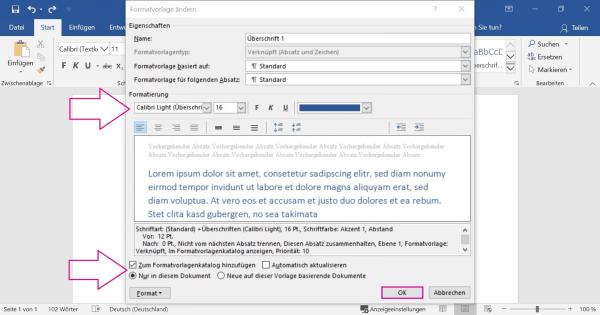 Make your adjustments under " Formatting " and tick the box next to " Add to styles catalog ". Finally, you can specify whether you want to create the " Only in this document " or " New documents based on this template " style.
 Quick access to the styles catalog
So that you can access the styles catalog independently of the " Start " tab, simply link it in the toolbar at the top left. To do this, right-click on any of the styles, then select " Add Catalog To Quick Access Toolbar ":
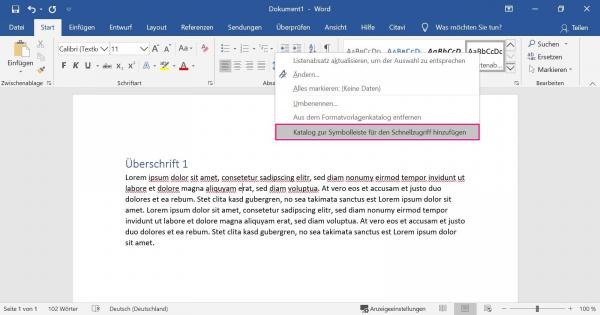
An " A " with a brush symbol will appear in the upper left corner . This button gives you direct access to all format templates:
