It is so much more convenient now that we can share photos with our friends and the people who are dear to us thanks to the new function which is found on iPhone and iPad running on iOS 12. It not only allows you to do all things safe, but also helps you keep in touch with whoever you want..
The Photos app, which is found on iOS devices, recently received quite a few awesome new features in iOS 12, including the ability to share iCloud Albums with family and friends. So, if you have memorable pictures and fascinating videos, you can prepare a special album to make your content accessible to the chosen people.
Personally, I have always loved the idea of creating an album that can store and share all of the great captures that have been taken on different occasions. It really is a great time to keep in touch with the people you love. So without further ado, let's go, let's get started!
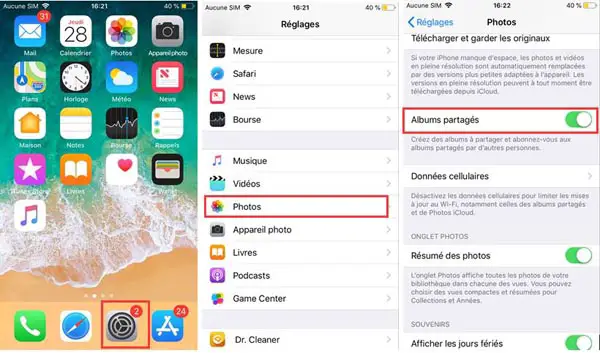
Just before you start, make sure that the “Shared Albums” function has been activated on your device. To do this, go to "Settings" → "Photos", and press the toggle located next to "Shared albums"..
How to Create iCloud Photo Album on iPhone or iPad Running on iOS 12
Step 1: Open the Photos app on your iOS device, then select the photos and / or videos you want to share, then tap the share icon.
Step 2: After that, the sharing function will appear with the “Shared Albums” icon..
Step 3: Tap “Shared Album”.
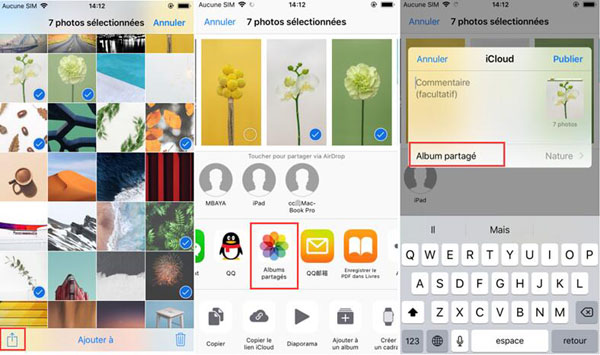
Step 4: Now tap on the “+” button, give your album a name, then continue with “Next”.

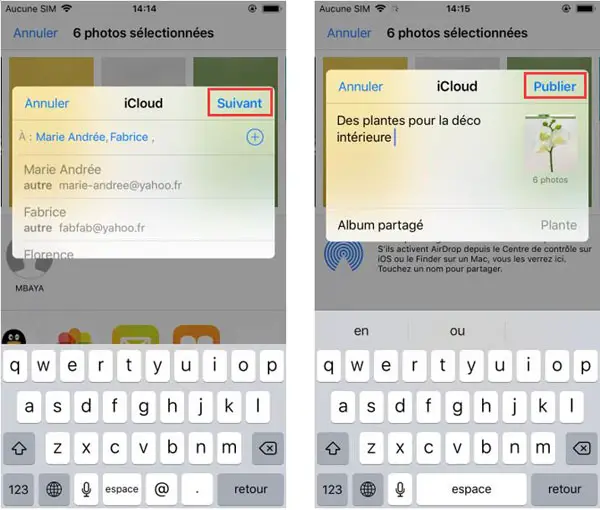
If you don't want to share your album with anyone, ignore the “To” box, and tap “Next”, then “Publish”.
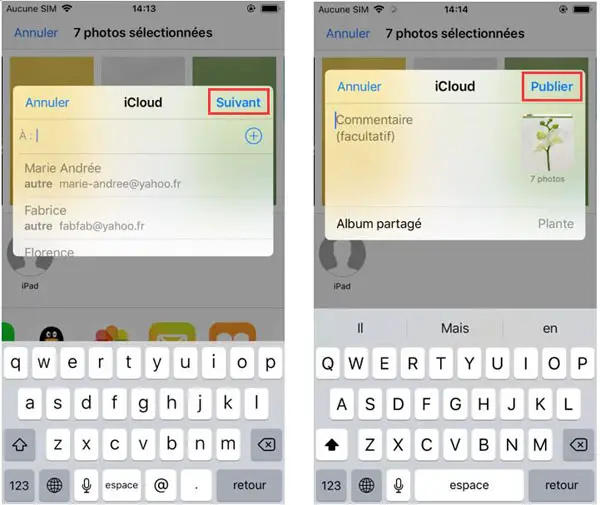
To share your album with someone, just type their name, phone number or email address in the “To” box, then tap “Next”. Now add a comment in the space provided. When you are satisfied with everything, finish with “Publish”.
And There you go ! Your iCloud album is finally ready! You can now access it in its tab in your Photos app on your iOS device, and you can manage it however you want. You will also be able to invite friends, allow or prohibit them from posting content in the album, and even delete the album that you have shared.
Conclusion
What did you like about this new function? Would you like to try it? Please feel free to share your thoughts in the comments space below.