"Can I use your laptop for a few minutes?" "
What does your gut tell you when you hear these words? You might be feeling uncertain as you don't know when was the last time you encrypted and sorted your video files? Are you worried that the person will click on the “wrong” folder? Do you prefer to stay behind the person using your computer in case you suddenly need to pick it up when they are about to click on the folder where you have stored your personal videos and media files?
What you are feeling are not the thoughts of someone who is paranoid, but those of someone who cherishes their privacy. While the above scenario is only for people who share their Macs, there are much more sinister alternatives, such as theft or your system being hacked by a hacker..
How to secure private videos on macOS
We're going to show you some practical steps you can take to make sure your video files are properly secured. We will start with manual methods and then we will reveal to you the best tool for hiding videos, Hidata.
Free try
Hide videos from the sight of others (but they are not completely safe)
There are many ways to hide your folders and video files. While not super secure, these simple solutions may be enough to allay your fears..
The most obvious method that is used by many people is to give your video folder a boring name, such as "Data", and move the folder to an obscure place where it cannot be found by accident. You can even take it a step further by renaming your video files to further reduce the chances that a media file search can detect them.
Personally, I wouldn't feel very comfortable with this method alone. So let's see something a little more efficient. The little trick that we are going to present to you is to hide your private videos in another account on your Mac..
Simply create a new user account by going to “System Preferences” → “Account”, then login to it and place the video files and folders you want to hide in this account. This means that you will have to constantly switch accounts to access your hidden videos, but at least it will eliminate the possibility that a colleague or a member of your family will discover them by accident.
Use encryption to protect videos
Encryption is a much more secure method. By encrypting your private videos or folders, you ensure that they cannot be viewed, even if someone finds them. Once encrypted, you can also move your files to an external hard drive or even back them up to DropBox, safe in the knowledge that if you lose your hard drive or your cloud is hacked, your videos will always stay safe.
The macOS Disk Utility application can help you do this. However, it was not developed for the purpose of hiding files, so it is not an ideal solution.
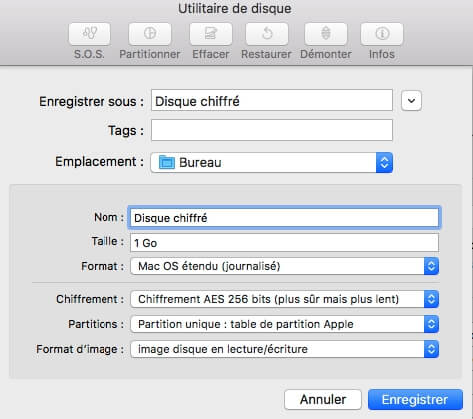
If you still want to try it out, we'll show you how you can create an encrypted folder (in this case called an "image") with Disk Utility.
- Open Disk Utility.
- On the top bar, click “File” → “New Image” → “Empty Image”.
- In the dialog box, choose the name of the image, the location where you want to create the image, and all other information.
- We recommend choosing “Mac OS Extended” for the format.
- Choose "AES 256 bit" for encryption. You will be asked to create a new password and choose a strong password that you can remember (or you can use Keychain Assistant. Its icon will appear next to the form).
- Choose “No Partition” for Partitions and “Read / Write Disk Image” for Image Format.
- Click “Save”, then click “OK”.

Disk Utility will create and mount the encrypted image file to the location where you saved it. Now open Finder and move your private videos into the image as if it were a normal disk drive. When you're done, just unmount the image and your videos will now be hidden and secure.
To view them, double-click on the image you created and enter your password. Remember to always unmount the image when you are finished.
Hide video files with Terminal
Using Terminal to hide video files and folders is a very efficient, but annoying method. This will absolutely ensure that your files will be hidden, but you will have to take a lot of time every time you want to hide and reveal a file or folder.
Here is how you can hide videos with Terminal.
Method 1:
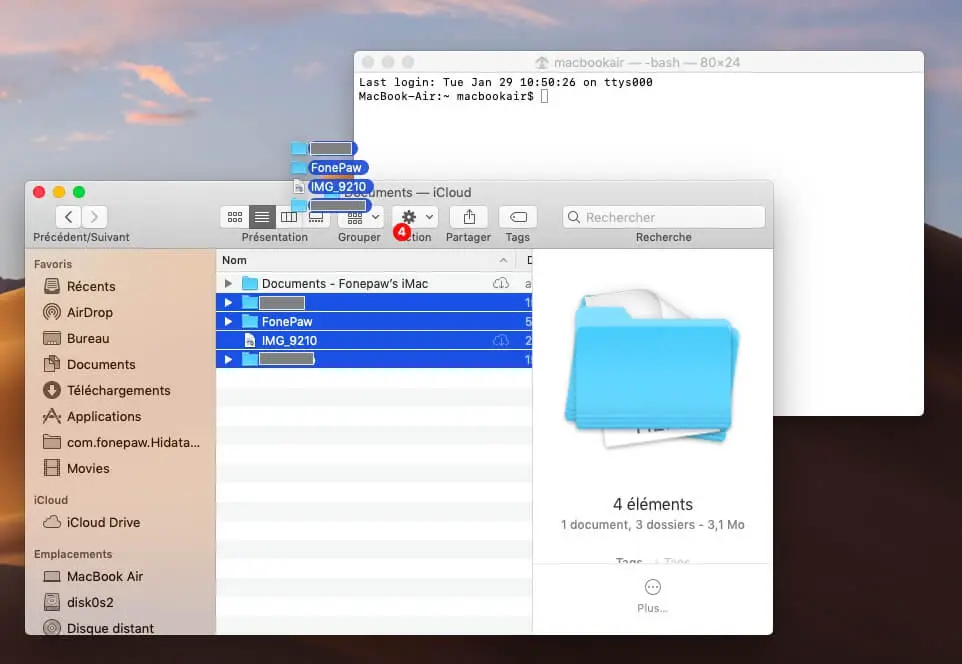
- Open Terminal, then type "chflags hidden".
- Drag a folder or file that you want to hide into the terminal window.
- Note the path to the folder.
- Press the "Enter" key.

Your video folder or file will now be hidden and inaccessible from Finder.
To access your hidden video folder or file, go to “Finder” → “Go” → “Go to Folder” and enter its path, for example: ~ Desktop / HiddenVideos. In summary, your folder or files are still present on your computer, but you need to know their path to find them.
To permanently display a folder or video files, go back to Terminal and type "chflags no hidden", followed by the path of the file or folder.
Method 2:
Open Terminal, then type "mv filename. Filename". This will move the original folder to a folder with a period at the beginning of its name. By default, folders with periods at the beginning of their names are hidden in macOS.
You can also type "mkdir .hiddenfolder" to create a new hidden folder. You can access these hidden folders and files by opening the "Go to Folder" dialog box (Command-Shift-G) and entering their full path.
Use specialized software to hide videos and preserve your privacy
In a perfect world, all the terminal functions and the security of Disk Utility encryption would be combined into a single user-friendly interface with good security and without inconvenience, difficulty or vulnerability.
Well, welcome to the perfect world because there is a great app for hiding videos called Hidata.
This is the fastest and easiest method to secure your most personal video files from curious and malicious people.
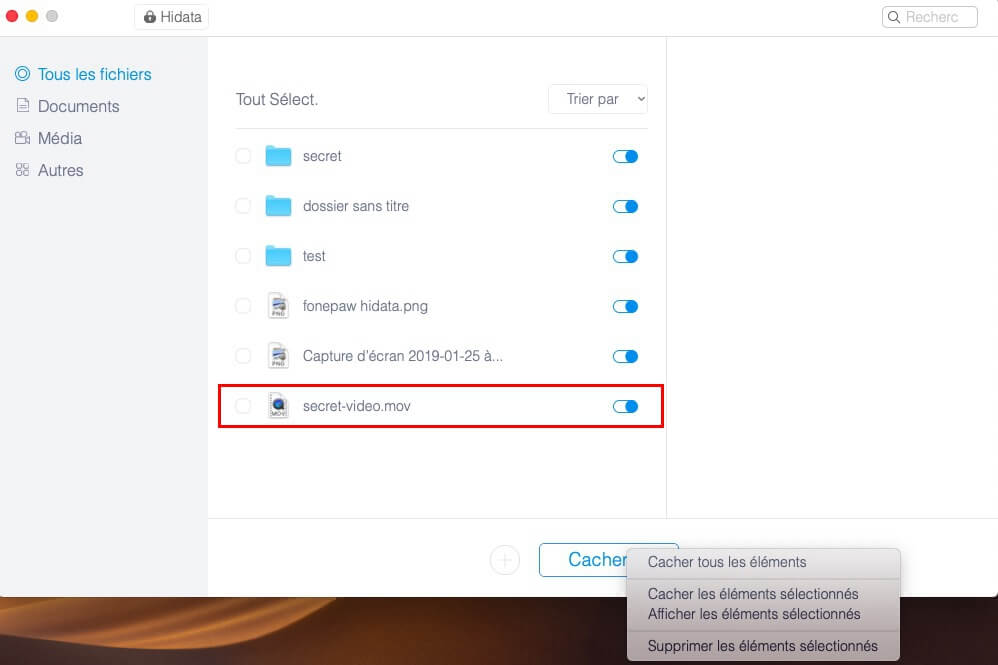
Just download, install and launch the application on your Mac computer to create a new password protected video locker (you can also hide any type of file like photos, documents, and even musics). With a simple interface that supports drag and drop, Hidata will hide your video files within minutes.
Step 1. Download and open Hidata, you can set up a password to secure this app.
Free try
Step 2. After setting the password, click the “+” icon to add your secret videos or drag the video files into Hidata.
Your videos will be hidden once added in Hidata.

Once your video files are hidden, no search action will be able to find them. Plus, with AES 256-bit encryption, you get a solid layer of security that even hackers can't penetrate. It's rare to see such powerful and easy-to-use security software available to everyone.