Paint.NET is not only the further development of the well-known Windows drawing program Paint, but was originally intended to replace it. It never came to that. Nevertheless, the Photoshop competitor has caught up enormously in recent years - both in terms of the range of functions for editing photos and creating images, as well as in the handling and appearance of the user interface. In the following article we have written a small guide with first steps and helpful tips for the Paint.NET program. Have fun!
Install Paint.NET
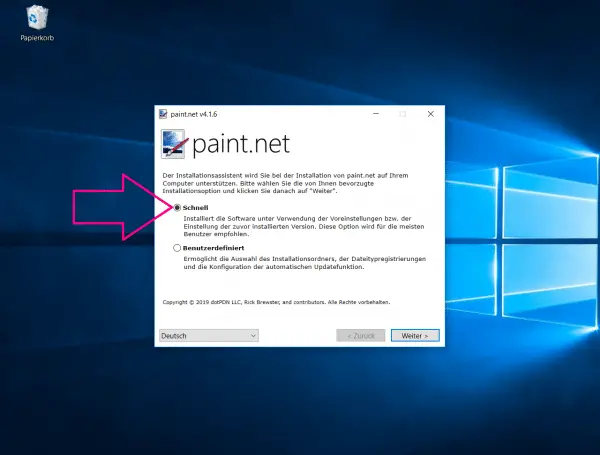
The software is available online as a free download for Windows. Use the standard settings suggested to you during the installation. Paint.NET is ready for use within a few minutes. As the name of the program suggests, a so-called .NET framework is required. This is automatically installed during the installation if you do not already have it on your computer.
Edit photos with mouse tools
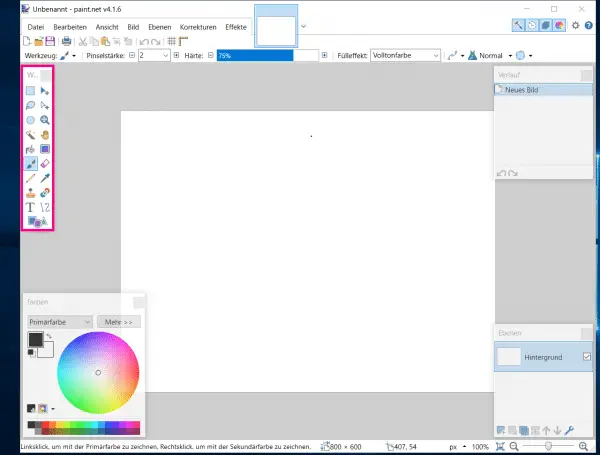
If you've worked with Photoshop or GIMP before, the look of the Paint.NET user interface may not be all that new to you. On the left side you will find the tools for image processing , including, for example, the lasso tool, the brush or the text tool for creating text elements in the image. To activate a tool, simply click on it once with the mouse. Further settings can then be made for some tools. For example, you can specify the shape and thickness of the brush. The associated parameters can be found at the top in the bottom menu ribbon. The practical: the menu surfaces appear semi-transparent so that you can always see as much of your pictures as possible..
Tip: We recommend working with so-called layers for images that you would like to edit in a more complex way. In this article, we will explain how you can best work with layers for GIMP. The steps from this article can also be used in Paint.NET.
Helpful plug-ins
Even more variety through additional extensions - that is what the plug-ins for Paint.NET promise. One of the most popular is the PSD plug-in , which you can even use to open Photoshop files in Paint.NET and edit them further. In this article, we explain where to find Paint.NET plug-ins and how to install them..
Instructions for automatic and manual corrections
If you want to see results very quickly, you can save a lot of time with the automatic correction function in Paint.NET. A little more time-consuming but also worthwhile is the manual correction to get the best out of your images. Follow our step-by-step instructions or take a look at the brief instructions .
1st step:
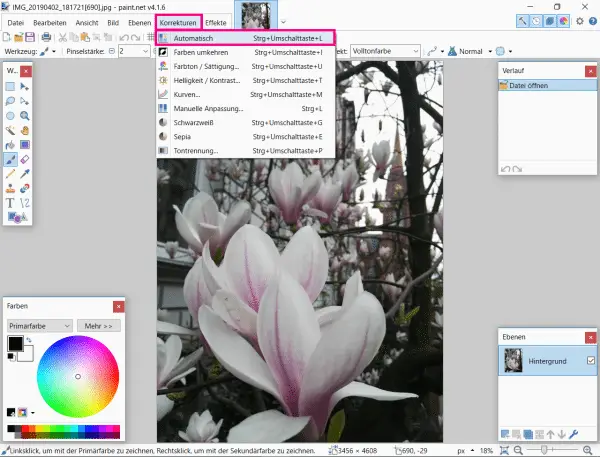 Open your photo in Paint.NET. Go to " Corrections " in the menu bar at the top . Click there on " Automatically ". The program then analyzes your image and adjusts it to the tone value, colors and brightness.