Abstract :
FonePaw Screen Recorder helps you fix Windows 10 camera problem..
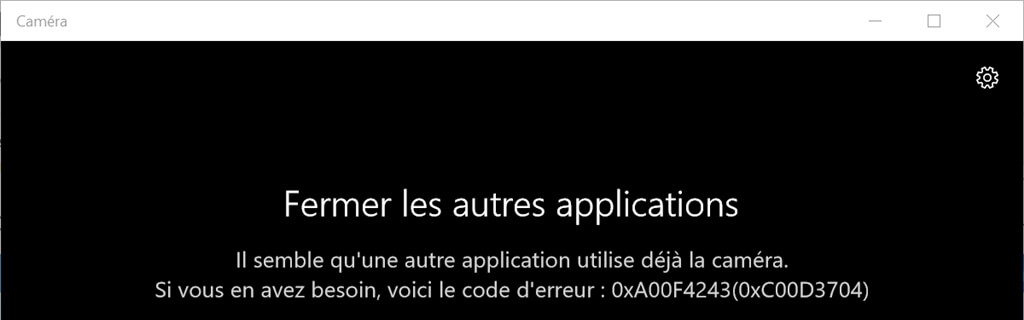
Many people have reported that their laptop's built-in camera or external webcam like Logitech or Alienware has stopped working after updating Windows 10. In some cases the camera cannot be started and appear with error codes 0xA00F4244 (0x200F4244) or 0xA00F4246, or still displays an image with a gray background and a white camera with a cross. Additionally, some users receive the error code 0xA00F4243 (0xC00D3704) because "it looks like another application is already using the camera."
This article will show you how to fix Windows 10 camera issues including cameras from Lenovo, Webcam Acer, Dell, Asus not working properly. Hope you can find the solutions for your built-in or external camera.
Fix Windows 10 camera problem with another app
You may notice that after updating to Windows 10, your laptop's camera can work with Skype and another camera app, but not with the built-in camera in Windows 10. Using a webcam app third party to replace camera app is a good solution for this. FonePaw Screen Recorder (opens new window) is also highly recommended.
This recorder not only allows you to take photo or record video with webcam, but also record screen activity with audio and webcam on your Windows PC. Games, demo videos, video and audio streams, etc. can all be saved..
Step 1. Launch FonePaw Screen Recorder. Activate the Webcam by clicking on the toggle button.
Step 2. To take a photo of everything in front of your laptop's camera, click “Take Photo”..
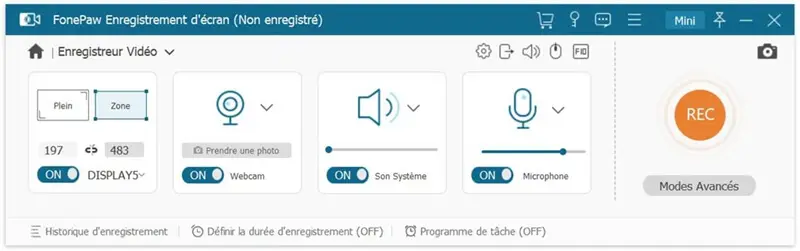
Step 3. To take a video with your computer's camera, click the “REC” button to start capturing video. It can also record system sound and microphone sound at the same time.

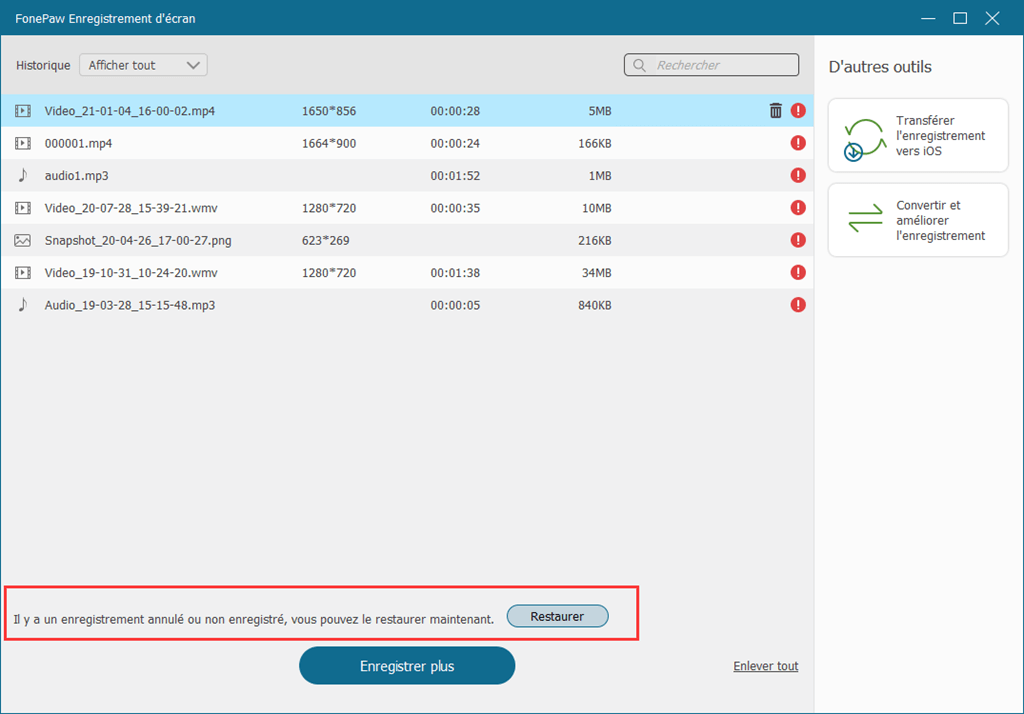
Tips : The canceled or unrecorded file can be restored when the program accidentally quits during recording.
All you have to do is access "Record History" at the bottom left of the software home interface. In the pop-up window, you will see the button at the bottom of the "Restore" window. Press this button and then you can recover the unsaved video.
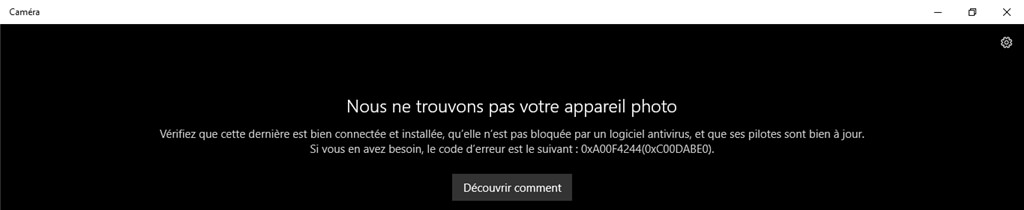
Cannot find or start the camera (error 0xA00F4244 or error 0x200F4244)
As the error message shows, the Windows 10 camera cannot be found or started because it is blocked by an antivirus service or the webcam driver is out of date. Here are some things you can try to fix Windows camera not working issue.
# Allow apps to access Windows 10 computer camera
After updating to Windows 10, some apps may not be able to access your camera. Therefore, applications cannot find or start the camera.
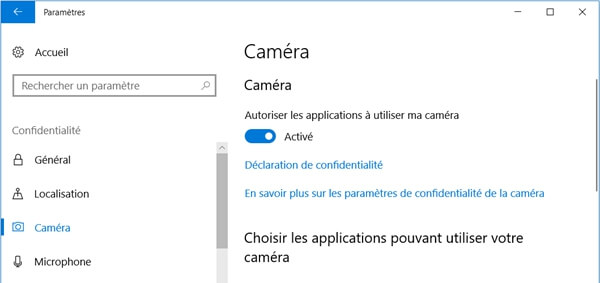
Step 1. On your computer, click the “Start” button, then select “Settings” → “Privacy” → “Camera”.
Step 2. Activate the “Allow apps to use my camera” button and select the apps that can access it.
# Use the F8 button
It is still not clear why it works, but some users noticed that the Windows camera started working again right after pressing the F8 key. This method may not always work in all cases, but it is a very easy trick to try.
# Reset camera app on Windows 10
Resetting a camera app can fix system issues that prevent the camera from working on Windows 10 and restart the app.
Step 1. On your PC, go to “Settings” → “Apps” → “Apps & Features” → “Camera”.
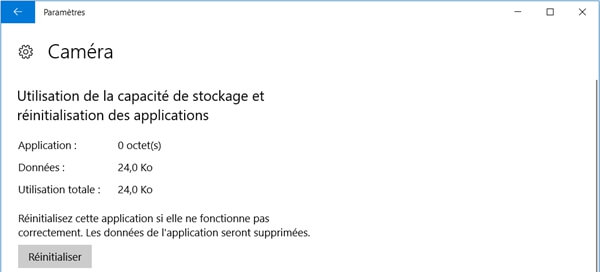
Step 2. Select “Camera”, then click “Advanced Options”.
Step 3. Then click on “Reset”.
# Check the Microsoft Webcam driver
There might be an issue with the webcam driver that is preventing the Windows 10 camera from working. First check the webcam driver.
Step 1. Open “Device Manager”.
Step 2. Navigate to “Imaging Devices”.
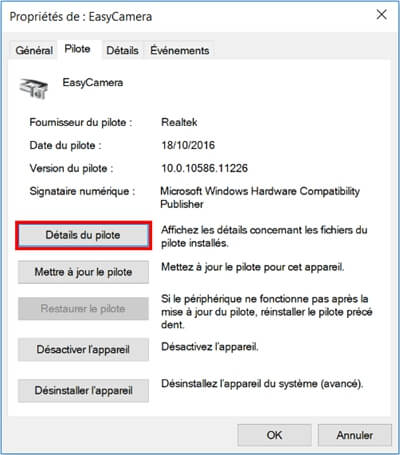
Step 3. Right click on your webcam driver and select “Properties”.
Step 4. Under the “Driver” tab, click “Driver Details” and check if there is a “stream.sys” file. If this is the case, then your webcam is obsolete and does not work with Windows 10. You must therefore look for a new driver for your webcam.
# Restore or update the webcam driver
If there is no stream.sys file in your webcam driver, then the webcam is usable, but you need to update or restore the webcam driver.
Step 1. On “Device Manager”, locate your webcam driver.
Step 2. Right click on it and select “Properties”.
Step 3. Click on the “Driver” tab. If there is a “Restore Driver” option, click on it to get a suitable driver.
Step 4. If there is no “Restore driver” option, click “Uninstall” → “Remove the driver software from this device”. After removal, go back to "Device Manager", click "Action" → "Check for hardware changes" and reinstall the webcam driver.
Then restart your computer for the changes to take effect.
If there is no imager or camera built-in in "Device Manager", you may want to analyze the hardware changes to reinstall the driver. Also, if none of the above methods work, check if there is anti-virus software enabled, if so, temporarily disable it, and check if the camera is working properly.
Fix Windows 10 camera that is not working (error 0xA00F4246 or error 0x887A0004)
After installing a new Windows 10, the camera app stops working showing error 0xA00F4246 (0x887A0004). To correct this error, you can try to:
- Reset the camera in “Settings” → “System” → “Apps and Features”.
- Check "Privacy" in Windows settings and make sure you have allowed the camera app and other apps to use the camera.
- Run the hardware and peripherals troubleshooting and right-click on the "Start" menu, then click "Search" → "Troubleshoot", then open the tool, and click "Hardware and peripherals" then "Run this" repair ".
- Reinstall or update the webcam driver. Open "Device Manager", select "Imaging devices" or "Integrated webcam". Update the driver. If no update is available, remove it and reinstall the driver.
If the above methods did not work in your situation, you can try to fix the built-in or external camera that is not working by adding a new registry value.
Step 1. Open the Registry Editor. Simultaneously press the "Windows" and "R" keys to open the "Run" window. Type "regedit" and press the "Enter" key.
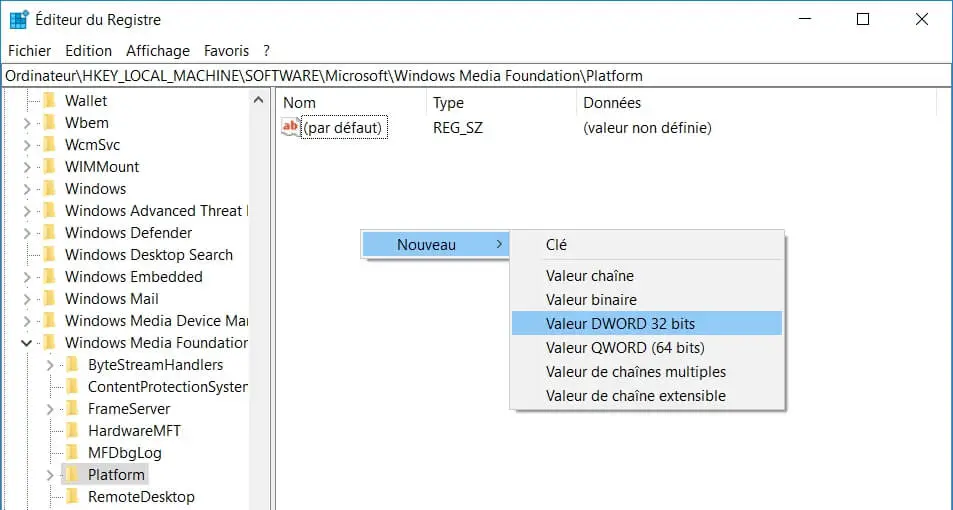
Step 2. Go to “HKEY_LOCAL_MACHINE” → “SOFTWARE” → “Microsoft” → “Windows Media Foundation” → “Platform”.
Step 3. Right-click on the empty space of “Platform”, click “New”, then select “DWORD (32-bit) Value” and create a new value named “EnableFrameServerMode”.
Step 4. Double-click on the value “EnableFrameServerMode” and enter “0” in its value data. Click on “OK”.
Restart your computer and then the camera will start to work normally.
Fix Windows 10 camera not working (error code 0xA00F4243) issue
After updating Windows 10, you can no longer use the camera or apps like Skype with your laptop's built-in camera because error 0xA00F4243 tells you to "Close other apps." It seems that another application is already using the camera ... ”.
If you want to fix such a camera problem, try the following solutions.
# Disable applications that use the camera.
Step 1. Go to “Settings” → “Privacy” → “Camera”.
Step 2. Disable all applications authorized to use the camera.
When you open an app that needs to use the camera, it will ask for your permission. In this way, you can start the camera, without another application using it.
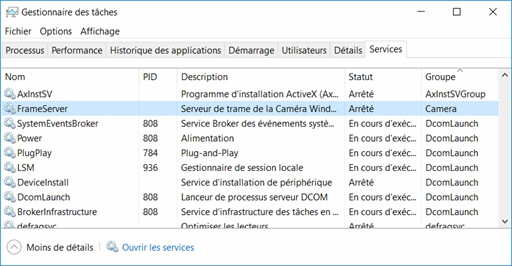
# Check Task Manager
Step 1. Right click on the empty space of the toolbar and select “Task Manager”.
Step 2. When the “Task Manager” is open, check the “Processes” box and disable the applications that use the camera.
Other users have suggested that if you find services like Intel (R) RealSense (TM) Depth camera Manager Services is disabled under the Services tab, run the services and the camera will start working.
# Reset or reinstall the camera
First, go to “Settings” → “Apps & Features” → “Camera” → “Advanced Options” and click “Reset” to reset the app. If the camera still does not work after the reset, you can reinstall it.
To uninstall Windows default apps like "Camera" you need to use PowerShell.
-
Run "Windows PowerShell" as an administrator.
-
Enter the following command: Get-AppxPackage Microsoft.WindowsCamera | Remove-AppxPackage. Then press “Enter”.
The camera app is uninstalled. You can reinstall it from Microsoft Store.
# Update the camera driver
Error 0xA00F4243 can be triggered by an outdated or corrupt camera driver.
That is why you need to update the camera driver to make the Windows 10 camera work again.
-
Open “Device Manager” → “Imaging Devices”.
-
Right click on the webcam driver and select "Update Driver Software". Follow the on-screen instructions to update the webcam driver.
These are all the solutions for Windows 10 camera not working problem, you can choose according to your need. If you are not familiar with the operating steps of the computer, FonePaw Screen Recorder (opens new window) can help you to avoid many operating problems. It only takes a few simple steps to record all the activities on your computer. Come download it and try it out!