In addition to Nextcloud, OwnCloud is probably the most popular solution for creating a self-hosted alternative to Dropbox, Google Drive and Co. If you don't feel like leaving your sensitive files in the hands of companies, OwnCloud is a very good alternative. In addition to storing and synchronizing files and folders, you can also use OwnCloud to manage contacts or take on tools such as a calendar, a to-do list and even office functions. By default, setting up OwnCloud requires your own web space, for which you would have to pay monthly. But there is another way: Simply install OwnCloud on the Raspberry Pi! Thanks to an adapted program package, the mini-computer is able to serve as an open source server for the private cloud.
OwnCloud on the Pi: requirements
OwnCloud runs theoretically on all Pi models. Due to the higher performance, the service is really fun only from the Raspberry Pi 2 model B, a Pi 3, Pi 3+ or Pi 4 is better..
You can install OwnCloud in an existing operating system such as Raspbian . However, this involves a lot of effort. For the sake of simplicity, we use the adapted DietPi distribution , with which you can set up the necessary services and programs particularly easily. A USB stick or an external hard drive (ideally an external SSD) is usually used as data storage for your personal cloud files.
We recommend connecting the Raspberry Pi directly to your router via an Ethernet cable. OwnCloud also works via WLAN, but experience has shown that the cable variant is more reliable. In order to be able to access the Pi-OwnCloud via the Internet, you must set up DDNS access and port forwarding to port 443 of the Pi. You can find more information on this in our article on DDNS..
Install OwnCloud on the Raspberry Pi
As already mentioned, we use DietPi to install OwnCloud on the Raspberry Pi, which you can download from this link: https://dietpi.com/ . Unzip the download file and transfer the DietPi image to an SD card. This works just like we showed earlier for Raspbian.
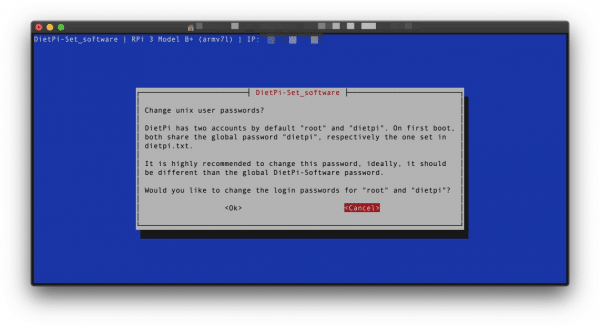
You can operate DietPi either directly with a connected keyboard or with an SSH client from another computer in the network. Here you can read how to set up SSH on the Raspi. The username is " root ", the standard password is " dietpi ". After the first start, a wizard will guide you through the most important steps. You can also set a different password if required..
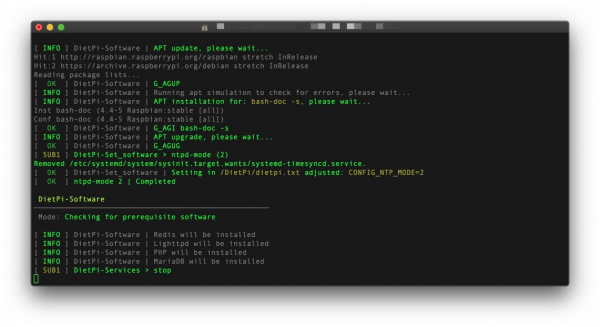
On the DietPi start page, switch to the “ Software optimized ” menu . All programs available for DietPi are listed here. Find the entry “ OwnCloud ” and mark it with the space bar. Then switch back to the start menu with the [Tab] key and select “ Ok ”. Here select “ Install - Go ” and confirm the installation. DietPi now not only loads OwnCloud, but also all required components such as the Apache server , Perl etc. down and set it up. This process can take a while. At the end you will be asked to restart the Raspberry Pi. All services that are required for the operation of OwnCloud on the Raspi are automatically loaded.
Move OwnCloud files to external hard drive
By default, DietPi saves all server files - and therefore also your OwnCloud data - on the microSD card. Of course, you can also move the data to an external USB stick or hard drive, which is particularly useful for OwnCloud. To do this, connect to DietPi via SSH and start the " dietpi-software " program.
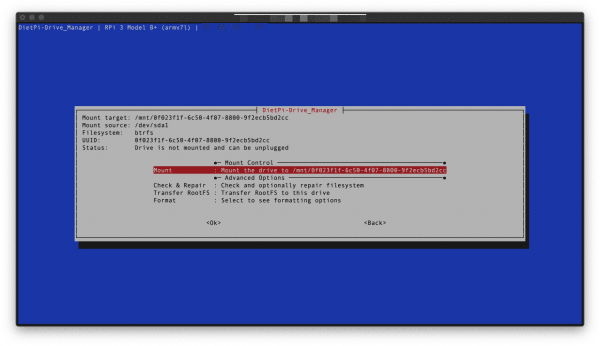
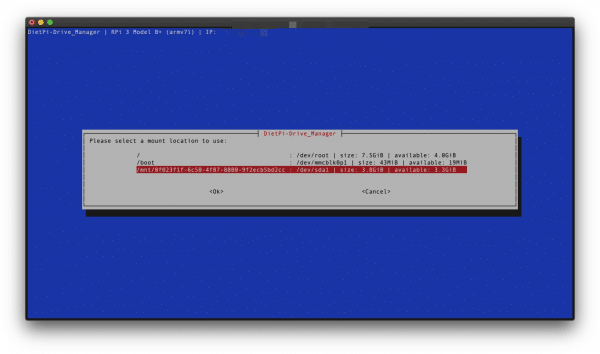
Here you open the point “ User data location ” and select the entry “ Drive ”. In this menu you can manage all storage media attached to the Pi. Identify the hard drive or USB stick here, mark it and select the “ mount ” command . If necessary , enter a name and click “ OK ” to make the external drive ready.
Switch back to the software menu with “ Back ” and “ Exit ”. Now open the point “ User data location ” again and select the command “ list ”. Now select the drive that has just been mounted and move the data with a click on “ Ok ”. All OwnCloud files now end up on the external hard drive or USB stick of your choice.
Set up OwnCloud on the Raspberry Pi
After installing OwnCloud via DietPi, you can continue in the browser of your choice. Open the OwnCloud start page by entering the IP address of your Pis followed by / owncloud in the URL bar. It looks like this, for example: http://192.168.1.160/owncloud
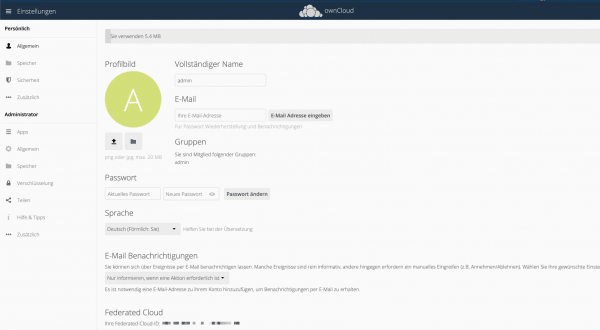
You will now land on the OwnCloud log-in screen. Here you log in with the user name “ admin ” and the standard password “ dietpi ”. You can now move files to the OwnCloud-Pi via the browser. You can create additional users and change the standard password via the “ admin ” menu at the top right and selecting “ Settings ”. OwnCloud is now running and can be used - for example via the OwnCloud client for Windows, macOS or Linux or the OwnCloud apps for Android and iOS. You can either enter the IP address of the Pis or the DDNS address you set up for your router in order to use the connection to your private cloud. The OwnCloud forum is a good place to go if you have any questions.