We use our laptop or desktop for studying, working and playing games etc. This is the reason why we store a lot of data on our computer including important data, commonly used files and default content. We cannot know if some files are still on the PC, you will notice its missing files only when they are lost and not found on your Windows PC. Therefore, it is necessary to back up your computer to prevent permanent deletion of files. What you need to do is just apply the methods recommended here..
Part 1. Backup Using Windows Built-in Backup Function
Each computer has built-in functions to back up data from the Windows PC. So, you are able to protect your computer files without any loss. It is quite simple to make a backup with the Windows 10 system image, but it is recommended that you use an external drive that has enough free space to save the file. Now we will learn how to create a system image and configure the backup.
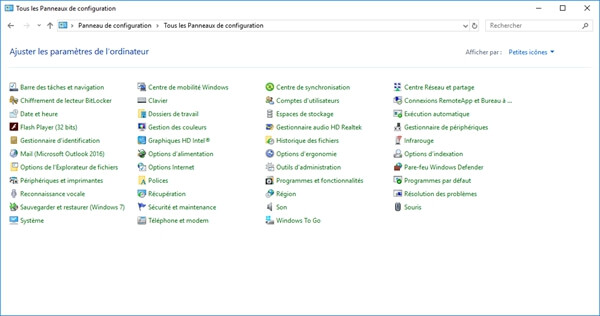
Step 1. Click “Start” button, open “Control Panel” → “System and Security”, click “Backup and Restore” (Windows 7). You can enter "Backup and Restore" (Windows 7) directly into the "Control Panel" in Windows 10..
Step 2. Select “Create System Image” option to begin, which will search for backup device. Click the drop-down list to find the appropriate hard drive to save the backup.
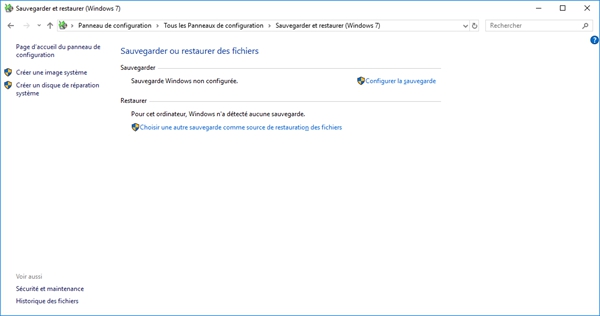
Note: It is recommended that you back up your data to an external hard drive to avoid loss in the event of a computer crash..
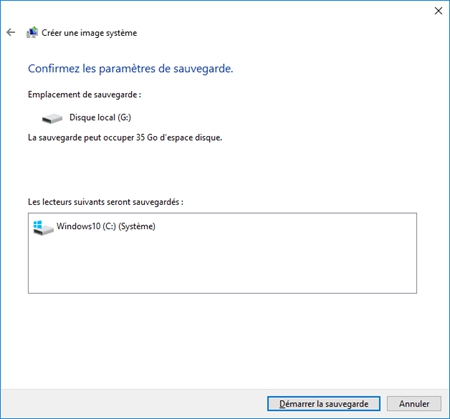
Step 3. Check the backup settings and confirm to continue, then your Windows PC backup will start.
Tip: You will see another option in the left pane where you can create a system repair disc that will help you recover your computer in the event of an error.
Part 2. Back up data using cloud storage service
Like iPhones and Android phones, you can also save your computer files to cloud storage. Only with online accounts, Dropbox, Google Drive, etc. can store your data on a Windows computer. Once you log into the account, the cloud storage service will sync files from your device to the cloud. However, if you have a lot of files that take up too much memory, this method is not recommended because these cloud services only offer limited storage for free.
Here's how to back up files via Google Drive.
Step 1. Install Google Drive and sign in to your Google account.
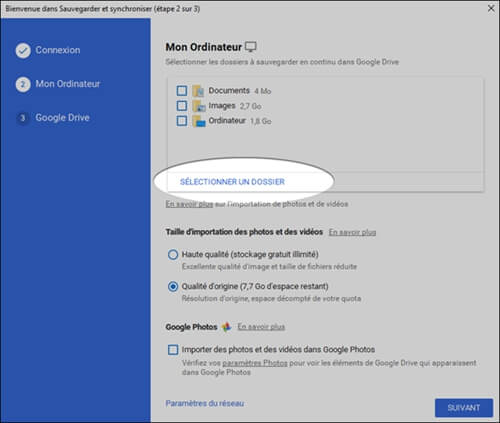
Step 2. Choose a specific folder to upload to Google Drive.
Step 3. As for photos and videos, you can select the quality of the items as you need. Also, if you have confirmed the upload to Google Photos, you will see them on the devices that you are signed in to the account.
Step 4. You can synchronize your disk to the computer by checking the box that will prompt you, which will save the files from the disk to the PC.
Step 5. Click on the “Start” button to finish setting up Google Backup. You will then be able to display the “Backup and Sync in the taskbar” icon, making it easy to back up your Windows data with just one click.
Part 3. Export Files to Computer with Data Recovery
The above method is very network dependent, you may not be able to back up a large number of files on your computer. At this point, you can use FonePaw Data Recovery to export the data to your computer, which is expert in Windows 10/8/7 / XP data recovery no matter existing or deleted files. So, it can save more data than the first and second method. Of course, it can exclude deleted data and save existing data only.
Step 1. Launch FonePaw Data Recovery wizard on PC and select one or all of the data types you want to backup.
Free TrialFree Trial
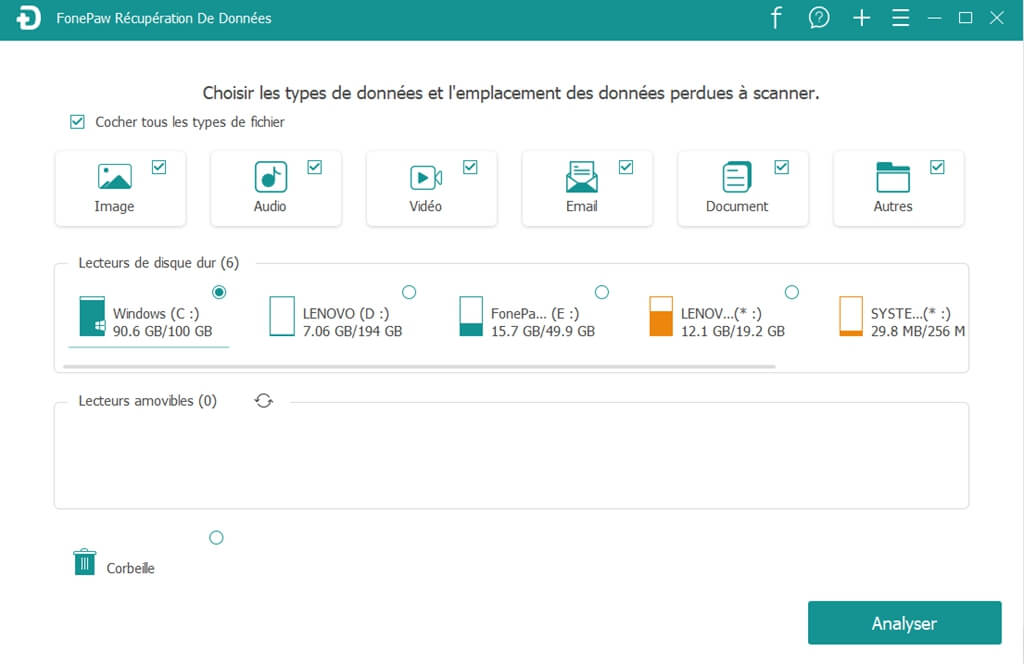
Step 2. Start scanning the files on your computer. All content will then be listed according to its format and save path.
Step 3. Preview and select the content you want to save. Click "Recover" to export them to your Windows PC.
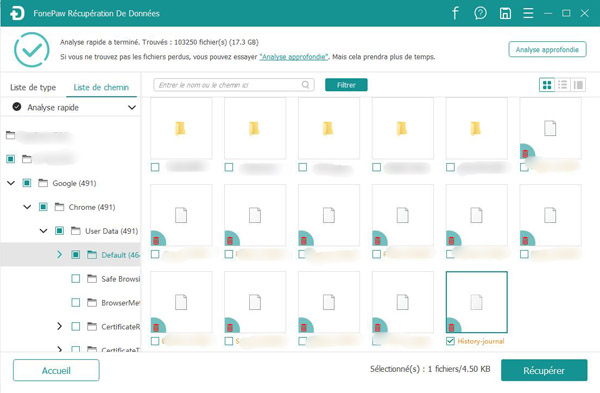
Note: When viewing the scan results, you can use the search field to filter. Additionally, the orange file name indicates deletion and black indicates the existing file on the laptop.
Free TrialFree Trial