The style photos of our parents or grandparents or even great-grandparents days really look great. Even though these photos are very old and sometimes almost blurry, depending on how it has been preserved, they often tell very moving and very interesting stories..
Today the photos we take are no longer in the same style as those old times. Nevertheless, we now have the possibility to recreate this kind of effect. With the advancement of technology, one can as what would say "go back in time".
It's simple. All you need is a good software to add effects to photos, and that's it, you can edit your photos! Image Resizer is what you need for that!
Free Trial Free Trial
Download it, install it and continue reading the next article to see how to do it..
Step 1: Start the software and choose your photos
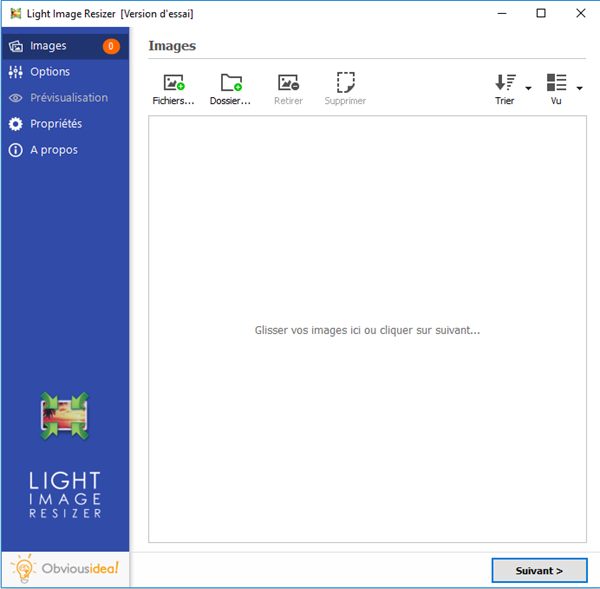
Start the Image Resizer program, by clicking on the shortcut icon representing it on your PC desktop.
Once the software is open, a window like this will appear on the screen. Then please click on "Files" or "Folders", and select the photos you want to change to sepia effect..
Step 2: Configure the settings for the sepia effect photo change
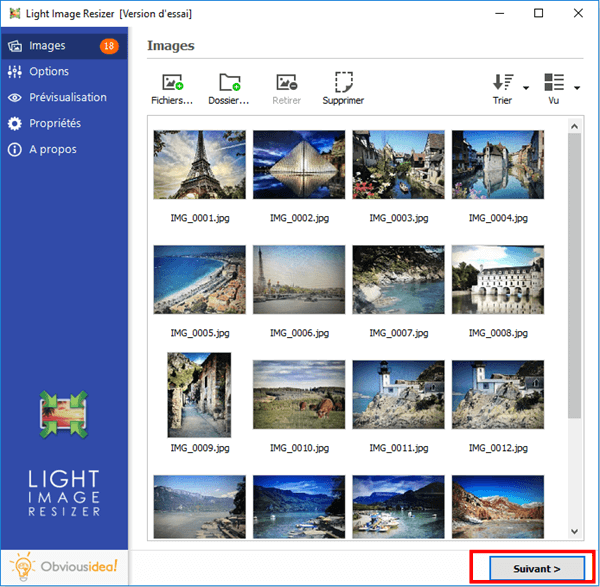
After selecting the desired photos, continue by clicking on the "Next" button.
Click on the “Effects” section and check the box corresponding to the “Sepia Effect” option.
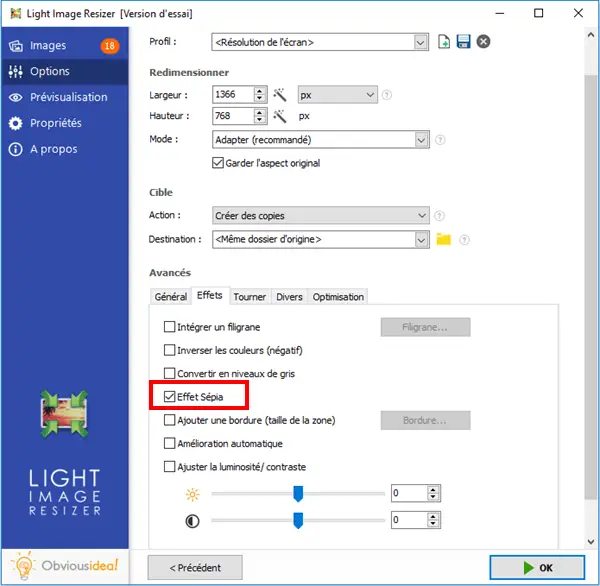
Note: You can preview the new images by clicking on the “Preview” option found in the menu on the left.
[Image to add - Before-after preview]
Step 3: Choose the output location and change your photos to sepia effect
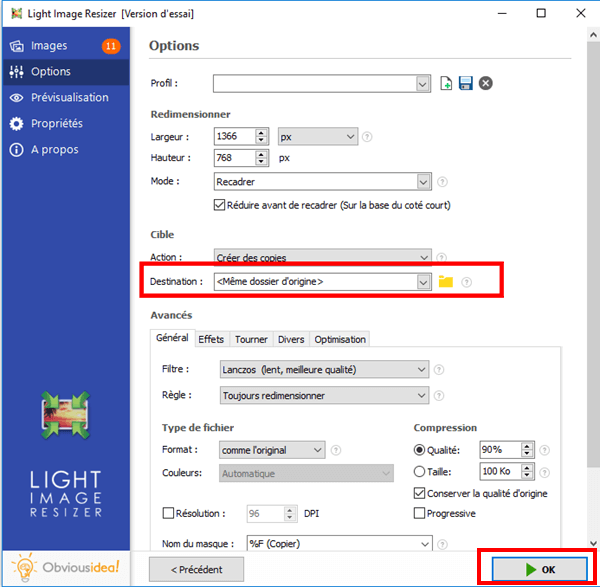
After the transformation, the file (s) will be sent to the folder where the original photos are located. But, you can change the default output location by clicking on the folder icon in the “Destination” part and selecting the new desired location .
Continue by clicking "OK" to start the process of adding a sepia effect to your photos.
Note: The duration of the process may vary depending on the number of photos you have selected to add the sepia effect. It can range from a few seconds to a few minutes. But you don't have to worry about the time used in this procedure, because it's usually very fast! A loading bar will appear on the screen to inform you of the remaining time.
A window will also appear to inform you that the transformation of your photos with the addition of sepia effect is complete and successful. For more information on the changes made, you can click on the "Details" badge located on the lower right corner of the window.
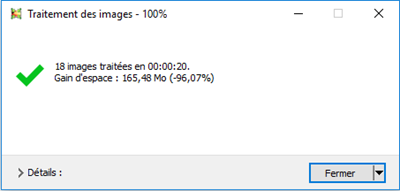
Note: By clicking on "Close", you will not only close the window informing you that the task has been completed, but you will also close the software. If you would like to continue performing other operations, please click on the arrow next to the “Close” badge, and select the action that best suits you. You can continue to make other changes from the software, open the folder where the transformed files were sent, etc.
Free Trial Free Trial
It was quick and easy, wasn't it? With Image Resizer, you can add effects of all kinds to your photos. You can personalize them and thus create a unique photo album!
The trial version allows you to transform quite a few photos for free before deciding whether or not to purchase the full paid version which will allow you to edit an unlimited number of photos.
Did you like this article? Feel free to share it with your loved ones on social networks or leave us a comment in the space below.