Videos are a collection of several and even thousands of photos, with the addition of sound. Many today have thus always first resorted to photography in order to be able to make a media montage..
Read also:
How to compress JPG or PNG image online and for free? (opens new window)
Do you need to convert your photos to a higher quality format so that you can shoot high resolution video? So no worries!

You will discover an easy and efficient way to transform your photos to facilitate your work. You can thus better personalize your memories in electronic form, better prepare your work and your presentations, make better montages for an advertisement, etc.
This tool you need is Image Resizer which will allow you not only to convert your photos to HD format, but also to personalize them by adding effects and styles of all kinds..
After downloading and installing the software, what should I do? No worries, just follow the following tutorial.
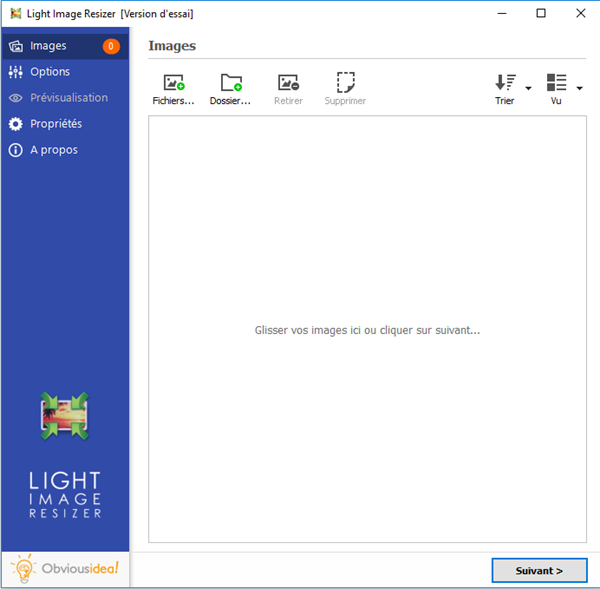
# Step 1: Start the software and choose your photos
Start the Image Resizer program, by clicking on the shortcut icon representing it on your PC desktop..
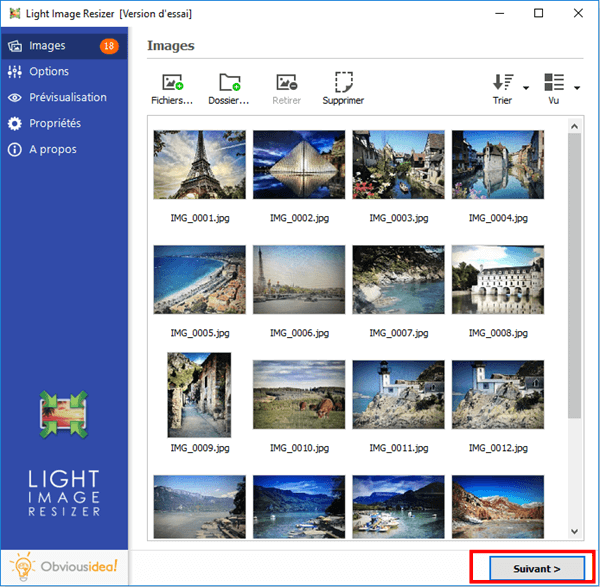
Once the software is open, a window like this will appear on the screen. Please click on "Files" or "Folders", and select the photos you want to convert to HD format.
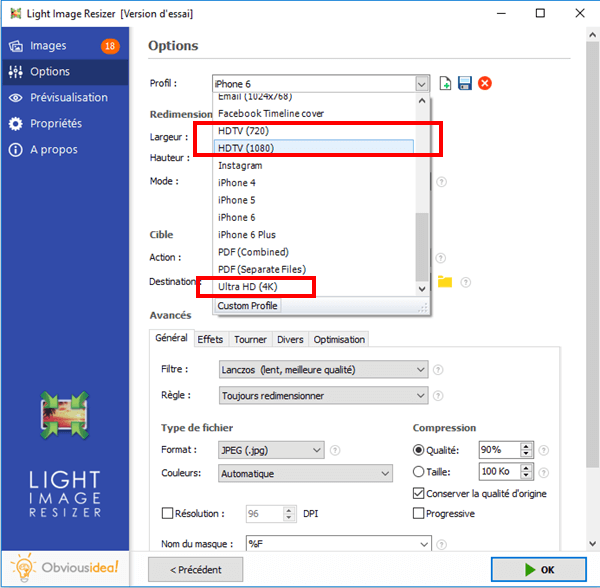
# Step 2: Configure settings for HD photo change
After selecting the desired photos, continue by clicking on the "Next" button.
In the "Profile" section, you can select the type of HD conversion you want to achieve.
You can choose from “HDTV (720)”, “HDTV (1080)”, and “Ultra HD (4K)”. Please select the new profile you want to get for your photos.
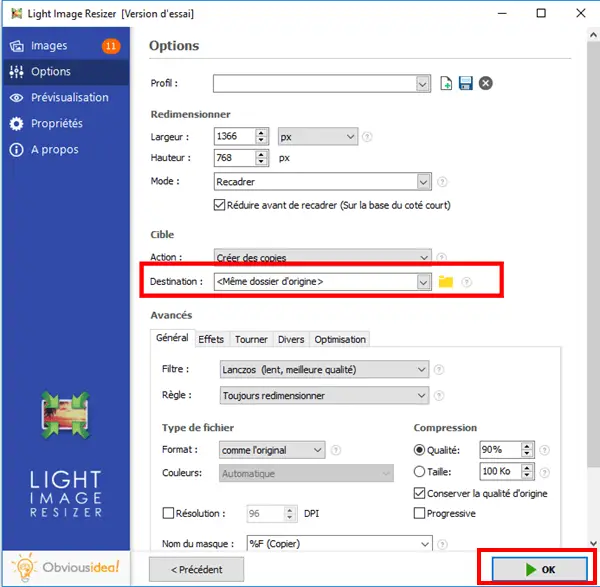
# Step 3: Choose the output location and convert your photos to HD
After conversion, the file (s) will be sent to the folder where the original photos are located. But, you can change the default output location by clicking on the folder icon in the “Destination” part and selecting the desired location.
Continue by clicking "OK" to start the conversion process.
Note: The process time may vary depending on the number of photos you selected for photo to HD conversion. It can range from a few seconds to a few minutes. But you don't have to worry about the time used in this procedure, because it's usually very fast! A loading bar will appear on the screen to inform you of the remaining time.
A window will also appear to inform you that the conversion of your images to HD is complete and successful. For more information on the changes made, you can click on the "Details" badge located on the lower right corner of the window.
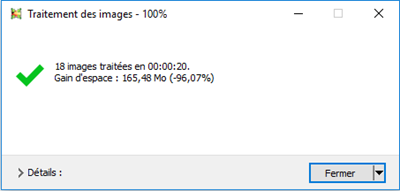
Note: By clicking on "Close", you will not only close the window informing you that the task has been completed, but you will also close the software. If you would like to continue performing other operations, please click on the arrow next to the “Close” badge, and select the action that best suits you. You can continue to make other changes from the software, open the folder where the transformed files were sent, etc.
And There you go ! It is done ! You finally have the photos with the size, characteristics, resolution and format you need to be able to achieve the video editing you want to do.
Did this article help you? We are convinced that the answer is yes, and that he can even continue to help more than one. You too can help bring that little sparkle of happiness to the eyes of people who are at the moment not sure what to do with this image resolution problem during video editing. Go ahead, share this article with all your loved ones.
If you feel like expressing your thoughts about this item or software. Do not hesitate to leave us a comment in the space below.