If you're worried about your online privacy, or if you're sick of seeing your old classmates' posts now that you've figured out they're not that cool, then you probably already have thought about deleting your Facebook account. In fact there are many reasons you can do this, and you will find that it is not that hard to do..
In this article, we'll walk you through how you can delete your Facebook account permanently, step by step, highlighting the difference between “deactivating” your account and deleting it completely.

If you are considering deleting your account then you are not the only one. Between the Cambridge Analytica scandal and the growing concerns of users about social networks about our individual and societal health, people are increasingly turning away from these sites that dominate the Internet..
Whatever your reason, deleting or deactivating your account is actually quite easy. Here is how you can do it.
How to Delete or Deactivate a Facebook Account - What's the Difference?
There are two ways to take your Facebook account offline. The first is deactivation, which means that:
- You can reactivate your account whenever you want;
- People will no longer be able to see your news feed on Facebook, or search for you on the site;
- Some of your information may remain visible (such as messages you have sent);
- Facebook will keep your account information (like your friends and interests) in case you decide to reactivate it later.
However, deleting your account is much more serious than that. If you decide to delete your account then:
- Facebook will delay deleting your account for a few days after the request. If you log in during this period of time, then the deletion of your account will be canceled.
- You will no longer be able to access your Facebook account once it has been deleted.
- It may take up to 90 days to delete your data stored in Facebook's backup systems. However, your information will no longer be accessible on Facebook during this time.
- Some items that are not stored in your account, such as messages you sent to friends, will remain on Facebook.
- Copies of certain documents (like connection logs) may remain in Facebook's database, but that data will be "separated from personal identifiers," according to the company.
In summary, deactivating your account is a way to log out of Facebook for a while, while deletion is a permanent solution that you should think carefully about before proceeding further..
How to deactivate a Facebook account
To deactivate your Facebook account, follow these four steps:
1. Click the down arrow to access your account menu, at the top right of any Facebook page on your web browser.
2. Go to “Settings”.
3. Choose “General” in the left column.
4. Click on “Account management”.
5. Then click on "Deactivate your account", then follow the steps displayed on the screen to confirm your decision.
To reactivate your account after deactivating it, all you need to do is log into Facebook with your email address and password. Your profile will be fully restored.
How to delete a Facebook account
Deleting your Facebook account is a serious decision, so make sure it's something you really want to do. Whether you like it or not, social networks are ingrained in society and your Facebook profile can affect your friendships, job prospects, and social opportunities. Keep in mind that there are also ways to secure your Facebook privacy settings, if that applies to you.
In addition, you will no longer be able to see the “same” funny ones if you decide to delete your Facebook account. And even if you find Facebook boring, it's also very useful for a lot of things, like keeping in touch with friends abroad and hosting events.
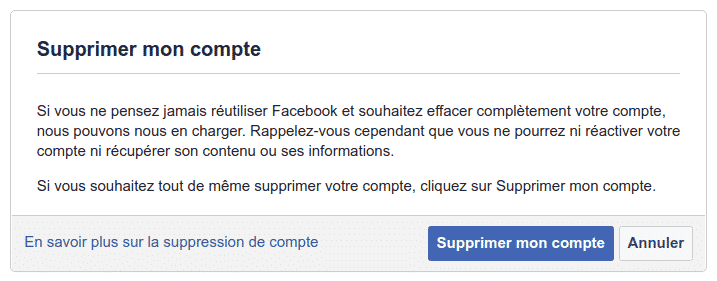
If you wish to permanently leave this social network, then click on the following link and choose the option "Delete account":
Delete my Facebook account
Before you delete your Facebook account, it may be interesting to download your Facebook data. To do this, follow the following steps:
1. Click the down arrow to access your account menu, at the top right of any Facebook page on your web browser.
2. Go to “Settings”.
3. Click on “Your Facebook information”, then select the “Upload your information” option.
4. Finally, click on “Create a file”.
A file that contains all of your Facebook profile information will begin to download, so be careful.