With a big screen, we can do so much on our iPad, and the technology of the Apple company continues to develop every day and allows everyone to have a more practical and simpler life with its various superb functions. They are very useful and are built into iPads without needing to download third-party applications to perform certain tasks..
Do you want to plot the route you have traveled using the Maps app on your iPad? Are you a great designer and would you like to share the different stages in the creation of your great works of art? Are there any games that you would like to take on video to share with your friends? Do you want to keep in memory the Live discussions of social networks or messaging applications? Do you need to teach people how to use their iPad? There are so many reasons why we might want to take video captures of our iPad screen.
Follow this tutorial on how to make a video recording of your iPad screen..
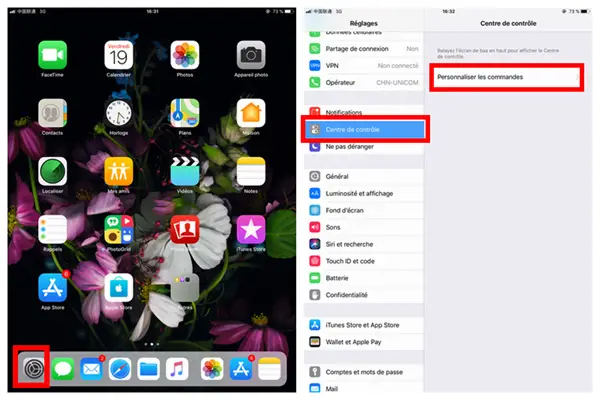
Step 1: Enter the configuration parameters
To do this, go to Settings , which is represented by a gray cog icon on your iPad's Home screen.
Drag the list of options and open the Control Center ..
Once this part is open, please select Customize Orders .
Step 2: Activate the Screen Recording function
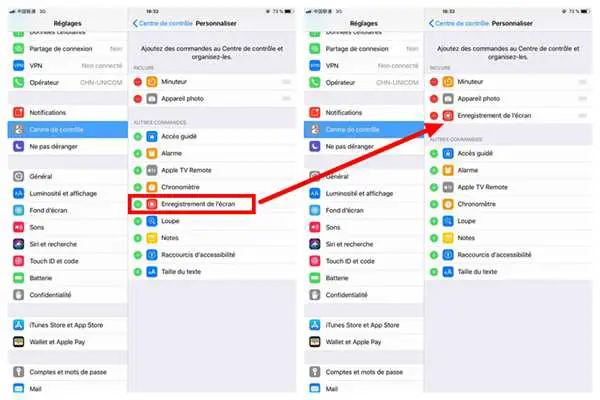
Once you have arrived in the settings of the Control Center which is responsible for the various commands that you can access by shortcut, please press the green (+) button which is located next to the inscription "Screen recording". By pressing it, the function will be moved to the “INCLUDE” part.
Step 3: Start filming the screen
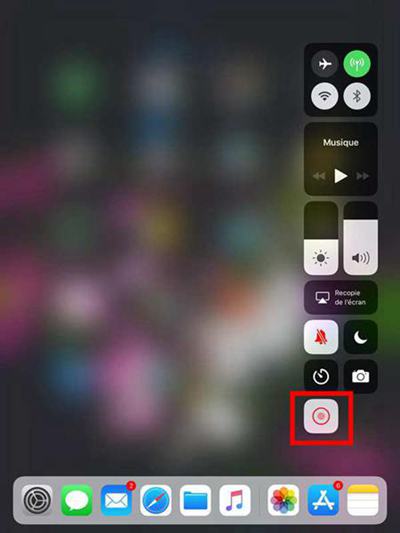
To start recording your iPad screen, please open Control Center by swiping your finger from bottom to top.
A new window like the one shown below will appear on your iOS device.
Please press the button represented by two circles inside each other to start recording your iPad screen.
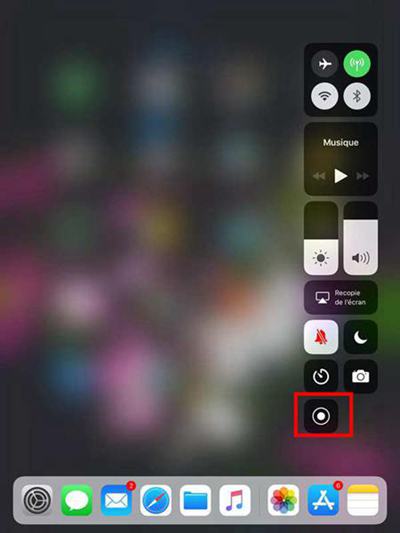
There will be a 3 second countdown before it starts, so you have some time to prepare, or just close the Control Center window to avoid having it in the video recording.
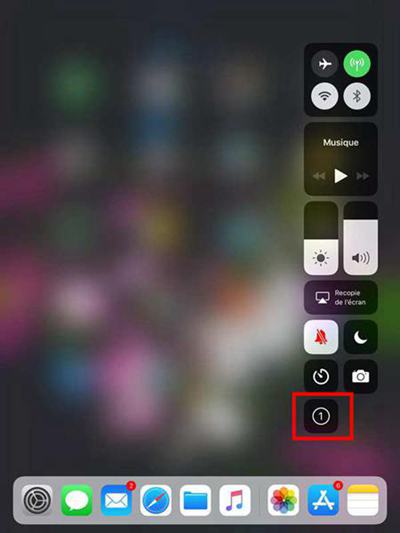
When you have finished showing everything you want in the video content to the screen, you can stop recording the screen.
To do this, open the control center again by doing your finger from the bottom up.
Then press the button represented by two circles inside each other to stop video recording of your screen.
A notification will appear to let you know that the video taken has been recorded.

Step 4: Edit and customize your iPad screen recording
During video recording of your iPad screen, there are surely some parts that you would not like to keep.
To customize the video clip, please first open the Photos app where the capture was saved.
Then select the video in question. You will see on the top right corner, the inscription Edit, please tap on it.
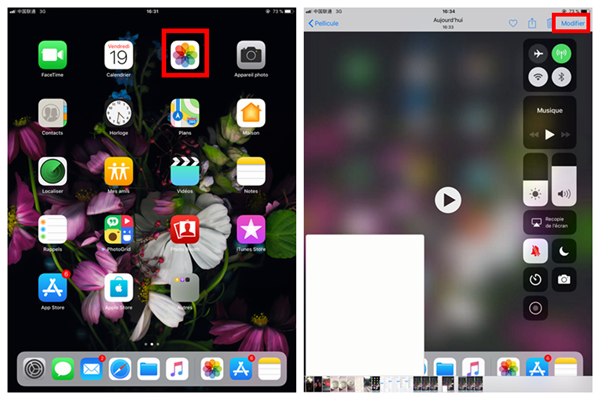
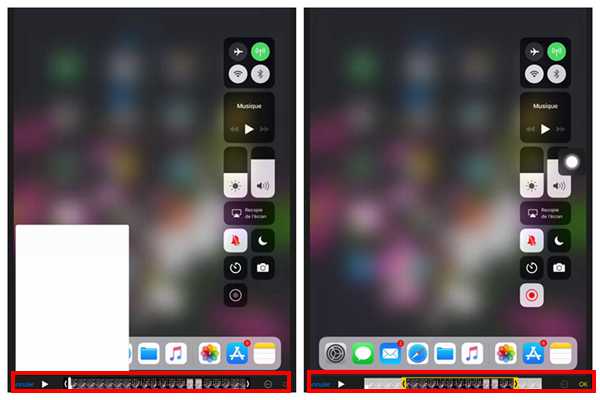
You can now edit the record you would like to keep. To do this, drag the arrow icons at the end of the video clip.
Please note that in the bar at the bottom, the blurred part is the one that will disappear, and the colored one is the one that will be kept in the screenshot.
After having marked the desired limits, finish by pressing OK.
Its good ! It's finish ! Wasn't that child's play? Now you can easily take video of your iPad screen as many times as you want. You can even use this recording however you want: on the net, to give a presentation, to explain how to use your iPad properly, etc.
Look no further for how to make a video of your iPad screen. The Apple company is already helping you, by giving you the possibility of making a high quality video! And this tutorial has shown you in detail the steps to follow.
Was this article helpful to you? Did you like it? If you answered yes, then don't wait any longer, share this link with your friends who are probably researching how to take a video capture.
Do you have any questions, ideas, or other advice, feel free to leave a comment in the box below. We are sure that many will appreciate your shares!